Govee Permanent Outdoor Lights Pro, 100ft 60 RGBIC
Govee Permanent Outdoor Lights Pro, 100ft 60 RGBIC Price comparison


- All prices mentioned above are in United States dollar.
- This product is available at Bestbuy, Govee.com, Walmart.com, Amazon.com.
- At bestbuy.com you can purchase Govee - 9.8ft Wi-Fi RGBICW LED Strip Light - Multi for only $29.99
- The lowest price of Govee - Wi-Fi RGBIC Outdoor Permanent String Lights 100ft - Black was obtained on July 23, 2026 00:26.
Govee Permanent Outdoor Lights Pro, 100ft 60 RGBIC Price History
Govee Permanent Outdoor Lights Pro, 100ft 60 RGBIC Description
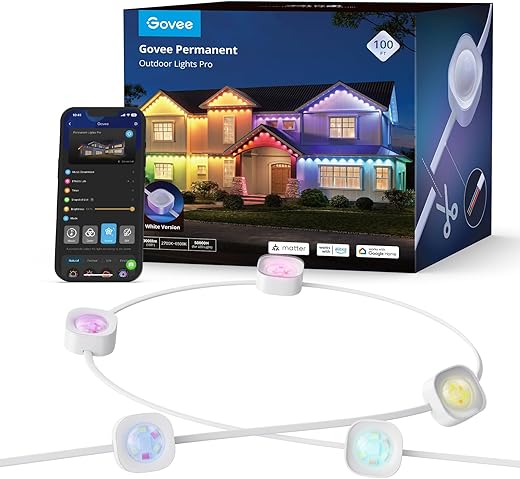
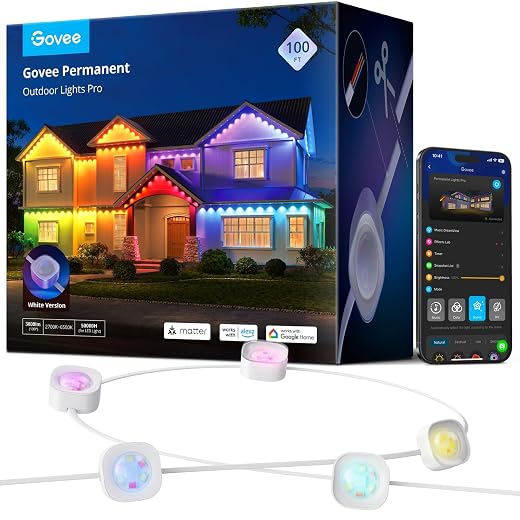
Govee Permanent Outdoor Lights Pro – 100ft 60 RGBIC
Illuminate your outdoor spaces with the Govee Permanent Outdoor Lights Pro. This 100ft lighting kit combines vibrant RGBIC technology with durability, making it the perfect addition to any garden, patio, or festive event. Designed with high-quality materials and innovative features, this lighting solution enhances your outdoor ambiance while offering flexibility in design. Whether you’re hosting a party or simply want to brighten your evenings, this outdoor lighting system has you covered.
Key Features of Govee Permanent Outdoor Lights Pro
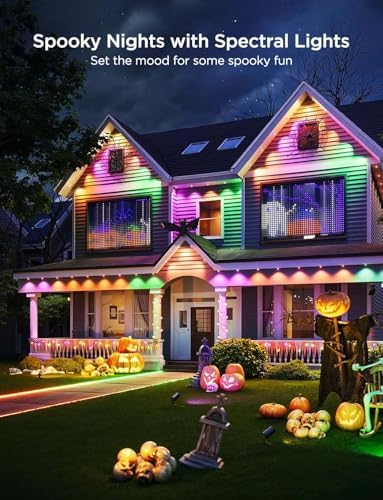
- 100ft Length with 60 RGBIC Colors: Enjoy the creative possibilities of 60 colors in a single strip, allowing you to mix and match for personalized designs.
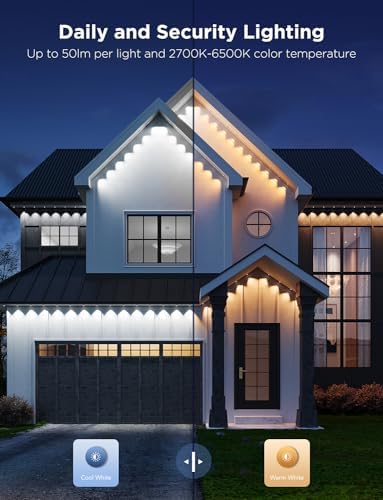
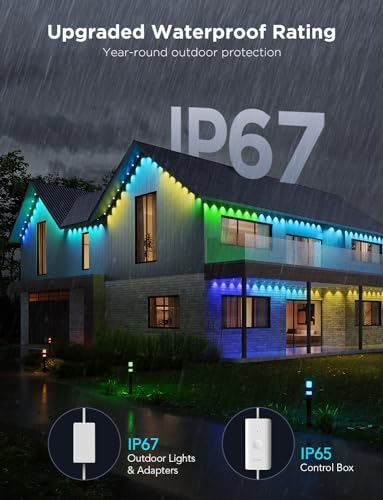
- Weather-Resistant Design: Built to withstand the elements, these lights are ready to shine rain or shine. They are perfect for year-round use.
- Smart App Control: Adjust colors, brightness, and modes easily from your smartphone. You can also sync the lights to music for a captivating experience.
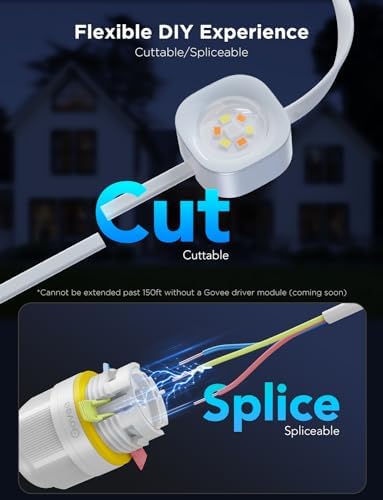
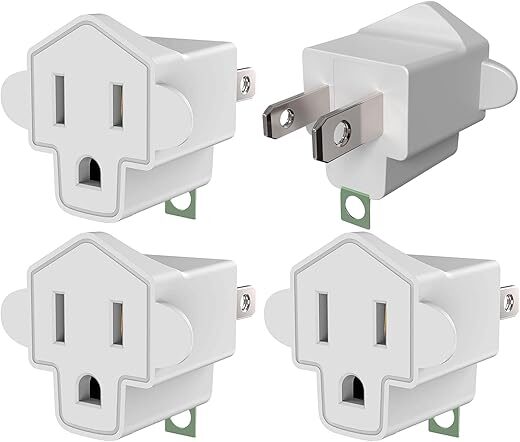
- Easy Installation: Comes with all necessary mounting accessories for a hassle-free setup, making it perfect for DIY enthusiasts.
- Energy Efficient: The Govee lights not only consume less power but also provide a longer lifespan compared to traditional lighting options.
- Song Sync Feature: Bring your outdoor gatherings to life with a music-sync function that changes the lights to match the beat of your favorite tunes.
Price Comparison Across Different Suppliers
The Govee Permanent Outdoor Lights Pro is competitively priced, with various suppliers offering options to fit your budget. You can easily compare prices across leading retailers to find the best deal. Keep an eye out for seasonal sales or special promotions that may lower the cost even further.
6-Month Price History Trends
Based on the six-month price history chart, we’ve seen a notable trend where the price tends to fluctuate during major holidays, typically dropping during promotional events. This is an excellent opportunity for those looking to purchase and save on their lighting investment. Observing these trends can help you decide the best time to buy for the best value.
Customer Reviews: Pros and Cons
Customer feedback for the Govee Permanent Outdoor Lights Pro reveals a generally positive reception. Many users appreciate the vibrant colors and ease of use. Here’s a summary:
- Positive Aspects:
- Users love the variety of RGBIC colors, creating stunning lights displays.
- The app is noted for its intuitive design and responsiveness.
- Many reviews highlight the durable construction, ideal for outdoor settings.
- Noted Drawbacks:
- Some users experienced connectivity issues with the app.
- A few mentioned that mounting clips could be more durable.
Explore Unboxing and Review Videos
If you’re curious about how the Govee Permanent Outdoor Lights Pro looks in real life, there are several unboxing and review videos available on platforms such as YouTube. These videos provide valuable insights, showcasing the installation process and real-world performance, helping you make an informed decision before purchasing.
Why Choose Govee Permanent Outdoor Lights Pro?
The Govee Permanent Outdoor Lights Pro is not just an outdoor lighting solution; it’s an experience. With smart technology, excellent durability, and customizable lighting effects, you can transform your outdoor space into a personal paradise for any occasion. Its energy-efficient design marries practicality with elegance, making it suitable for different environments.
In summary, if you’re in the market for a quality outdoor lighting kit, the Govee Permanent Outdoor Lights Pro stands out due to its affordability, functionality, and customer satisfaction. Don’t miss out on this opportunity to enhance your outdoor spaces.
Ready to light up your evenings? Compare prices now!
“`
Govee Permanent Outdoor Lights Pro, 100ft 60 RGBIC Specification
Specification: Govee Permanent Outdoor Lights Pro, 100ft 60 RGBIC
|
Govee Permanent Outdoor Lights Pro, 100ft 60 RGBIC Reviews (11)
11 reviews for Govee Permanent Outdoor Lights Pro, 100ft 60 RGBIC
Only logged in customers who have purchased this product may leave a review.

Arun Kumar –
Easy setup onto eves love them worth the price!!! Just so cool
Derrick Rose –
Software is very user friendly and easy to setup.
The 3M tape works perfectly and instructions are very clear!
Great brightness and amazing look with the preset settings.
Valerie –
Love the lights so far. They look awesome!! I used some brake cleaner to clean the surfaces prior to sticking. Also used #6 square head screws instead of the ones supplied. Made installing them so much easier. I highly recommend them. Hopefully they last a long time given the price. Seem to be high quality, even down to the boxes they came in.
Timothy Watts –
Love the Govee Pro outdoor lights. Totally customizable, bright, look great and easy to install. Would highly recommend adding the mounting brackets that are available on amazon and securing each light pod with screws rather than relying on the stickky tape,
Timothy Watts –
These are quite bright with several effects. The adhesive is bit weak but applied additional adhesive so should be fine.
Will –
The media could not be loaded.
I did it !!! I broke down and purchased the GOVEE Pro lighting system for my house, everyone on the forms and reviews praised GOVEE for the Quality, the Features, The Functions, The VHB tape, and the lights, from the brightness to the longevity and the vividness of the colors!!!! So Far I can not complain!!!!!! now As you can see in the Pictures I do not have the easiest roof line to hang these lights and when you add the 3 d printed retainer clips it just takes that much longer to complete the job. I am not a young man anymore, I am slower and not as sure footed as i used to be so I decided to forgo the Route of the Ladder(and with 3 18ft peeks I just dreaded doing it) and rented me a 35 ft man lift from the BigBox Store. Now it added to the expense of the job but I would still be out there today (6 weeks LAter) climbing up and down the ladder putting these up. I did order the 200 ft Kit and for my house I was able to completely wrap the lights around my entire house. The final look is amazing!!!! a couple of times for anyone who is concerned about taking on this type of project. I recommend you pre plan your actions; first, you will want to make sure you unwrap your lights from the wire ties they were shipped in. This will do 2 things, one if you hang them in the sunlight it will soften the wire loops and straighten the wires making it easier on your fingertips when you are putting the lights up and you want the wire super straight. Secondly, if you connect your light strands together and lay them out or put them on a spool(I chose the spool because of the man lift, as it kept me from stepping on them) you will not have to reposition too many things every time you move the ladder down the line. ALso you want to figure out before you actually start installing the lights , exactly where you want them to be under the overhang of your roof. I suggest taking a couple of lights and hanging them with temp configuration by hanging 3or 4 as close to the wall as you can and then 3 or 4 in the middle of the overhang and then the last 3 or 4 as far out. This will help you identify what looks the best for your house and your liking. When you have decided on the spacing I took a small piece of cardboard and cut it to the width of where the wire is going to be on the eves. This will allow you to take a pencil mark where the wires need to be and your mark will keep the lines as straight as possible. Next I suggest you have a tool bag/belt with all of the things you will need to complete the project, template for you wire guide and a pencil, a small trash bag for all of the tape covers you will take off, a screwdriver to screw the wire clips (supplied in the Kit) in place. something to keep your screws together so if you need one you can get it easily. also a small pouch or container to separate the wire clips from the screws to easily grab them when needed. You will also want some paper towels and alcohol to clean the spot where you are going to stick the lights so they get a good hold and will not fall off too early. These are just some of the items I needed to put up my lights. You may also want a head mounted flashlight if you don’t have adequate light or doing it in the evening. I took a couple of days to plan out my attach plan because
I was renting the MAnlift and needed to maximize the output because of the cost and I only had 24 hrs till I needed to return the lift. so making unnecessary tripe to get a tool or something was just not in the plan and would slow me down. I also chose to pick up some 3 d printed covers for the Govee Pro Lights. They were a bit more expensive, but the piece of mind was that the pod lights were screwed into place along with the VHD tape, and I never would have to rely on just the tape holding the pod in place. Again a bit of an expense but in my situation with the 20 ft peaks I don’t want to climb a ladder if the tape fails in 4 or 5 years!!! The look is much better than expected. and the lights in the picts are set at 15% brightness because 100% is too bright!!! The only complaint I have about these Lights Is with the APP there are so many features and combinations of functions it is a bit overwhelming. Also there is a section where other users can share configurations, which is nice. The only thing is there is no explanation of what each one is and there are thousands of them. so when you click on one and want to come back to it later it may be lost if you are not paying attention to the name on the shared config. also
I wish there was a place where you could preconfigure the lights like a lab type environment so you can see what something will look like without it happening in real time. This would help when you are trying to put scenes together and link them for a show!!
Will –
The media could not be loaded.
TLDR: Look great, work great, fairly easy install. Govee Permanent Outdoor Lights Pro are the way to go.
Really glad I didn’t pull the trigger on the first gen lights and waited for the Govee Outdoor Lights Pro. The 200′ was perfect for my needs and I ended up using 196′ and clipping off the last few lights. With the booster module it’s great being able to power the entire thing from one end instead of having to do power injection or plug in at multiple places. The Pro version gives you options for extending, cutting and splicing that wasn’t possible before. The splice units are super easy to use with Wago style toggle connections. The short and long extensions are great if you need to skip an area, say to go up to a second story. I couldn’t find the exact contents for the 200′ set anyplace, so here’s what came in mine: 12 stands of lights; 4 each male and female splice connectors; 4 – 4′ extension cables; 2 – 12′ extension cables; power brick, control unit, signal booster (for 200′ for kit only); lots of mounting clips and extra adhesive tabs. Really wanted a clean looking install so I mounted the power and control units inside an Orbit irrigation control box after running power to my install location. Also wanted to minimize clip use and bought some 3D printed mounting brackets that fit over the lights. They make the lights look slightly bulkier but I was able to limit clip use to turning corners or working around an obstacle. I spent a lot of time untwisting and flattening the cable to get it as flat as possible. Kind of a pain but the flat cable is what makes splicing possible for DIYers so I’m not complaining. The instructions say to use an automatic wire stripper for splicing. It’s not clear if they were talking about the outer sheath or the three internal wires, but mine absolutely wouldn’t work on the sheath. I had to very carefully cut that with a razor knife. All told it took some non-OSHA approved ladder shenanigans and two full days of work as a somewhat competent DIYer and I’m happy with the results. IMO the Govee Permanent Outdoor Lights Pro are the way to go unless you want to spend thousands on a pixel or puck system and learn Wled. The estimate I got from Jellyfish lights was 6k. While not inexpensive Govee has frequent sales and I got the 200′ set for $560 and saw them for $480 on Prime Day. If you are new to Govee the app isn’t perfect but they update and improve it frequently. There are plenty of lighting options that require only one click to get started. The app has close to 100 preset themes for holidays, seasons, etc. The video is the “Universe” theme, pics are warm and cool white respectively. The pro have dedicated warm and cool white leds that are great for general illumination. Using the app I created an automation so they come on with a color effect 30 minutes after sunset, change to warm white 30% brightness at 12am, then turn off 30 minutes before sunrise. The DIY function allows you to create any combination of colors and patterns you can think of. I’ve been using the new AI bot to create light scenes and it’s kind of fun.
Shawn Hoskins –
Install was pretty straight forward and the final product works amazing, very pleased!
raymond rogalski –
I have been looking a those lights for a while,.and when i bought a new house, I knew i wanted the neighbors to be a bit jealous… well did i ever achieve!… they are amazing, easy to make your own scenes… the presets are also enough for someone who wouldn’t want to spend the time of making your own scenes.
The Pro version is made to cut and comes with extensions and splice connectors, i had enough in the box to make all the dormers, hips and gaps i needed.
Rapid Robert –
Overall these have been fantastic. Make sure to purchase the wire stripping tool that they recommend in the manual, I ended up going with Klein tool. It was well worth it and saved a ton of time. The splice kits makes it very easy to install this exactly the way you want it without extra lights in random places. I have a couple minor complaints. The little clips that it comes with are pretty much worthless, I ended up using coax clips with a hex head screw from Lowe’s instead so I could power drill the clips on. The 3M sticky on the back of each light does not work at all on textured hardboard soffits. Even after cleaning the area, drying it and sticking it on it still fell off within 24 hours. I had to put a clip on every single light. Also, you cannot purchase extra light extension cords separately from the kit, so make sure that you purchase a kit large enough to include the extension cords you need. I reached out directly to Gover and they said currently they do not sell them separately.
Valerie –
I ordered the product during Prime Days on Tuesday with a delivery for Thursday. Wednesday morning it’s still at the same price but delivery by Wednesday evening. Customer service (including the supervisor) was unable to expedite the shipping. They said they don’t have any access to fulfilment, and literally just dropped the line.
The product is good and worth the money at the prime day price.