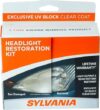
SYLVANIA Headlight Restoration Kit With UV Block
$21.75
SYLVANIA Headlight Restoration Kit With UV Block Price comparison


- All prices mentioned above are in United States dollar.
- This product is available at Walmart.com, Macy's, Acehardware.com, FinditParts, MSC Industrial Supply Co., SHEIN.
- At walmart.com you can purchase Headlight Restoration Kit with Crystal Coating, 6 fl oz for Yellowing Removal, Lens Restoration, and UV Protection for Car Headlights for only $6.89 , which is 92% less than the cost in SHEIN ($81.43).
- The lowest price of Car Headlight Polishing Agent Scratch Remover Repair Headlight Renewal Polish Liquid Headlight Restoration Kit Auto Accessories was obtained on July 23, 2026 18:42.
SYLVANIA Headlight Restoration Kit With UV Block Price History
SYLVANIA Headlight Restoration Kit With UV Block Description
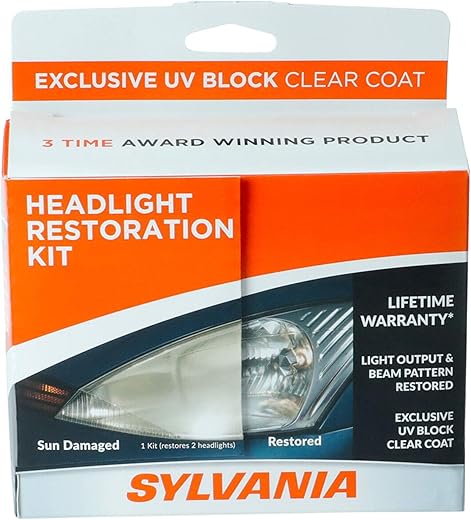
SYLVANIA Headlight Restoration Kit With UV Block
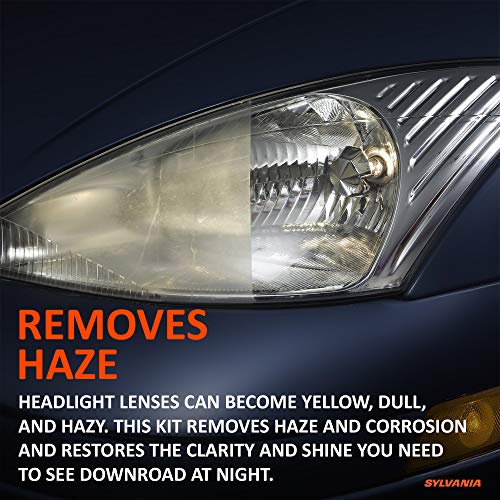
Experience crystal-clear visibility on the road with the SYLVANIA Headlight Restoration Kit With UV Block. This innovative kit is designed to restore your vehicle’s headlights, making them look brand new while enhancing your safety during night drives. By effectively removing oxidation and yellowing, this restoration solution ensures your headlights shine bright, providing optimal clarity and distance. Discover why the SYLVANIA Headlight Restoration Kit is the go-to choice for car enthusiasts and everyday drivers alike.
Key Features and Benefits of the SYLVANIA Headlight Restoration Kit
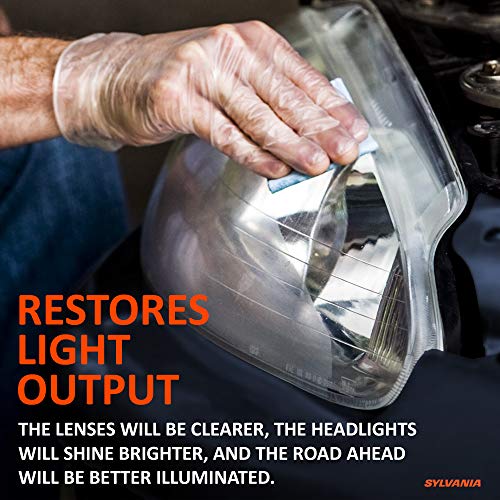
- Restores Clarity: The kit effectively removes discoloration and cloudiness from your headlights, restoring clarity and improving night driving safety.
- UV Block Protection: Includes UV block technology to protect your headlights from future fading and deterioration, ensuring longevity and sustained performance.
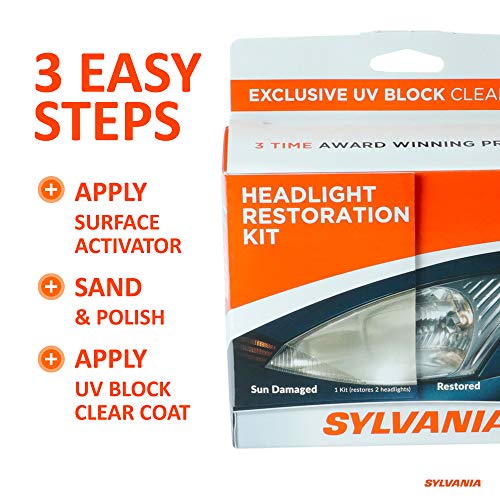
- Easy to Use: Designed for a simple DIY application, it requires no special tools and can be completed in just a few steps.
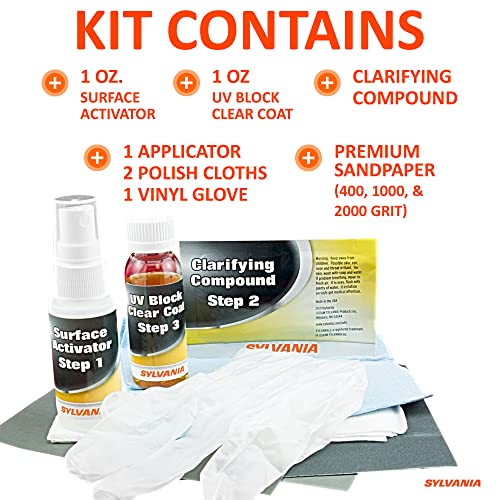
- Comprehensive Solution: The kit contains everything you need for a successful restoration, including cleaning wipes, sandpaper, and a UV clear coat.
- Compact and Lightweight: Weighing only 4.8 ounces and measuring 8 x 2 x 6 inches, it’s easy to store in your garage or vehicle for on-the-go use.
- Quality Assurance: Manufactured by SYLVANIA, a trusted brand in automotive lighting, ensuring you receive a reliable and high-quality product.
Price Comparison Across Suppliers
When considering the purchase of the SYLVANIA Headlight Restoration Kit, it’s essential to compare prices to ensure you get the best deal. Prices typically range from $19.99 to $29.99, depending on the retailer. Our price comparison saves you time and money, allowing you to shop wisely and choose the most affordable option available.
6-Month Price History Insights
Analyzing the 6-month price history chart reveals some notable trends. The SYLVANIA Headlight Restoration Kit has mostly been stable in pricing, with only minor fluctuations. Previous sales events often lowered prices to around $18.99, making it an excellent time to purchase when prices dip. Keeping an eye on these trends ensures you make informed buying decisions and potentially save on your investment.
Customer Reviews: A Balanced Perspective
Customer feedback for the SYLVANIA Headlight Restoration Kit highlights several positive aspects. Many users appreciate the ease of use and effectiveness in restoring their headlights. Customers report significant improvements in headlight brightness and clarity, leading to enhanced visibility while driving at night. Reviewers often highlight that the comprehensive kit not only simplifies the process but also yields professional-grade results.
However, some users noted a few drawbacks, including the need for thorough preparation and cleaning before application. A small percentage of reviewers mentioned that for extremely oxidized headlights, multiple applications may be necessary to achieve the desired clarity. Despite these occasional criticisms, the overall consensus is that the SYLVANIA Headlight Restoration Kit delivers exceptional value and performance.
Explore Unboxing and Review Videos
For those interested in seeing the SYLVANIA Headlight Restoration Kit in action, several YouTube videos showcase unboxing and application techniques. These videos provide valuable insights into the restoration process, offering tips and tricks for maximizing results. Watching these demonstrations can help you feel more confident in using the kit and understanding its full potential.
Conclusion: Why Choose the SYLVANIA Headlight Restoration Kit
In summary, the SYLVANIA Headlight Restoration Kit With UV Block is an essential tool for maintaining safety and enhancing the aesthetic appeal of your vehicle. With its ease of use, effective restoration capabilities, and long-lasting UV protection, it’s a worthy investment for any car owner. The positive feedback from satisfied customers reinforces its reputation as a reliable and effective product. Don’t wait for your headlights to deteriorate further—improve your night driving visibility now!
Ready to enhance your driving experience? Compare prices now!
SYLVANIA Headlight Restoration Kit With UV Block Specification
Specification: SYLVANIA Headlight Restoration Kit With UV Block
|
SYLVANIA Headlight Restoration Kit With UV Block Reviews (9)
9 reviews for SYLVANIA Headlight Restoration Kit With UV Block
Only logged in customers who have purchased this product may leave a review.
C.R. –
Tried one of the “seen on TV” brands which was easy but didn’t last long. This is not an easy wipe-on-and-walk-away deal until after you do 4 other steps. Took me about 1-1/2 hrs to do both headlight lenses complete. They looked great when I was done but can’t say what the long-term durability might be. 2 tips: the directions state that the products are harmless to car finishes but then they suggest you tape and mask off painted areas. And it uses lots of water for rinsing so I don’t recommend using paper for masking. Lastly, it says to use a thick coating of the final solution which seems to be a good recommendation. Of course you need to avoid having it run down your bumper too. They give you one cheapo plastic glove but you really need 2 gloves since the final liquid is kind of like super glue on your skin. Overall, it’s just a bit tedious but seems to give good results.
Auton –
This kit takes a bit of work, but the results are worth it. I took me about an hour total to do both headlights. The only annoying thing about using the sandpaper is that my headlights had little nubs that stick out and make it difficult to do the sanding. Outside of that the kit was easy to use. The results were even better than I was hoping. The headlights on my 99 Suburban were badly oxidized and somewhat scratched. They were so bad that my wife asked if they were even on one night. The sanding took all the oxidation out, but there were still a few scratches. The coating filled in the scratches and made the headlights look like new. They are also MUCH brighter. I wish I had done this years ago.
Faisal T AL-Maiman –
Tried similar products which always discoloured within a few weeks. Follow the instructions and you get perfect results and so far headlights remaining perfectly clear. Excellent product
Savanna Puckett –
I own a seventeen-year-old Toyota Yaris hatchback (152,000+ miles), which has been parked outside in the sun and elements all of its life. I’d already had the headlights resurfaced (by the Toyota team) many years ago—but my headlights were, by this point in time, at the stage of not passing annual inspection. Replacing both headlight units at the dealership (including labor) would have cost in excess of $700, so I figured—why not try this, and see what happens!
The results are really terrific. As “like new” as you’re going to get with a seventeen-year-old car which is parked outside. Here would be my observations having just done this project this morning (without access to a hose, mind you!).
The instructions are worth reading a couple of times before you take-on the project. It’s, actually, a lot easier than the very detailed instructions might imply. Just go step by step, doing each step to both headlights before you move on to the next step, and you’ll be fine.
1) Bring lots of water, and a spray bottle (as recommended in the instructions). I filled up some clean milk-cartons I’d saved for the project, and just refilled the spray bottle from those as needed. Super easy. I used about three milk-cartons of water (1.5 gallons). You’ll need lots of water-spray as you sand with the provided grades of sandpaper. I would recommend starting (with the first grade of sandpaper) with light to medium pressure, then move to more consistent medium pressure. The second and third grades of sandpaper really are very smooth and fine, and you can finish-off the third grade of sandpaper with a really light pressure. Be patient, and go for a truly smooth surface. I did the recommended circular motions both clockwise, and counter-clockwise, to ensure the smoothest possible finish. Worked like a charm.
2) Regarding the activator spray (with which you will start and, toward the end, use again): I used about 2/3rds of the spray on the first stage (both headlights), dissolving the initial oxidation and grime. I feared I’d not have enough with just 1/3rd by the end, but I had plenty. I’d bring a soft sponge, too, just to ensure that you get the lenses fully clean between steps. I found having extra soft, clean rags helpful with drying as well.
3) Painter’s tape definitely protects your paint around the headlight, so take the time to mask-out your light, and protect your paint. The only thing I’d suggest, is to spray-clean your paint-surface after your remove the painter’s tape following use of the polishing compound. Some of the polishing compound gets under the tape, so just give that a rinse before you dry the lenses and apply the final UV gloss-coating. Keeps things neat and clean around the lenses.
4) As for the gloss-coating: you really can be very generous applying it to the provided blue-cloth. I was a tiny bit stingy on the first headlight, fearing I might not have enough product for the second headlight. Don’t worry … you’ll have plenty of UV product left over when you’re done. I’d really soak the entire blue-rag well, and apply generously. I can see a *very* tiny difference between the first headlight I did (where I was more stingy applying the UV gloss-coating) and the second (where I was more generous). It’s so slight you’d never see it. Just rest assured that you’ll have plenty of UV gloss by the end of the project, as it spreads evenly, smoothly, and well—so be generous in applying it.
The best part? If I get any haze again, this was probably the easiest headlight-repair imaginable. I’ll just do it again! And I saved about $700 to boot. You just need to set aside the time to do each step well and carefully. It took me perhaps an hour and a half from start to finish (and I was moving slowly and carefully), with some time thereafter cleaning up and just standing around to ensure no falling autumn leaves fell on the UV gloss while it was still wet. Just went to check on the headlights, and they’re completely dry to the touch, and very smooth and glossy.
This is a terrific product! Easy to use, great instructions, and a really fine result. I look forward to seeing the longevity of the product.
R. Pancoast –
Awesome product! Carefully follow the very clear and detailed instructions and your lenses will be as new. It’s barely believable!
Savanna Puckett –
Like many others, my headlights were hazed over which was causing difficultly seeing at night and I felt as though my visual acuity was impaired due to this. I’ve tried a few other solutions or ideas to restore my headlights and none of them worked. I came across this and was slightly skeptical, however I was surprised by the results! My headlights look brand new and I couldn’t be more impressed! They’re shiny and clear. The directions were easy to follow and it is truly worth every penny!
Pablo Vanegas –
I think the sanding paper provided in the kit is not enough. You might need to buy more sanding paper. Also the liquids provided in the kit seem not enough for cars with bigger headlights. Just be careful when applying them not to waste more than needed. Other than that its a good kit. It’s on YT if you want to watch videos about it.
GUIMIOT YVES –
Su aplicación fue sencilla y con buenos resultados a un buen precio.
Vic Wilkinson –
Amazing results for 10 years old car. No more blinding other drivers. Some elbow grease required for upmost results