Rybozen 4K USB 3.0 Capture Card
$29.99
Rybozen 4K USB 3.0 Capture Card Price comparison
Rybozen 4K USB 3.0 Capture Card Price History
Price History for 4K Audio Video Capture Card, USB 3.0 HDMI Video Capture Device, Full HD 1080P for Game Recording,...
Rybozen 4K USB 3.0 Capture Card Description
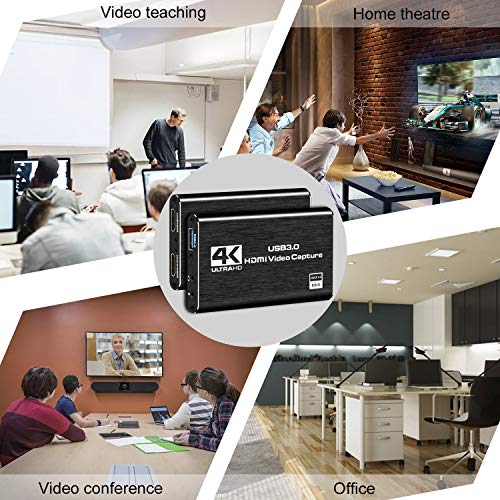
The Rybozen 4K Audio Video Capture Card is a versatile and high-quality capture device designed for gamers, streamers, and content creators. Featuring USB 3.0 connectivity and full HD 1080p capture resolution, this device is perfect for recording and broadcasting gameplay, live streaming, and much more.
1080P HD High Quality
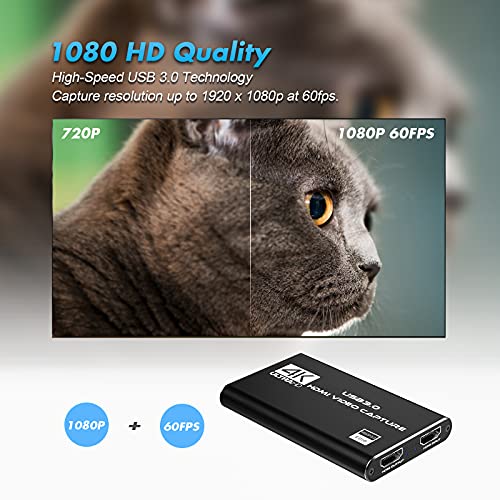
The Rybozen capture card supports capture resolutions up to 1080p, making it ideal for all HDMI devices, including PS4, PS3, Xbox One, Xbox 360, Wii U, DVDs, DSLR cameras, security cameras, and set-top boxes. With its superior video quality, you can ensure your recordings and streams are crisp and clear.
Plug and Play Convenience
One of the standout features of the Rybozen capture card is its true plug-and-play functionality. No driver or external power supply is required, making setup a breeze. Once connected, the device is automatically identified as a webcam, and it can detect input and adjust output automatically. Additionally, it won’t occupy your CPU, offering optional audio capture with no freezing when configured correctly.
Wide System Compatibility
The Rybozen capture card is compatible with both Windows and Mac OS, providing flexibility for different users. Its high-speed USB 3.0 technology and superior low latency ensure smooth and efficient transmission for live streaming to popular platforms like Twitch, YouTube, Facebook, Twitter, OBS, Potplayer, and VLC.
HDMI Loop-Out for Seamless Gaming
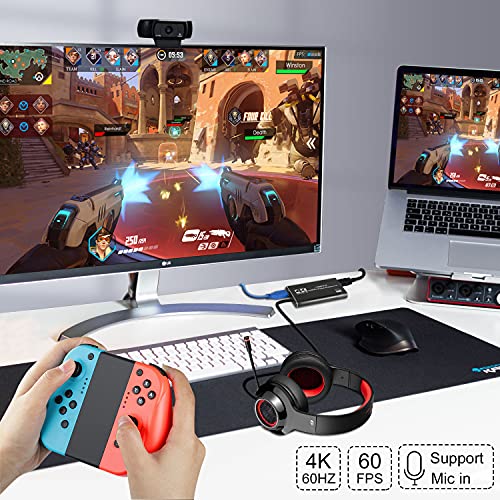
Thanks to its high-speed USB 3.0 technology, the Rybozen capture card can capture a single HD HDMI video signal without any delay during gameplay. This HDMI loop-out feature is particularly useful for gamers who require real-time feedback while streaming or recording their gameplay sessions.
Support for Mic-in Commentary
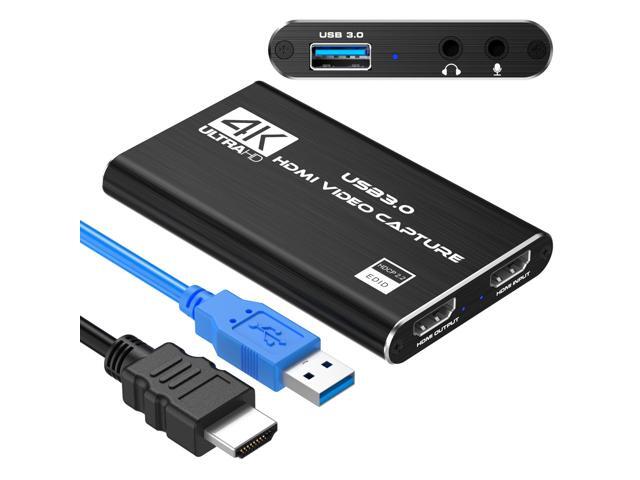
The Rybozen capture card also includes a microphone input, allowing users to add external commentary while playing a game. Please note that it only accepts 3.5mm TRS standard microphone headsets. This feature is perfect for streamers who want to provide real-time commentary to their audience.
Product Specifications
- Product Dimensions: 3 x 2 x 1 inches
- Item Weight: 6.4 ounces
- Manufacturer: Rybozen
- Item model number: V316B
- Date First Available: December 28, 2020
In conclusion, the Rybozen 4K USB 3.0 Capture Card is a high-performance and user-friendly device that caters to the needs of gamers, streamers, and content creators. With its excellent video quality, plug-and-play convenience, wide system compatibility, and support for mic-in commentary, it stands out as a reliable and efficient choice for capturing and broadcasting high-definition content.
Rybozen 4K USB 3.0 Capture Card Specification
Specification: Rybozen 4K USB 3.0 Capture Card
|
Rybozen 4K USB 3.0 Capture Card Reviews (4)
4 reviews for Rybozen 4K USB 3.0 Capture Card
Only logged in customers who have purchased this product may leave a review.





BuyeRM –
I used this with my laptop (Legion 5 Pro RTX 3060, which is a Windows 11 laptop) and struggled quite a bit to get it to work well. I am new to this and just wanted to stream my Nintendo Switch gameplay on Discord.
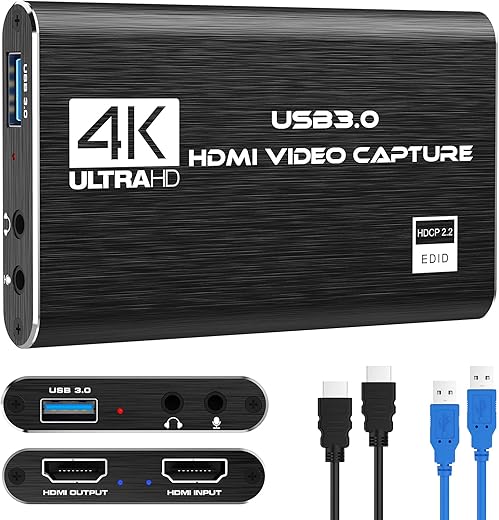
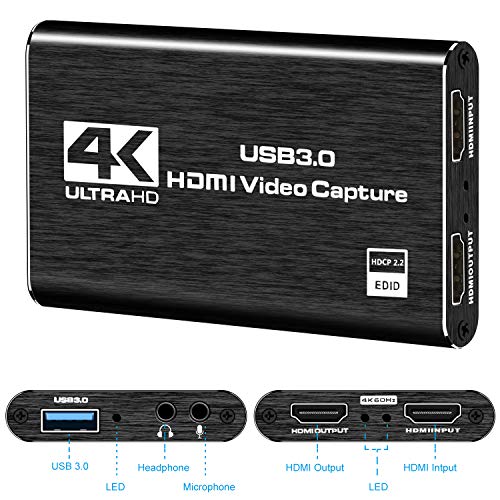
The capture card manual comes with a diagram (also there’s multiple diagrams on the product page). The instructions were very minimal. Physical installation was easy.
My biggest issue was dealing with the sound from the capture card outputting audio on my Discord microphone, which I ended up resolving through my system settings and Discord settings. Honestly I was about to return this thinking it was defective or that I had to have a second monitor to stream without audio issues. Even google couldn’t help.
After finally getting it to work, it was what I wanted. Just didn’t like struggling to troubleshoot the issues.
[Review end]
—–
[Instructions for those who might need it:]
Here’s what I ended up doing from beginning of installation to end for my laptop specifically and without anything extra besides just the capture card, Switch, and laptop. Everyone might use this differently and depending on your PC the settings might be different, but maybe it will help someone who also wanted to use it the way I did:
– Install OBS.
1. After installation, open the program and make a new source under the Sources tab by pressing the “+” sign.
2. Press “Video Capture Device” and name it however you want (I named it Switch), then press OK.
2. Set Device: USB3.0 Video
3. Audio Output Mode: Capture Mode Only
4. Turn on “Use custom audio device”
5. Audio Device: Digital Audio Interface (USB 3.0 Audio)
6. Close source tab.
– In the OBS settings, go to Audio.
7. Under Audio, disable all Global Audio Settings but leave Mic/Auxiliary Audio alone.
8. Set Mic/Auxiliary Audio: Digital Audio Interface (USB 3.0 Audio)
9. Press Apply, then OK.
Under the Audio tab (not settings):
10. Under the Audio tab (next to Sources), right click Mic/Auxiliary Audio then press Advanced Audio Properties.
11. Set the Audio Monitoring for Mic/Aux to “Monitor Only (Mute Output)”
– Go to PC settings > System > Sound.
12. Input > set to Laptop Microphone
13. All Sound Devices > Input Devices > Digital Audio Interface. Make sure it is NOT set to default.
14. All Sound Devices > Input Devices > Laptop Microphone. Make sure it IS set to default.
– Go to Discord.
15. If the application detects the new device (capture card) and asks if you want to switch to a new audio device, hit “don’t switch”
16. User Settings > Voice & Video > Input > Laptop Microphone.
17. User Settings > Voice & Video > Output > Laptop Speakers.
Device should be ready for streaming now with no audio issues. Also to stream games on full screen on Discord, simply right click on the screen in OBS > open “Windowed Projector (Preview).” Then go to Discord, hit screenshare, and pick that option in the Applications tab. It should show only the game for the audience. Then on your end, you can right click on the OBS screen > open “Fullscreen Projector (Preview)” and you can view the game just fine on a full screen for yourself.
To check if your mic on Discord is working correctly, mute OBS and turn off screen share to see if your icon in a Discord call is turning green without you saying anything. If it is turning green it means that sound is coming through your microphone for other people in the call due to the capture card.
How I fixed that was going to my PC settings > System > Sound > All Sound Devices > Digital Audio Interface. I turned that off and then back on. Then I went back to Discord to see if the prompt window to change audio devices comes up, then I pressed “don’t switch” when it did. I had no more issues after that and was able to stream on Discord just fine. I typed all this out because it took me several hours to figure out how to get rid of the mic audio issue so I wanted to put this out there in case it helped someone else too.
Random person 2 –
Not sure what exactly is off, but the color settings on the recording seem to just be over-saturated or something. Works great for a basic recorder for games and basic streaming though.
Chris Bolin –
I had purchased the capture card for my PS5. It connects from the PS5 to my computer via HDMI cables, 1 of the 2 are provided. The I bought a USB-C to USB 3.0 cable for the power from the card to the computer. It also came with the capture card but it was to short for my needs. Got to say once it was all set up, This capture card works great, EVEN the sound when streaming. I use the capture card to the computer using OBS to run through with Twitch. Amazing cheap setup for under 30.00
Molly C. –
It works very well for a lower-end capture card, and if you don’t want to spend a lot on one,
it’s a good option.
It comes with a blue USB 3.0 cord, so you can plug the device into your computer, allowing you to capture video (after you’ve downloaded and set up a program to display it with.)
The cord is kind of short, maybe about 12 inches long, so it might be necessary to buy a longer one to replace it with if your consoles are not stored next to your PC/laptop.
This blue USB cord plugs into the side of the capture card with one cord slot, and then from there, the other end of it plugs into one of your computer’s USB slots. You could also plug it into a USB hub, instead, if it works better that way.
On the other end of the capture card, there are two cord slots.
One of them is to connect the second cord that comes with your capture card to your TV.
I’d suggest using a widescreen/HD TV for this, because the TV might not have the right components in the back of it, otherwise.
The capture card does *not* come with an HDMI cable to attach to your game console.
However, if you’re starting out by capturing your Switch, Switch systems come with an official Nintendo-branded HDMI cord you can use to connect to your device. I believe that this same cord will also work with PS4s or anything else that takes HDMI input/has an HDMI cord slot. So it seems to be possible to use just one HDMI cord, and switch between consoles as needed.
I tested it on the PS4 and Switch and it seems to do pretty well with those.
Note:
1. This will not work with AV-based components such as those the N64 and Gamecube have.
You would need a different device for that, it’s only compatible with modern HDMI/HD outputs.
2. It does not come bundled with any kind of special software. To capture and record your game’s picture and audio, a free program like OBS broadcaster will be required.
3. It doesn’t only capture video, it does capture audio as well. Both an “Audio Source” and “Video Source” need to be added in OBS (or the program of your choosing) in order to pick up both audio/video at the same time.