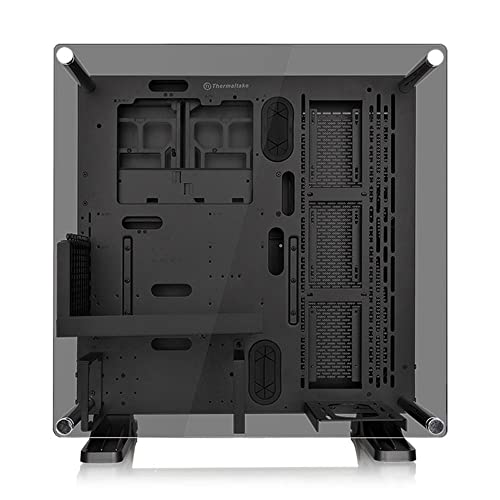
Thermaltake Core P3 ATX Tempered Glass, CA-1G4-00M1WN-06
Set Lowest Price Alert
×
Notify me, when price drops
Set Alert for Product: Thermaltake Core P3 ATX Tempered Glass Gaming Computer Case Chassis, Open Frame Panoramic Viewing, Glass Wall-Mount, Riser Cable Included, Black Edition, CA-1G4-00M1WN-06 - $123.99
Last Amazon price update was: January 9, 2025 18:33
×
Product prices and availability are accurate as of the date/time indicated and are subject to change. Any price and availability information displayed on Amazon.com (Amazon.in, Amazon.co.uk, Amazon.de, etc) at the time of purchase will apply to the purchase of this product.
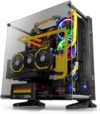
Thermaltake Core P3 ATX Tempered Glass, CA-1G4-00M1WN-06
Original price was: $139.99.$123.99Current price is: $123.99.
Thermaltake Core P3 ATX Tempered Glass, CA-1G4-00M1WN-06 Price comparison
Thermaltake Core P3 ATX Tempered Glass, CA-1G4-00M1WN-06 Price History
Price History for Thermaltake Core P3 ATX Tempered Glass Gaming Computer Case Chassis, Open Frame Panoramic...
Statistics
| Current Price | $123.99 | January 9, 2025 |
| Highest Price | $123.99 | October 17, 2024 |
| Lowest Price | $123.99 | October 17, 2024 |
Since October 17, 2024
Last price changes
| $123.99 | October 17, 2024 |
Thermaltake Core P3 ATX Tempered Glass, CA-1G4-00M1WN-06 Description
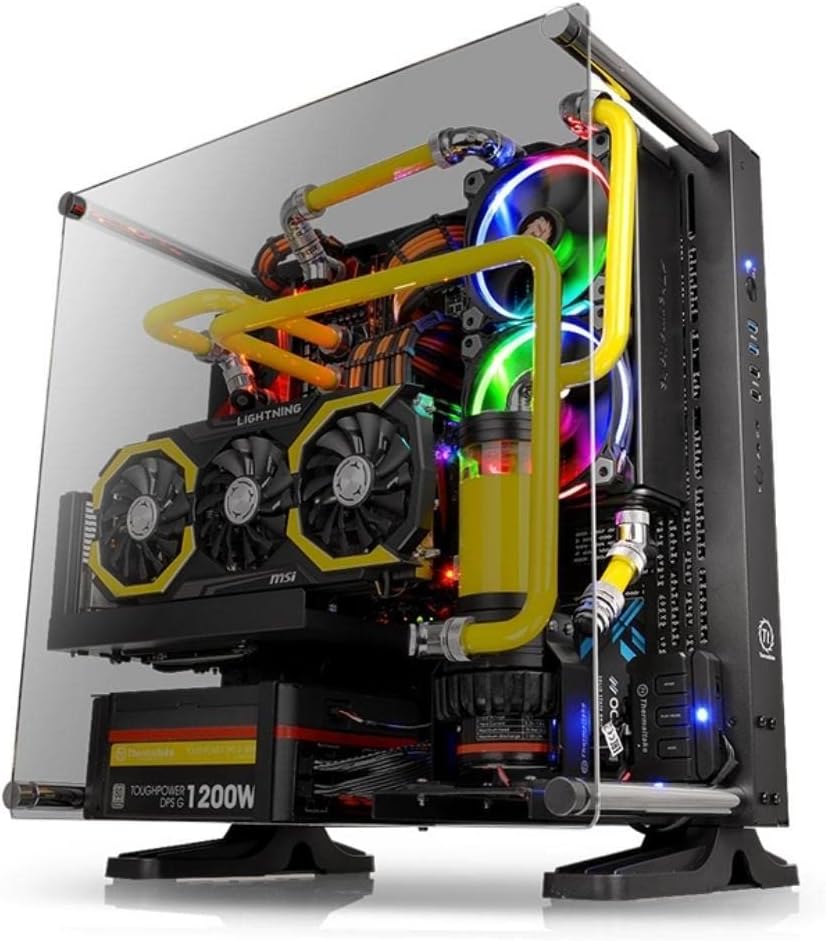
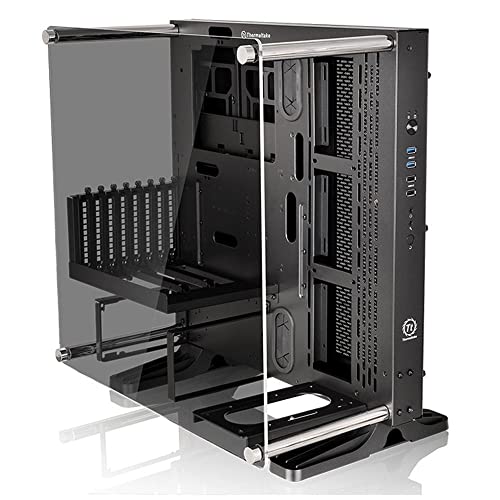
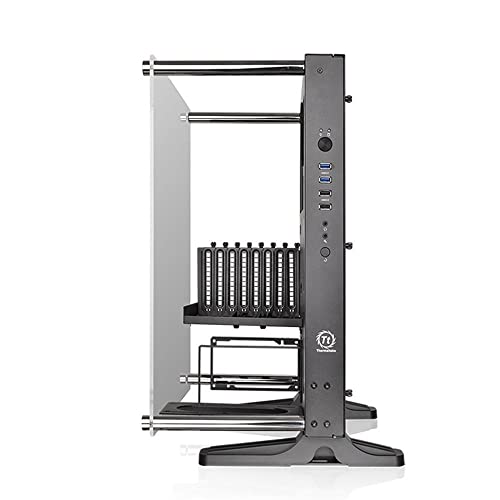
- Supports Mini ITX, Micro ATX, ATX Motherboard
- Open Frame Panoramic Viewing: 5 millimeter Thick Tempered Glass at Front
- 3 Way Placement Layout: Wall mount, vertical, and horizontal placement
- Vertical GPU Mounting: One PCI E Riser Cable included
- Vertical PSU Mounting: Vertical PSU layout when ITX Motherboard is applied
- Dismountable Modular Design: Freely build the system from the ground up with given modular panels, racks, brackets, and pre design mounting arrays
- Tt LCS Certified: Liquid Cooling Supported. Compatible with extreme liquid cooling configurations
Thermaltake Core P3 ATX Tempered Glass, CA-1G4-00M1WN-06 Specification
Specification: Thermaltake Core P3 ATX Tempered Glass, CA-1G4-00M1WN-06
|
Thermaltake Core P3 ATX Tempered Glass, CA-1G4-00M1WN-06 Reviews (7)
7 reviews for Thermaltake Core P3 ATX Tempered Glass, CA-1G4-00M1WN-06
Show all
Most Helpful
Highest Rating
Lowest Rating
Only logged in customers who have purchased this product may leave a review.



Jokingpurse –
The media could not be loaded.
Hola, espero les pueda servir más a fondo esta reseña ya que las que vi anteriormente con fotos y videos no me ayudaron tanto,
El gabinete es muy grande, es de buen material y está muy hermoso que tenga 3 cristales,
Cambié a este gabinete por que antes tenía una 2070 y compré una 4070ti, y temía por el tamaño, ya que la nueva gráfica llega a medir aprox unos 32 cm, y es bastante ancha, de largo queda muy bien,
Previamente tuve problemas con mi enfriamiento líquido, el radiador es de 280 y los ventiladores 140, ponerlo arriba si queda sin ningún problema ya que anteriormente chocaba con las RAMS y los disipadores de calor de la Motherboard, pero en este gabinete aunque si choca si lo pones a la misma altura que la mother board tiene más espacio y se puede desplazar hacia un lado lo suficientemente como para que ya no choque.
Igual se pueden poner en la parte trasera pero a mi estéticamente no me gusta pero sin ningún problema cabe,
A consideración, la parte de adelante es un caos, para los ventiladores, no hay un hueco que permita pasar los cables por un lado sin tener que cruzarlos por la parte visible y esto se me hace raro que no haya estado pensando, los cables se pasan por el lugar donde iría el radiador o los ventiladores en la parte de atrás, habría que considerar si se pone el enfriamiento líquido ahí ya que no quedaría muy bien y probablemente estorbe.
Donde va la fuente de poder está muy bien, no tiene una cobertura por la parte de abajo, eso es bueno y malo, bueno por que permite mejor flujo de aire malo por que si tienes cables que no puedas acomodar bien quedarán volando por abajo
Para las nuevas tarjetas gráficas con la nueva conexión pcie5.0 como recomendable dicen que no se debe doblar demasiado el cable para evitar que se queme, pues con este gabinete aunque no queda libremente volando el cable entre la gráfica y el cristal si deja el espacio suficiente para que se cierre, si lo dobla pero es mínimo lo cual no debería de haber problemas,
chaosdvorak –
I bought this case to use for my first-ever PC build. I’ve always been interested in building a PC but never motivated to make it happen. I would consider myself technically proficient and capable of looking things up that I have questions about, but I didn’t have first-hand experience doing a build myself. That’s the context for this review.
I absolutely LOVE this case – it looks sharp, it was pretty easy to build in, and there is TONS of space. I see that many reviews complain about the lack of instructions that come with the case. This is definitely true – the instructions are extremely sparse, vague, and poorly written – but I didn’t have any trouble figuring out how to put everything together with lots of trial and error. You get a wide selection of different screws – which, as others have noted, come with very little instruction/guidance for what to use them for – which I didn’t have any trouble figuring out how to use by simply trying things out. The materials of the case are high-quality, and this thing is an absolute tank. All and all, it took me about 2 hours to get my power supply and motherboard mounted (keep in mind that this was my first build – I imagine that for someone with extensive building experience, they wouldn’t need nearly as much time).
There’s plenty of space on the back of the case for cable management and storing unused cables – in fact, I’ve got all of my extra power cables for my PSU (somewhat) neatly stored in the back of the case. You’ve got plenty of options for running wires throughout the case to keep your build clean. One thing to note is that this thing is HUGE. For building, this is quite nice – I was able to fit all of my components with plenty of space to spare, and the large amount of space made the build itself easy to do. The downside is that the case will leave a large footprint wherever you put it. Obviously a case like this is meant to show off your build, and I thought that putting the finished build on the floor where it can’t be seen was totally pointless. It’s a bit too big for my desk which has been a bit of an annoyance, but that’s a problem with my setup rather than the case. Just keep this in mind if you plan to show off your build – you’ll need a pretty large space for the case wherever you end up putting it.
Here are my quick notes that stood out to me:
PROS:
– Excellent quality materials, built like a tank. The frame is extremely rigid and has quite a bit of mass, and the tempered glass panel is quite thick. It looks great on my desk.
– Plenty of space, which makes both building and cable management easier. I was able to fit a pretty large CPU air cooler on top of the CPU as well as 3 x 140 mm fans for air cooling (in addition to all of the usual components of a build) and still have plenty of space to spare.
– I like that there are two hidden 3.5″ drive bays on the back of the case, which allowed me to hide away my second HDD for the build with space to add a third drive if I wanted.
– All of the front panel wiring worked, was clearly labeled, and easy to get hooked up.
CONS:
– As others have mentioned, the instructions provide some helpful information, but they lack a lot of detail. I don’t imagine that this would be a problem for most people assuming you have the ability to problem solve and try things, but the instructions definitely will NOT walk you through the build step-by-step. I would again mention that I have never built a PC before and was able to get everything put together in this case without any significant difficulty, albeit slowly.
– I do wish there were one or two more ports to allow routing of wires to the back of the case, specifically in areas convenient for an ATX motherboard. You do have multiple options, but I still had to route some wires around the motherboard due to a lack of options for running wires to the back of the case.
Overall, I’m extremely happy with the case and think my final build looks great. The components are solid, especially for the price of the case, and the color scheme worked well for my black-and-white theme. I’m still working on cleaning up the wiring a bit, but I would definitely recommend this case for those looking for a huge space to show off their new build – and willing to go on a bit of an adventure with respect to actually putting everything together.
chaosdvorak –
This case is a very well thought out design, with some minor flaws. I primarily bought this case as I wanted a new AIO now, but want to go custom loop later when I build a new system. This case seemed perfect for my current needs.
PROS:
– Great build quality: The entire case and glass is very well packaged to protect everything, and I didn’t have a single flaw in my case. No scratched paint, dented sides, blemishes, bad threads, or anything like this.
– Great cooling: I was worried that not having airflow across my motherboard VRMs would become a problem, but my temps have dropped a bit from my last case with a Cooler Master T4 Heatsink with Noctua NF-F12 120MM Fan that was paired with 4 120MM Rosewill case fans. Those four Rosewill fans are not longer used, so the heat just rises out with my setup. Mind you I am currently only cooling a 7700k at 4.5 GHz and a GTX 1080, but are not overclocked.
– Design. Standing up this case looks great, but you could easily take off the side panel and metal rod mounts and set the case on its back and use it as a test bench. You can also mount it on a wall or to a desk with a VESA mount, but considering how heavy a full build is, I would never try it.
– Glass: The smoked tempered glass is perfect. Acrylic is too cheesy for such a nice a build.
– PCI-E Riser Cable: It works flawlessly with my GIGABYTE GTX 1080 WindForce 3X OC. I was no difference in 3DMark scores with it installed directly to the PCI-E slot or using the riser cable, so it appears I got a newer cable or got very lucky, as they are known to be a huge problem online.
CONS:
The Thermaltake website and spec sheets list full 420MM radiator support. While my Arctic Freezer II 420 mounted fine, the radiator cannot be mounted perfect. There is a support piece in the upper right front of the case that slightly blocks the top right radiator screw just enough that it forces you to drop the entire radiator down slightly. Once I got to the bottom I could not thread in the bottom two screws for my radiator as the holes didn’t line up. They are correct on the case, but because the radiator had to be shifted down slightly it won’t line up. I also had one screw right behind a USB 3.0 front header that I couldn’t mount because the cable was perfectly in the way. I have 9 out of 12 screws mounted though, so I have no fear of the radiator coming off or sliding around.
– Cable management: This case has so much room in the pack I was able to fit 2x 3.5″ HDDs in the mount and randomly stuff 3x 2.5″ SSDs in to the back with room to spare.
– Pointless dust filter: If you use this thing for water, the dust filter in the back of the case becomes 100% useless. It would only protect the cable management area where drives are mounted anyways in an air setup, and that is with the flow backwards from looks the best.
– Instructions: My god are the instructions useless. The diagrams are horrible and don’t explain anything. They are useful for checking you got all your necessary hardware as it has a parts list, but beyond that they were more harm than good. I STRONLY suggest you watch multiple YouTube videos for the install, as I watched over 5 and not a single one got everything right. Watching those, along with the following tips will greatly help.
ASSEMBLY TIPS
1.) If your motherboard has a CPU power connector up on the top of the board like most you need to remove the bottom HDD mount bracket from inside the case to run the cable behind it for better cable management. There are 4 screws for this on the motherboard side of the case. You don’t need to remove the motherboard for this, there are two each side and that panel removes. I ran the cable underneath this bracket and reinstalled it. You can also do this without removing the bracket BEFORE you install your motherboard.
2.) If mounting GPU vertically, make sure you don’t mount the power supply sideways, there are two PSU brackets included in the kit. You can install the PSU with the fan facing towards the glass, but only with a Micro-ATX board and no vertical mounting. The case has hardware to do it both ways.
3.) Make sure to attach the small support post to the power supply bracket BEFORE you install a power supply if you are going to install your GPU vertically with the riser cable. The power supply will block you from making this install. Use the flat screw designed to go into the recess on the PSU bracket so it mounts flat to your PSU.
4.) Be very careful with the threads. The case is very thick, but case steel tends to be very soft. Some of the powder coat is in the threads, so if you feel any resistance at all, back your screw out and check them. I ended up just slowly backing the screws out and back in a few times when I had this issue, and it only happened 2-3 times across the entire build.
5.) Carefully go through the hardware. There were 4 rubber plugs and washers that I thought were supposed to be anti-vibration mounts for a custom water pump, but they are actually rubber bushings and washers for the tempered glass panel. The plugs go into the glass to protect it, and the washers go on the thumb mounts for the glass. Totally protects the glass from any damage or vibration. Also make sure you are using the right screws for the right threads — the manual is actual nice for this on the inside front pages, it lists how many of each screws or parts there should be — but more importantly it lists exactly what it should be used for. You don’t want to strip out a thread on this nice case.
This case is my favorite I have ever had, and it is probably close to my 20th or so. I don’t see myself needing a new case for a long time, and if I ever did change to a new one for any reason, this case would make a very good test bench, or maybe even a good closet wall mounted media server!
Brandon Vout –
Instructions are a bit small, but you can figure it out.
Looks super neat, the Riser stand is great, considering I can’t measure and my GPU was too long. Easy fix to just turn it on it’s side and have the GPU blow air away from the case, not into a glass screen (unless you want to install that)
Alex Cole –
Bastante facil de ensamblar , es robusto es una torre completa, piezas de muy buena calidad sin rebabas o defectos , el vidrio templado en todos lados le da mucho lujo al ensamble , tengo una refrigeración liquida de 420 mm. Y sin problema puedes trabajar poniendo tus componentes en el , además trae incluído un cable riser 3.0incluído, que me parece un detallazo pues no es Barato uno de estos cables . Visualmente tu PC será una obra de arte y llamará la atención lo recomiendo
Logan Zetaruk –
Me fascina el gabinete, un estilo de primera.
Pros:
-Materiales y acabados de primera calidad.
-Suficiente espacio para instalar las tarjetas de video y disipadores mas grandes sin problemas.
-La posibilidad de montar la tarjeta de video de manera vertical.
-El acabado de vidrio templado se ve excelente.
-Se siente muy sólido.
-Posibilidad de montarlo en la pared o de manera horizontal en una mesa.
Cons:
-El instructivo es terrible, debido a la estilo del gabinete es diferente el armado a la mayoría de los gabinetes cerrados y las instrucciones incluidas dejan mucho que desear, tengo 15 años armando máquinas y este me.dio trabajo, recomiendo ver algún vídeo de armado de este modelo, ayuda mucho.
-Es un gabinete para tenerlo fijo, el peso es alto por lo tanto moverlo puede ser complicado.
Lo recomiendo ampliamente!!
Alex Cole –
The Core P6 TG is a vast improvement from my old case. My arms had plenty of room to maneuver while adding the motherboard or cables and you can remove almost any part of the case you need to for ease of access.
It’s sturdy and unlikely to topple over or break under normal relocation conditions. As a result, it is very heavy. Save your back by investing in a cheap tower stand with wheels.