ANYCUBIC Photon Mono M5s Pro 3D Printer
Set Lowest Price Alert
×
Notify me, when price drops
Set Alert for Product: ANYCUBIC Photon Mono M5s Pro 3D Printer 10.1'' 14K HD LCD 3X High Speed Printing - $339.00
Last Amazon price update was: January 9, 2025 23:16
×
Product prices and availability are accurate as of the date/time indicated and are subject to change. Any price and availability information displayed on Amazon.com (Amazon.in, Amazon.co.uk, Amazon.de, etc) at the time of purchase will apply to the purchase of this product.

ANYCUBIC Photon Mono M5s Pro 3D Printer
$339.00
ANYCUBIC Photon Mono M5s Pro 3D Printer Price comparison
ANYCUBIC Photon Mono M5s Pro 3D Printer Price History
Price History for ANYCUBIC Photon Mono M5s Pro 3D Printer 10.1'' 14K HD LCD 3X High Speed Printing
Statistics
| Current Price | $339.00 | January 9, 2025 |
| Highest Price | $649.99 | August 5, 2024 |
| Lowest Price | $339.00 | September 5, 2024 |
Since August 5, 2024
Last price changes
| $339.00 | September 5, 2024 |
| $419.00 | August 14, 2024 |
| $649.99 | August 5, 2024 |
ANYCUBIC Photon Mono M5s Pro 3D Printer Description
- 【Ultra-High 14K Resolution】Features a 10.1-inch Mono LCD with a resolution of 13312*5120, Anycubic Photon Mono M5s Pro delivers XY resolution of 16.8*24.8μm—printing precision comparable to the thickness of one hair. The light uniformity has been enhanced to 85%,ensuring smallest details and sharp edges.
- 【Comfortable Printing Experience】The Pre heating function can ensure keep the resin temperature reach above 20 ℃ before printing for achieving successful printing even in low-temperature environments. Efficient and replaceable built-in activated carbon odor absorption system can be used separately, which bring you the pleasant printing environment.
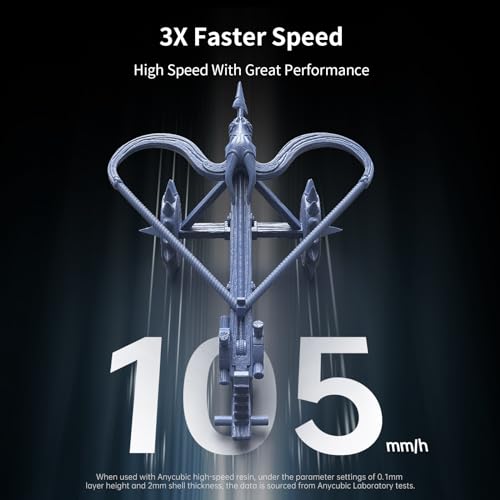
- 【High Speed Printing】With an average print speed up to 105mm/h, the Photon Mono M5s Pro offers a high-speed resin printing experience. It adopts the third-generation high-speed ACF film, which ensures high success rates while lowering the peeling height and increasing lifting speed.
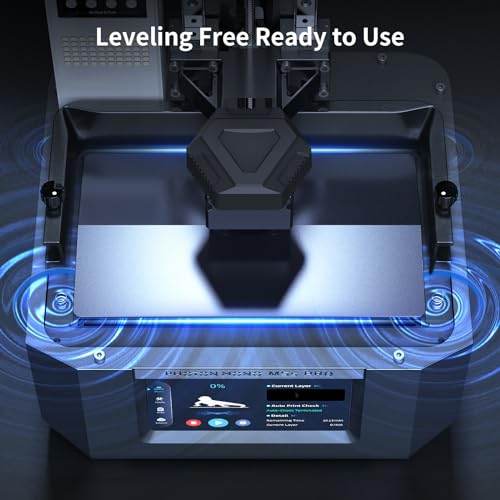
- 【Leveing Free】Photon Mono M5s Pro adopts an brand new leveling-free solution that through the floating platform technology and internal sensors, will make necessary adjustments to ensure that the print is uniform and falls within an acceptable range to achieve a better result.
- 【Increased Success Rate】Residue detection function can intelligently identify residues in the discharge box during the descent process, avoiding screen breakage. And the Intelligent release will intelligently calculate and adjust the peeling height in real time according to the model shape during printing process, so as to improve the printing success rate and printing speed.
ANYCUBIC Photon Mono M5s Pro 3D Printer Specification
Specification: ANYCUBIC Photon Mono M5s Pro 3D Printer
|
ANYCUBIC Photon Mono M5s Pro 3D Printer Reviews (7)
7 reviews for ANYCUBIC Photon Mono M5s Pro 3D Printer
Show all
Most Helpful
Highest Rating
Lowest Rating
Only logged in customers who have purchased this product may leave a review.


Oscar ponce –
今までPhrozen Shuffle、Elegoo Mars Pro、Phrozen sonic mini4K、Phrozen Mighty 4Kと様々なプリンターを使用してきましたが、そのなかでも素晴らしい製品だと感じました。
Anycubic製品は初めてでしたが、今までのプリンター同様の操作感で使用することができました。
FEPフィルムには今までにないLCD面にざらつき加工(曇りガラスのようになっています)が施されたものが標準で使用されており、非常に剥離性能が高く感動いたしました。
今までメーカー付属のFEPといえば、剥離性能が低く、剥離時にベリっと音が盛大に鳴ってしまうようなイメージでしたので、静かに剥がれるこちらは非常にありがたいです。
今まではPeopolyのFEPを別途購入して使用しておりましたが、これからはメーカー純正品のフィルムを使用していこうと思えました。※現状では交換用のFEPやLCDは販売されておりませんが、メーカーに問い合わせたところ今後リリースを進めていくとのことです。
意図としたものなのかは若干疑問ではありますが、造形品にうっすら表面シボ加工を施したようなイメージで仕上がりました。
従来の4KでもXY方向にできる造形の年輪はありましたが、気持ちそれが解消された(?)ように感じます。
製品本体のカバー以外の部分は基本的に板金や切削で作成されており、筐体剛性も申し分ないです。
一見樹脂バットのように見えるレジンバットですが、金属部品で構成、塗装がされておりました。
ボールネジを採用したZ軸リニアレールも非常に剛性感があり、FEPフィルムの剥離性能もさることながら、従来のZ軸送り出し台形ネジのようにリフト時にフィルムの張力にビルドプレートが引っ張られるような感じがなく、スムーズに造形が進みます。
コスト削減のためか中型機にはQIDIの「i-Box Mono」以外でボールねじを採用しているプリンターはなく、採用されない傾向にありましたが、今回標準搭載で6K解像度ということもあり、購入を決めた部分が大きいです。
ボールねじの方が摩耗損失が少ないため、個人的には通常の送りねじより高精度なリフトが行えるのでは、と考えているので、今後とも中型機以上のものはボールねじを使用してもらいたいところです。
(レジンのオートフィーダーは正直無くてもよかったかなというのが正直な感想ですが、使ってみたら実は便利だったりして…?)
3Dプリンターの進歩は目覚ましいものがあり、今後とも目が離せません。
J. Darknell –
Excelente
Matt Torch –
I’ve been 3D printing for over 5 years and printing with another companies resin printer for the past 18 months. I was spoiled by its ease of use, but it was also expensive to operate so I didn’t use it as often as I would have liked. Curiosity finally got the better of me and I picked up this Anycubic Photon Mono just to see what these little LCD printers are really capable of and I can safely say I’m blown away by the print quality. Once you have a process that works, its very easy to use. Just expect a learning curve.
When I was waiting for the printer to arrive I submersed myself in all the YouTube videos on the subject that I could find. Turns out this was a good thing AND a bad thing. Based on all this new found “knowledge” and thinking I knew better, I forged my own path for my first print and sadly it was an utter failure. Based on the videos I had watched I started ordering resin trays and FEP film but due to my inexperience, I ordered all the wrong things. Long story short after a comedy of errors and a half dozen failed prints I finally hit upon a winning formula that I’ve been able to readily duplicate across half a dozen successful prints now.
The printer gives you most everything you’ll need to start printing right away. Everything except the resin, and depending on the type you get you may also need isopropyl alcohol to clean the print which for some reason is still hard to come by. I bought the Anycubic Craftsman resin and have been super happy with the quality.
Some of the things I learned during my first couple weeks–
–When you have a failed print, make sure to clean out the resin tray otherwise the next print will be adversely affected
–Some of the resins are extremely bad smelling, some protection is recommended
–You will eventually have to replace the FEP film, however the most popular videos on YouTube show a product and process that is out of date.
–There is definitely a learning curve you can only get past by experience. All the video watching in the world can’t prepare you for every little hiccup, especially when so many videos contradict those of other channels.
So like everything there are pros and cons, so from my perspective, here are mine–
PROS
–Printer is super easy to use and setup once you know the process
–Very inexpensive to operate relative to high end solutions
–High quality print results that surpasses expectation
–Comparatively fast, prints an entire layer in one go, taking just a couple seconds of exposure
CONS
–Initial learning curve, you need to understand burn-in layers, exposure times and lift speed and half a dozen other settings, yet none of these options are really clearly explained, nor is it covered how they affect the final result.
–It can take a couple hours before you can see if there’s anything on the build plate, I wish there was a way to know earlier if a print failed.
–There are so many options for resins available, yet there is very little data on what settings you need for a particular printer/resin combo so some educated/guessing will be necessary.
All in all, I’m super happy I took the chance on this printer, as I’ve done so much printing, trying different things now that I would never have considered with my other printer mostly due to speed and cost. I’m sure next I’ll be looking to upgrade to its big brother.
Amazon Customer –
I bought this to replace another resin printer of another brand that died. When replacing the FEP on this one, be aware that you place the FEP *and* its bracket, not just the FEP sheet. This makes replacements more expensive, and I admittedly didn’t know that when I bought this. I was initially pretty upset. However… these work so well they’ve saved me a lot of time, money, and prints in the last year. With the bracket already attached, the tension is perfect. I haven’t had to do anything to help prints from releasing (I had to use silicone spray for the other printer.) I just had my first failure in about three months, probably because I was too stingy with supports, emptied the tank, and the FEP still looks amazing. This is only the third FEP sheet I’ve used, and it’s going back in. I probably have 8 or 9 kg of resin on this one sheet already. Everything else is pretty standard for the printer’s category, but if the FEP replacement is the concern, as far as my experience has been, this is actually the inexpensive, reliable way to go.
ramon p. –
購入直後から不具合が多発しました。先ず、レジン供給機のモーターが周り続けて故障、予備にと思って別途購入しておいた部品に交換後、販売元へ連絡し該当部品を無償送付してもらいました。その後、数回印刷すると今度は液晶パネルが故障、再度販売元へ連絡するとメーカーサイトのサポートへ連絡するよう指示があり、メーカーサイトのサポートへ11月末日に英文で連絡、日本の正月、中国の旧正月等を挟み交換部品が到着したのは、なんと3月でした。液晶パネルを交換後、数回印刷すると再び液晶パネルが故障、販売元へ連絡し商品交換を希望すると購入から4か月経過しているので交換は出来ず、部品交換対応するので再度液晶パネルを送るとの事。この4か月間は交換部品待ちで商品が使えなかったのに。。。交換するなら本体マザーボードと液晶パネルの交換を希望し、1か月後に交換部品が到着、ようやくまともに動作するようになりました。この間、別のM3Plusをもう一台購入し使用しましたが、そちらは全くの無問題でした。販売元のサポートは良いですが、メーカーからの部品供給は1か月以上かかるので、このメーカー商品は初期不具合が出たならば無条件に返品・交換する事をお勧めします。
2023/8/24追記
その後も再び不具合が出て、タッチパネルも交換、さらに本日再び液晶パネルが故障しました。今回は連絡しても液晶パネルは3か月保証だとの一点張りで、部品代を請求してきました。液晶パネルが3か月保証なんて話は以前には無かった話です。ここ最近の製品には液晶パネルは3か月あるいは6か月保証と記載されるようになりましたので、保証内容を変えてきている模様です。液晶パネルにこれだけ不具合が出続けた事を考えると、このメーカー、商品の液晶パネルには問題があるのかと考えられます。ただ、同じM3plusをもう1台、M3Max,M3Premia等も使用していますが、不具合の出るのはこの商品だけで、他は何も問題が出ません。
2023/9/5追記
交渉の末、なんとか無償で液晶パネルを送って貰いました。交換用の液晶パネルは、中国本社からの発送で10日程で届きました。当然ですが、液晶パネル交換後は正常に動作しています。
私は、不具合の出ないM3Plusも保有していますが、この不具合連発の商品と何が違うのか徹底的に調査してみました。結果、プラットフォームを上下に動かすアームのホーム位置とプラットフォームの高さ調整する金具に欠陥がある事を見つけました。というより、正常に動作している商品の方が稀なのかもしれません。
アームをホーム位置にした時にプラットフォーム金具が上と下それぞれ数ミリ動かせるか確認してみてください。
不具合の出る商品は、ホーム位置が低い為、上には動かせますが、下には動かせません。この事は、プラットフォームが液晶パネルを強く押している事を意味します。市販の磁石式鋼板パネル等を付けた場合は更に条件は厳しくなり、液晶パネル破損となるでしょう。
液晶パネルに不具合の出る方は、レベリング調整時にプラットフォームが液晶画面との間に入れた紙がホーム位置にした時にある程度紙が動かせるか確認してみてください。全く紙が動かせなければ、液晶パネルを加圧状態ですので、いずれ液晶パネルが破損するでしょう。
この件について、メーカーへ問い合わせましたが、レベリング調整のビデオを撮影して送れの一点張りで、本日現在回答が得られていません。
私は現在プラットフォーム側の取り付け金具の高さを数ミリ低くした物を3D印刷して使用しています。金具の高さを低くする事でプラットフォーム取付金具の調整範囲が広がり、正しくレベリングが出来るようになりました。
Matt Torch –
I’ve owned multiple FDM (PLA filament) 3D printers over the past 4 years I’ve used for commercial and prototyping. The quality of the prints was okay, but not necessarily the needed quality for smaller models. I’ve been waiting for an SLA printer to become a little less costly as many on the market are well into the $1,000’s. Thankfully, the demand for less expensive SLA printers has pushed a handful of printers under the $500 mark. I ended up buying the Anycubic Photon after watching a bunch of YouTube videos.
PROS:
– Build volume is a good size especially on the Z-axis.
– Easy assembly right out of the box. All you have to do is put the build plate on.
– Calibration was relatively easy, but instead of the directions given with the printer, I used the Flint Read method you can find on YouTube.
– The touch interface is nicer than the ones I’m used to with my FDM printers. I like how it shows you the progress layer-by-layer.
– This printer has a door on a hinge which was a deciding factor for me. Other ones had a bulky shell that you’d have to remove every time you finish a print.
– Clean-up isn’t all too bad once you get the hang of it. (more info on that below)
CONS:
– My only issue was with the slicing software. It really is bare bones. I ended up using Chitbox instead with better results.
– Not particular to this model, but for all SLA printers… it can get very messy if you don’t know what you’re doing. The resin is known to be toxic. You need to wear gloves!
– Again for all SLA printing, there is post-print processing needed! You need to wash the prints with isopropyl alcohol and then cure it. You need to wear gloves!
PACKAGING:
It came well packaged with a good amount of insulation. The only issue I had was that the stepper motor wasn’t working properly. I reached out to customer support, and they helped me through it. It turned out that one of the wires for the stepper motor backed out likely during shipping. I fixed it quickly and was printing within minutes.
PRINTING:
The first couple of prints failed for me. They were falling off the bed into the vat. After some YouTube videos, I figured I had the settings wrong. I changed the bottom layer exposure for the first 3 layers to 100 seconds, and that fixed the issue. The settings differ from other brands and types of SLA resin.
As for quality, I cannot stress enough who incredibly detailed the prints to come out. I printed the Eiffel Tower as a torture test. It was printed at 0.05mm layer height and 15-second exposure per layer. The post-print was cleaned in isopropyl alcohol and cured with ultraviolet light.
IMPORTANT:
This should go without saying, but I wouldn’t consider this printer to be one for beginners and definitely not for kids! This goes for all SLA printers. The resin is toxic and can get messy. You need to wear gloves when handling uncured prints, and there is a bit to post-processing the prints. I certainly would not trust a kid with these tasks. If you are looking for a 3D printer for your kid, look into FDM printing.
For SLA, you will need to buy a couple of extra things. Stock up on +91% isopropyl alcohol, nitrile gloves, Tupperware ONLY used for cleaning (never again food), and ultraviolet light for curing.
All-in-all, it is a great SLA printer. I would highly recommend this to anyone who has experience with FDM printers looking to step up to SLA. If anything changes down the line, I’ll update this review.
J. Darknell –
Es un excelente producto imprime con muy buena calidad a un precio muy accesible, compatible con una gran cantidad de resinas