Celestron NexStar 8SE Computerized Telescope
Original price was: $1,599.00.$1,299.00Current price is: $1,299.00.
Celestron NexStar 8SE Computerized Telescope Price comparison
Celestron NexStar 8SE Computerized Telescope Price History
Price History for Celestron - NexStar 8SE Telescope - Computerized Telescope for Beginners and Advanced Users -...
Statistics
| Current Price | $1,299.00 | January 8, 2025 |
| Highest Price | $1,599.00 | July 19, 2024 |
| Lowest Price | $1,230.74 | September 9, 2024 |
Last price changes
| $1,299.00 | November 16, 2024 |
| $1,599.00 | September 10, 2024 |
| $1,230.74 | September 9, 2024 |
| $1,599.00 | August 31, 2024 |
| $1,339.00 | August 28, 2024 |
Celestron NexStar 8SE Computerized Telescope Description
“`html
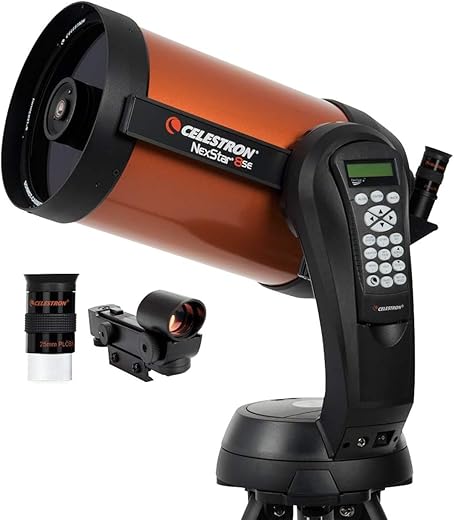
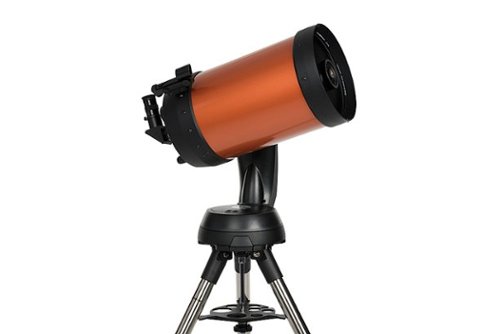
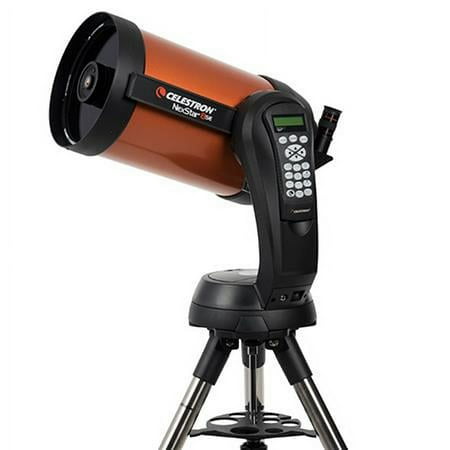
The Celestron NexStar 8SE Computerized Telescope is a blend of tradition and cutting-edge technology, designed to offer an extraordinary stargazing experience for both beginners and advanced users. This telescope features Celestron’s iconic orange tube design, a hallmark of quality and innovation since the company’s inception.
Exceptional Optics with an 8-Inch Aperture
At the heart of the NexStar 8SE is an 8-inch primary mirror, a marvel of optical engineering. This Schmidt-Cassegrain telescope packs substantial light-gathering power, allowing you to observe stunning details within our Solar System and beyond. Despite its powerful optics, the telescope retains a compact form factor, making it suitable for both adults and kids to use together. The NexStar 8SE is also compatible with StarSense Technology and WiFi for added convenience and enhanced functionality.
Fully-Automated GoTo Mount
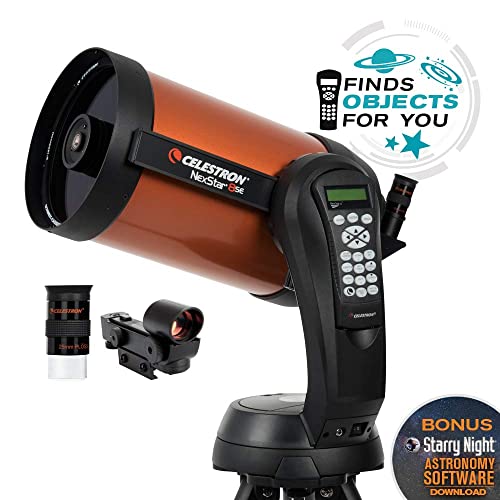
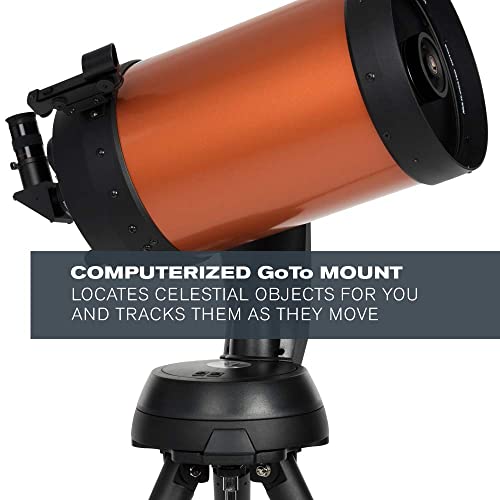
One of the standout features of the NexStar 8SE is its fully-automated GoTo mount. This advanced mount houses a database of over 40,000 celestial objects. Whether you’re an astronomy novice or a seasoned observer, the GoTo mount will automatically locate and track objects in the night sky for you. This automation significantly reduces the learning curve and allows you to spend more time observing and less time searching.
Effortless Setup with SkyAlign Technology
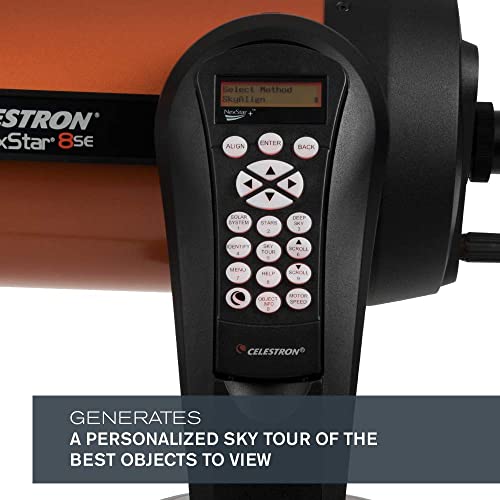
Setting up the NexStar 8SE is incredibly straightforward, thanks to its single fork arm design and sturdy steel tripod. The components assemble and break down easily, making transportation a breeze. With SkyAlign technology, aligning your telescope is a matter of minutes, so you can get straight to observing without the hassle of manual alignment.
Reliable Warranty and Customer Support
Purchasing a NexStar 8SE from Celestron means you’re investing in a brand with a rich history of quality and customer satisfaction since 1960. The telescope comes with a 2-year warranty and unlimited access to technical support from Celestron’s team of US-based experts. This unbeatable warranty and support system ensure that you can buy with confidence and peace of mind.
Product Details
- Product Dimensions: 16.54 x 9.31 x 5.11 inches
- Item Weight: 23.9 pounds
- Item Model Number: 11069
- Batteries Required: 1 Lithium Metal battery
- Date First Available: June 17, 2003
- Manufacturer: Celestron
In conclusion, the Celestron NexStar 8SE Computerized Telescope offers a perfect blend of tradition and modernity, making it an excellent choice for both budding astronomers and seasoned stargazers. Its powerful optics, automated features, and ease of setup make it a standout product in the world of amateur astronomy.
“`
Celestron NexStar 8SE Computerized Telescope Specification
Specification: Celestron NexStar 8SE Computerized Telescope
|
Celestron NexStar 8SE Computerized Telescope Reviews (7)
7 reviews for Celestron NexStar 8SE Computerized Telescope
Only logged in customers who have purchased this product may leave a review.






Graham Peterson –
This is my first telescope since I was a teen. Setting up the telescope wasn’t easy. Need patience, but once set up great views. As the telescope only comes with one lens, you should include additional lenses with greater magnification.
JG –
El tripié es muy estable. La montura lo hace ideal para principiantes, ya que la configuración es muy sencilla y tiene una base de datos muy completa. Ideal para todos los niveles. Permite la observación y seguimiento de objetos planetarios y de espacio profundo (aunque no para fotografía de larga exposición, hay que adquirir una cuña por separado para configurarlo de manera ecuatorial). A mi parecer por el precio debería incluir el adaptador de corriente (ya que no viene incluido) y para usarlo sólo con sacarlo de la caja, es necesario colocarle 8 baterías AA (de buena calidad para que rindan una sesión de unas 4 o 5 horas). El Finder de punto rojo es muy práctico para alinear y encontrar “manualmente” objetos que se ven a simple vista. Viene con un solo ocular de 25mm, que da unos x81 aumentos y un campo de visión de unos 0°38′ de arco.
Christoph Lüdecke –
Sehr gutes Teleskop für Anfänger.
Qualitativ hochwertige Ausführung.
Bildqualität Mond und Planeten sehr gut.
Leicht einzurichten
Matheus Amaral –
Tudo certo e dentro do prazo. Produto chegou em ótimo estado
Elle –
Where to start…first, I am so happy with this telescope! We transitioned from the Celestron 80MM Star Sense Explorer to this scope. Quite a jump, I know but so glad we did. So…it was a bit heavier than expected but manageable. I had to do a lot of reading and I am still learning about the “utilities” and settings and it definitely took some time to get used to. The manual is okay but you will find more on You tube and on the Celestron website for tutorials. Putting the scope together was simple enough. The red dot finder is not great, definitely need to upgrade that if you choose not to purchase the Star Sense Auto Align. More on that later. The 25 mm lens that comes with the scope is actually really good and we pair it with the Barlow lens. The scope arrived in great condition and was packaged nicely. The tripod is decent and easy to adjust. So back to the Auto Align. the first few times we took the scope out we attempted to use the 3-star alignment….never could get it to work correctly….having said that…we live in a light polluted area near Nashville so we expected some issues. After attempting this alignment several times we decided to purchase the Star Sense Auto Align…I know it is fairly pricey but wow, so glad we did!!! The Star Sense aligned the first time and has worked great each time (read my review on that one as well, hopefully it will help if you decide to purchase it). I had never seen the Orion Nebula before and my first early morning viewing was breathtaking! Views of Saturn, the Moon, and Jupiter are fantastic…you can see the Cassini division in Saturn’s rings. Images are clear and detailed. The one thing that I was unaware of when purchasing this scope and only found out after watching some You Tube videos is that you have to upgrade the firmware on the mount….the joy of being a newbie! So things we purchased for this scope that may be of use for someone purchasing it:
1. Celestron X-Cel 12 MM lens
2. Celestron X-Cel 3x Barlow
3. Celestron Oxygen iii Filter
4. Baader UHC-S Nebula Filter
5. Celestron Solar Filter (8″ for the 8 SE)
6. Celestron Lithium Power Tank 12 V (a must have or you will be replacing batteries every 30 minutes)
7. Colored filters but mainly Red, Violet, Blue, and a Moon filter…haven’t used the other colors yet. Orion has a
great set, although it is expensive.
8. A carrying case- we travel a lot….Celestron has one for this tube size, otherwise use the boxes it came in- they
work just as great!
9. A pelican case for your eyepieces and filters….we purchased one with pullouts and made our own…or you can
buy one from Celestron.
10. And a must have for those living in the South or colder climates…a dew shield or heater!
11. A red flash light or just use the red light on the Lithium Power tank.
12. Last but not least….for newbies…there are several companion books you can purchase….The Backyard Astronomer’s Guide, Night Watch, The Total Skywatcher’s Manual, and National Geographic has some great books. We love locating things in the sky, then looking them up and reading about them. The books also contain great tips and suggestions from purchasing eyepieces to filters, and how to best view objects in the night sky.
All of these items were purchased on Amazon and we bought them over time but each purchase has enhanced our viewing and really made our nights out so enjoyable.
Pros: So many but to name a few…
Great, clear images, mostly newbie friendly- just have to educate yourself on operating the telescope to get the most out of it, a lot of items available for purchase to upgrade your experience, and with the star sense auto align you can spend hours outside enjoying clear skies. Not to say most people cannot get the 3-star alignment, we just lost patience with it and purchased the auto align 🙂
Cons: Manual not so great…You Tube has great videos from knowledgeable enthusiasts, it seems a bit heavy but manageable for one person. My husband is always with me so portability isn’t an issue but just going out alone it may be somewhat heavy.
Overall, I am so happy with this purchase and would recommend it for anyone wanting to add a more advanced telescope to their collection. There are several tutorials available online at Celestron and via You Tube that I encourage you to view. The telescope can be a bit intimidating for those that are new to the hobby but with a little research you will be loving it! We take it out at least 3x per week (skies permitting). The most beautiful site seen was the other morning I went out at 5 am and viewed Venus…the moon, and Orion’s Nebula…so clear and amazing…it was definitely a treasure trove that morning, spent about 90 minutes viewing the sky until the Sun started to come up…very peaceful! We are still learning this telescope and each thing we learn just enhances our experience. I was hesitant on this purchase at first…a lot of money to spend plus accessories but we are so glad we decided to buy it! Definitely do your research to determine which telescope is best for you and your goals but this is a great one for those just entering the hobby or graduating from a starter scope. Now if we could only afford to buy another one of these so my husband and I don’t fight over viewing time!
Koenig –
Tres bon télescope , j’ en suis ravi très simple utilisation même pour novice ,oculaire de série mes rendue très nette bon instrument pour commencer .
ICEMAN –
When I was a kid in the late 60’s, my folks got me a Tasco telescope, had a lot of fun with it. In 2007 I got a Bushnell reflector telescope as a gift. Both telescopes were the lower end of the quality window but still enjoyed using them.
I finally decided to upgrade for several reasons. Neither telescope would track an object through the night, after about a minute in the eyepiece, the object would be out of view and a readjustment was necessary. Finding anything in the sky was a pain as I had to rely on my knowledge of where to point the telescopes. The Bushnell came with a sort of ‘guide’ to help, and it did, but it was just mainly in the general direction to point the scope. And then the lenses that came with both the telescopes were cheap and hard to focus. These telescopes were very beginner based models.
After looking around on the web, the Celestron telescope was often mentioned in the top 10 or so of quality scopes to purchase for the price, and the Nexstar SE series was getting very good reviews. After much deliberation and a cut in price of over $200 one day, I ordered the Celestron NexStar 8 SE. I also ordered the X-Cel LX 25mm, 9mm, and 5mm eyepieces to go with it, it comes with a lower quality 25mm Plossl lens. I also got an X-Cel 2x Barlow lens and a zoom lens from Celestron, the zoom works okay but is not in the same league as an X-Cel, and a Celestron StarSense Automatic Alignment device to help in locating celestial bodies. Also got the AC Adapter as the reviewers everywhere said don’t rely on the 8 AA batteries to run the device as they die quickly.
Of course the day it arrived it was cloudy for three nights, which gave me a chance to really review and read the instructions. It was delivered safely and fast, the telescope was in a box, in another box, and then another box in foam, so no problems there. If I had any issues, it was with the assembly instructions, they never actually show you how to put the orange tube on the fork, which IMO was the most important part. After looking at the pictures in the manual and checking Youtube vids, I was able to figure it out (I had it on upside down and backwards). Otherwise no problems.
Once I had a clear sky I took it outside at dusk and set it up, just lined up the index points and aimed the scope at the horizon, leveled it by eye and took off. I did use the StarSense Auto Alignment unit to calculate the position and within about 7 minutes was enjoying the sights of Jupiter and the Moon like I had never seen them before. Saturn is still below the horizon, but I can imagine it will be a sight to see also. The telescope is definitely worth it, the X-Cel lenses are a must, so clear and great views and focus ability. The zoom lens was actually used the most as I could capture an object in the sky and then zoom in and out easily, and the zoom lens has a rubber eyepiece so you can still wear glasses if you want.
The absolute best part was being able to use the handheld remote and tell it to find something, a star, galaxy, planet and then it slews right to it. The first time it was a little off because of user inexperience, so I doubled down and researched it, actually called Celestron and talked to a live person and then the second time was ready. You do need to keep a few things in mind.
Try to insert the EXACT time into the controller ( I used my iPhone, I just set it for the next minute at 00 seconds, and then wait for the second hand to hit the 12 and then hit enter on the controller, perfect), be sure to set the time correctly, UTC 24 hour time (i.e. 9PM is 2100), make sure you have the correct time zone and daylight savings time set correctly.
Also try to set the correct location as close to where you are setting up, again I used an app on my iPhone to give the correct longitude and latitude coordinates. You have to enter the degrees and not the decimal coordinates, also make sure to get the north/south and east/west location right.
Then you have to align the scope to find out your best calibration, take your time, it is definitely worth it. I used the StarSense Auto Alignment method, so your calibrations may be a different set of instructions. After the final alignment (which took all of about 5 minutes), I told the hand controller to find a star and it slewed right to it, in the absolute center of the eyepiece and then tracked it for as long as I had it on there. Fantastic, it was doing everything it was advertised, I am very happy with this purchase.
It is a heavy telescope, I have to have help to move it safely in and out of the house, you may be able to move it by yourself, or take the tube and fork off the tripod and reassemble in your viewing location.
Only con I can see is the hand controller is a bit hard to see at night, just a little dim, I remedied that with a small flashlight with a red lens to keep down the light pollution, but I found you can control brightness and contrast on the controller so problem solved.
Very glad I finally have an almost pro (IMO) telescope. After I see an object I can tell my wife to look at it and she was amazed at the improvement over the Bushnell scope, and since it tracks the object, no need for a readjustment every 45 seconds…
Great value for the money, great construction, I called Celestron for help and was talking to an expert in two minutes who knew exactly what I was talking about, would recommend this telescope to anyone who wants to experience astronomy.