Comgrow Creality Ender 3 V2 Neo 3D Printer
Set Lowest Price Alert
×
Notify me, when price drops
Set Alert for Product: Official Creality Ender 3 V2 Neo 3D Printer with CR Touch Auto Leveling PC Spring Steel Platform Full-Metal Extruder 95% Pre-Installed 3D Printers Resume Print and Model Preview 8.66x8.66x9.84 inch - $199.00
Last Amazon price update was: January 18, 2025 13:46
×
Product prices and availability are accurate as of the date/time indicated and are subject to change. Any price and availability information displayed on Amazon.com (Amazon.in, Amazon.co.uk, Amazon.de, etc) at the time of purchase will apply to the purchase of this product.
Comgrow Creality Ender 3 V2 Neo 3D Printer
$199.00
Comgrow Creality Ender 3 V2 Neo 3D Printer Price comparison
Comgrow Creality Ender 3 V2 Neo 3D Printer Price History
Price History for Official Creality Ender 3 V2 Neo 3D Printer with CR Touch Auto Leveling PC Spring Steel Platform...
Statistics
| Current Price | $199.00 | January 18, 2025 |
| Highest Price | $199.00 | July 30, 2024 |
| Lowest Price | $199.00 | July 30, 2024 |
Since July 30, 2024
Last price changes
| $199.00 | July 30, 2024 |
Comgrow Creality Ender 3 V2 Neo 3D Printer Description
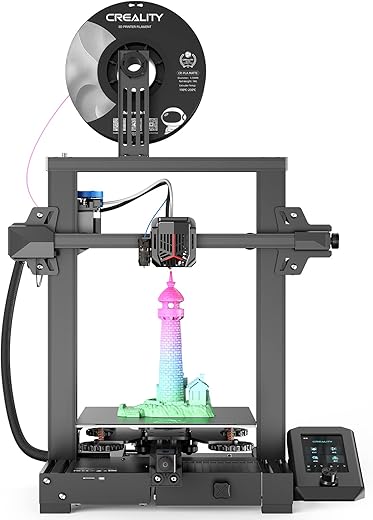
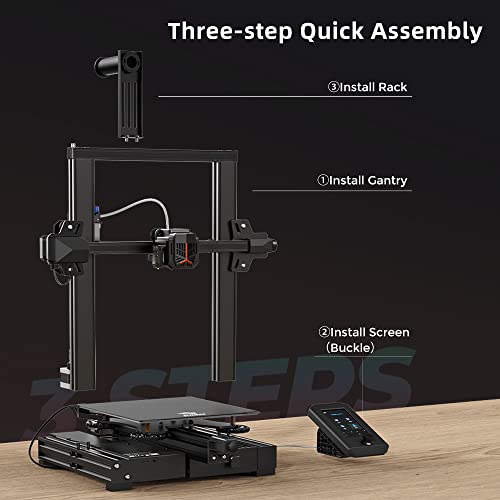
- 1.Easy Assembly: Compared to Ender-3 V2, this Ender-3 V2 Neo printer is pre-installed, and the assembly requires only 3 steps. Friendly enough to users and beginners in assembly process, which will save much time. It is convenient for customers to install it in quick way, more efficient.
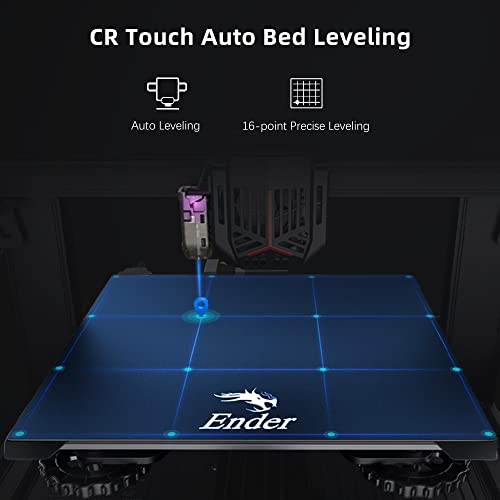
- 2.CR Touch Auto Bed Leveling: Upgraded CR Touch 16-point automatic bed leveling technology saves you in the trouble of manual leveling. Easy to use, the intelligent leveling system can automatically compensate for the printing height of different points of the hot bed. It saves much more time for customers in long-time leveling adjustment, quickly finish the leveling process.
- 3.Brand New 4.3 Inch UI User Interface: The upgraded UI adds a model preview function, making it easier to observe the printing shape and progress for customers. Which is convenient for you to know about the model status. Also, it supports nine languages for different customers demand.
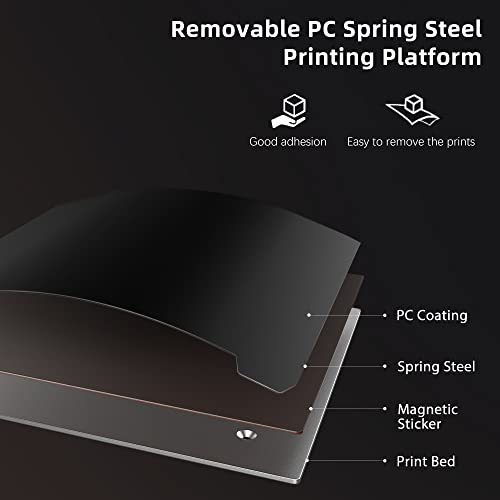
- 4.PC spring steel magnetic build plate: Different from ender 3, ender 3 pro and ender 3 v2, this new-released FDM 3d printer comes with a removable PC spring steel magnetic build plate. The innovative printing platform is a combination of a PC coating, a spring steel sheet and a magnetic sticker, which sticks to the surface immediately when released. The PC coating brings good adhesion for filament, and the finished models can be easily removed by bending the print sheet.
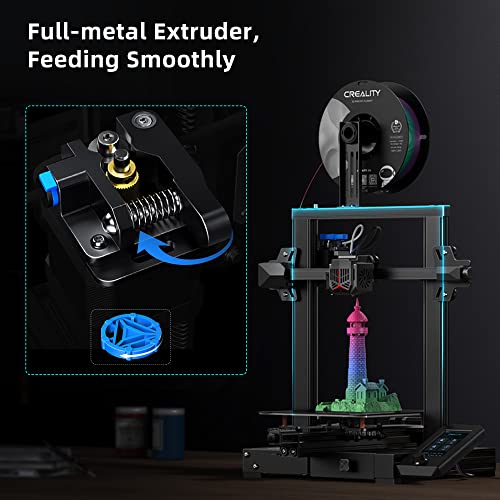
- 5.Silent Motherboard: The mainboard is 4.2.2 version but it is silent mainboard which is different from ender 3 mainboard. This Ender-3 V2 Neo equipped with self-developed silent motherboard, which has stronger anti-interference, faster and more stable motion performance, silent printing and low decibel operation, create a quiet environment.The extruder is upgraded to full-metal extruder, which has greater extrusion force and is more durable, reducing the risk of nozzle blockage.
Comgrow Creality Ender 3 V2 Neo 3D Printer Specification
Specification: Comgrow Creality Ender 3 V2 Neo 3D Printer
|
Comgrow Creality Ender 3 V2 Neo 3D Printer Reviews (8)
8 reviews for Comgrow Creality Ender 3 V2 Neo 3D Printer
Show all
Most Helpful
Highest Rating
Lowest Rating
Only logged in customers who have purchased this product may leave a review.



Aaron Lamarca Mata –
Cuando ya tienes experiencia en impresión 3D y usaste impresoras básicas, el brinco tecnológico te sorprende, una impresora que es fácil de usar, fácil de mantener, económica y con excelente calidad de impresión.
Si eres principiante en el mundo de la impresión 3D, esta impresora es para ti, pues no tendrás que batallar con el horrible proceso de calibración de la cama de impresión.
Aclaro, con material basico PLA, esta impresora es excelente, para otros materiales no.
Jorge –
me ha funcionado pefectamente
John –
After a bunch of research, I settled on an Ender 5 for an entry level printer, and I couldn’t be happier.
I’m comparing it to a pair of Ultimaker printers at my office (10x the price). Honestly, out of the box, the only thing it really needed is leveling the bed and increasing the extruder steps per mm with a 5-minute test. At that point I’d say it reached about 80% of the print quality of a new Ultimaker. For a grand total of another $25 I’ve added a new extruder, Bowden tube and connectors, and glass bed, and printed a hard support and cable strain relief for the bed. With these and more tuning of slicer settings, I’m consistently getting incredible looking and functioning prints. The stock magnetic flexible bed is actually pretty OK, the adhesion is great, but slightly bowed down in the center and leaves a rough bottom surface. I’ve learned to love plain clean glass for many materials, adheres great and then floats off as soon as it cools.
My only real disappointment is the stability of the bed. It is just a flat plate that screws onto another flat plate that rides on the Z-axis, so the entire bed bends like a diving board. Wish it had a few small ribs to reinforce it. It’s ok for small prints but I recommend printing some support arms early. The cables are also too short to manage nicely, but some spiral wrap can tidy them a bit. Mine has a Landy power supply, which is apparently worse than the Meanwell that some are shipping with, but zero issues so far.
Know what you’re getting into – it’s still a hobbyist printer, your mileage may vary. I’m sure there’s a lottery for DOA units as well, but mine was great. The FDM process itself has limits, and most of what you’re paying for in a more expensive printer is the assembly, the features, and the tuning/setup done at the factory. This is a kit printer on a tight budget, but with some TLC can easily match the much more expensive printers. I chose it because it’s easy to modify and widely popular so there are tons of user-created guides and printable upgrades. It works fine as-is, but for me half the fun is getting to make it mine and push its limits. The frame and XY platform are a great design and assemble very easily. Conceptually seems much more stable than the Ender 3 design. It doesn’t have the bells and whistles like auto leveling and wifi, but these can be modded in for cheap too. The stock board/drivers are a little noisy, the silent upgrade are worth considering if it’s in your living space. Do a little research on “things I wish I knew for my first 3D printer” and essential tools and printable upgrades, there is a great community around the 3D printing and Creality world. Many Ender 3 mods work for the Ender 5 as well.
There are a number of Ender 5 issues you’ll see around the internet that have already been fixed by the time I got mine in Nov-2019. An early unboxing video pointed out some issues caused by backwards parts in preassembled sections, but my version has reversible parts so the issue can’t happen. The extruder now has a small brass insert where the filament spool feeds in so it doesn’t wear down. The firmware on mine has thermal runaway protection enabled. I tested mine with every method I could find, and it always shut down safely within 60 seconds. Research and test this on yours before you ever consider printing unattended!
If you’re considering the Ender 3 vs Ender 5, I would lean toward the 5. The box frame design seems much more stable, and the wobbly bed can easily be stabilized.
It came with 200g of white filament, an extra nozzle, clips that slightly improved the Bowden tube stability, a micro-SD card and USB reader, a spatula to help remove prints, a nipper/flush cutter that is good for trimming tube, filament, and excess material on prints, and a small set of tools that are enough to assemble and adjust everything. Didn’t include a mini-USB cable (old trapezoid, not the usual cell phone kind. You can print from SD without it but need it if you want to tinker with the firmware).
If you’re on the fence, get one! The correct number of 3D printers to own is always N+1.
Wyatt E –
This is a great first 3d printer. But to start, you need to understand low cost 3d printing is definitely still in its infancy, you should not expect everything to be super easy and awesome. You will need some patience and a willingness to learn. On to the review.
The printer came packaged in a fantastic box, every piece was securely contained in a specific spot and it was all correctly packed. Unpacking was pretty straightforward, I recommend having a utility knife to carefully cut off some plastic packing wrap. Assembly is very straightforward if you have a good guide. I used the “Creality Ender 3 V2 assembly and pro build tips” video from Tomb of 3d Printed Horrors youtube channel, it is excellent and walks through the entire build process and helps avoid almost every pitfall. I say almost because my z axis motor mounted in such a way that the z leadscrew was very crooked. I ended up installing a little cardboard shim between the motor and mount to move it out and straighten the z shaft. It is definitely worth checking for this issue. The failure symptom is noisy clicking when it tries to move the z axis up when it is down near the bed. Once that issue was fixed everything worked great.
The same youtube channel has a great video on bed levelling. Once my bed was level I printed the dog model included on the microsd card. It worked perfectly. I was shocked at the out of box print quality. It was fantastic.
The first thing I noticed during printing is how quite it is. The new silent stepper main board is really great, it alone it’s probably worth the price difference between the Ender 3 Pro and the Ender 3 V2. All the other little updates are great also. Strangely the little drawer on the front is one of my other favorite upgrades, it is just super convenient for storing the little parts. I like the PSU under the build plate, it just feels protected from stuff accidentally falling in our getting jabbed in by a child. Overall I feel like there design of the V2 is much more polished than the older Enders. I personally feel the V2 upgrades are worth every penny.
I was also surprised at how few problems I had initially with adhesion, many people complain about prints falling off, but the included filament worked on every print I ran. Notably, when I switched to Hatchbox copper colored filament I had a number of problems and had to have my bed dialed in perfectly to get adhesion, I also need to clean the print bed with isopropyl alcohol between prints. I lost my first 4 or 5 small prints in Hatchbox PLA due to adhesion issues.
For tools I downloaded the latest Cura slicer which seems to work very well. For high quality prints I use the custom cura setup from the above youtube channel for mini printing. It takes a little time to setup a custom cura profile, but it has produced beautiful mini prints as well as a functional threaded nut I needed for a broken fan.
I found Cura is not great for generating supports, my prints come off with lots of surface flaws that really ruin the print finish. I am now using Meshmixer for creating custom supports with much better results.
For my functional prints I have used Tinkercad, it was super easy to create the hex nut I needed, note plan to create threaded holes quite a bit larger than measured to account for plastic shrinkage.
Obviously, this wasn’t simple and I have learned a ton in 2 weeks. You will need to learn a variety of new skills and tools to get the most from your printer. If you are up for it this is a great printer.
Phs –
Nothing to dislike
Laurie –
As the owner of a jewelry, 3D design, and crafting company, precision and reliability are paramount in every aspect of our work. That’s why I was thrilled to incorporate the Official Creality Ender 5 Pro 3D Printer into our production process. Let me tell you, this machine has exceeded all expectations and become an indispensable tool in our workshop.
First and foremost, the upgrade to a silent motherboard has revolutionized our workspace. Gone are the days of noisy printing sessions disrupting our creative flow. Now, we can focus intently on our designs without any distractions, thanks to the whisper-quiet operation of the Ender 5 Pro.
But it’s not just the silence that impresses us. The upgraded metal feeder extruder ensures smooth and consistent filament flow, resulting in flawless prints every time. Whether we’re working with delicate jewelry pieces or intricate 3D designs, the Ender 5 Pro delivers impeccable detail and accuracy, elevating the quality of our finished products.
One of the standout features of the Ender 5 Pro is the Capricorn Bowden PTFE tubing, which enhances filament feeding and reduces the risk of clogs or jams. This means less downtime for maintenance and more time for us to focus on what we do best – creating stunning pieces that delight our customers.
The sturdy construction of the Ender 5 Pro instills confidence, and its large build volume provides ample space for printing multiple items simultaneously, increasing our productivity without sacrificing quality.
Moreover, the user-friendly interface and intuitive controls make operating the Ender 5 Pro a breeze, even for those new to 3D printing. Whether we’re printing prototypes, custom jewelry pieces, or intricate components for our crafting projects, the Ender 5 Pro consistently delivers exceptional results.
In conclusion, the Official Creality Ender 5 Pro 3D Printer has truly raised the bar for precision crafting in our workshop. Its silent operation, upgraded features, and reliability make it an invaluable asset to our business. If you’re serious about taking your crafting endeavors to the next level, I wholeheartedly recommend investing in the Ender 5 Pro. Trust me, you won’t be disappointed.
Yessica Sánchez –
Para uso personal
Miguel Angel Flores –
The printer was relatively simple to assemble, but I’m giving one star because I had to replace the strudder assembly. From the moment i finished the assembly of this printer it was really difficult to introduce the PLA filament. I noticed that the bearing was not even fixed to the metallic base, it was actually glued and it wasnt rotating when the motor moved the extrusion gear to introduce the filament. I tried to tighten the screw, but it was impossible: the screw was wore out. They glued it instead of replacing this piece. I ordered a new piece before returning the printer, replaced it and the problem was solved. Printer works just fine now, and the printer quality is as expected.
I get that you need to fix your printer whenever problems like this happen, but not when it is a brand new printer and it is clearly sold with faulty pieces.