ELEGOO Neptune 4 Max High-Speed 3D Printer


Set Lowest Price Alert
×
Notify me, when price drops
Set Alert for Product: ELEGOO Neptune 4 Max FDM 3D Printer 500mm/s High-Speed with/ Klipper Firmware - $549.99

Price history
×
| Price history for ELEGOO Neptune 4 Max FDM 3D Printer 500mm/s High-Speed with/ Klipper Firmware | |
|---|---|
|
Latest updates:
|
|
Last Amazon price update was: January 9, 2025 23:16
×
Product prices and availability are accurate as of the date/time indicated and are subject to change. Any price and availability information displayed on Amazon.com (Amazon.in, Amazon.co.uk, Amazon.de, etc) at the time of purchase will apply to the purchase of this product.
ELEGOO Neptune 4 Max High-Speed 3D Printer
$549.99
ELEGOO Neptune 4 Max High-Speed 3D Printer Price comparison


ELEGOO Neptune 4 Max High-Speed 3D Printer Price History
Price History for ELEGOO Neptune 4 Max FDM 3D Printer 500mm/s High-Speed with/ Klipper Firmware
Statistics
| Current Price | $549.99 | January 9, 2025 |
| Highest Price | $549.99 | December 30, 2024 |
| Lowest Price | $339.99 | December 14, 2024 |
Since August 6, 2024
Last price changes
| $549.99 | December 30, 2024 |
| $438.88 | December 25, 2024 |
| $339.99 | December 14, 2024 |
| $349.99 | November 14, 2024 |
| $483.74 | September 5, 2024 |
ELEGOO Neptune 4 Max High-Speed 3D Printer Description
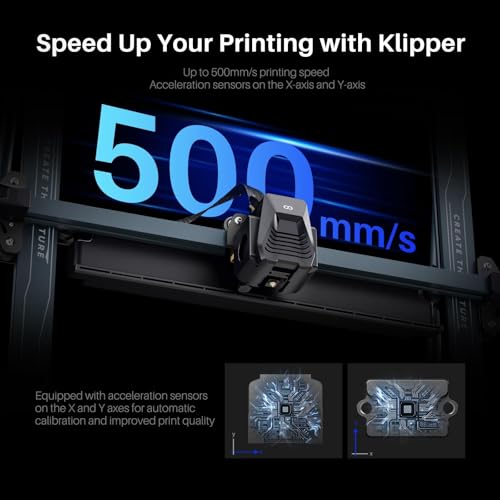
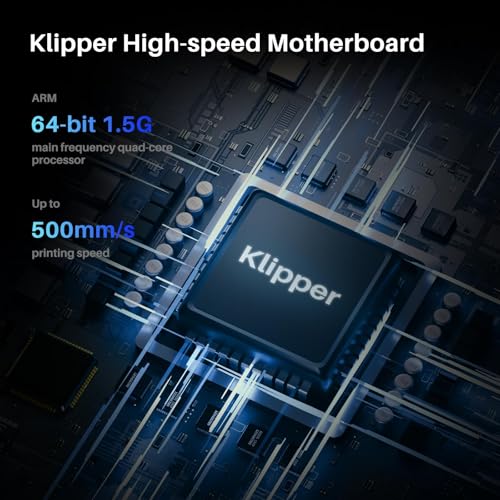
- 【500mm/s Lightning-Fast Speed】Neptune 4 Max comes with the powerful Klipper firmware, enabling impressive printing speeds of up to 500mm/s (default 250mm/s) and up to 8000mm/s accelerations. Rapid filament is recommended for high speed mode
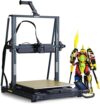
- 【Massive Build Volume】16.53”x16.53”x18.89”/420x420x480mm spacious build volume, Neptune 4 Max help you bring ambitious designs to life, whether for large models or multiple smaller objects
- 【Precise & Excellent Printing】Support input shaping and pressure advancing, and acceleration sensors on the X and Y axes for automatic calibration, reduce impact of vibration on the printing accuracy. You can get precise details, amazing quality and fast printing all at the same time
- 【Direct Drive Extruder】Self-developed dual-gear direct drive extruder has a 5.2:1 reduction ratio, providing powerful extrusion and smoother filament feeding. Paired with metal throat pipe and unique air duct design to reduce nozzle clogging risk
- 【300°C High-temp Nozzle】High-temp nozzle with extended hot end design, 60W ceramic heating element and PID parameters automatic calibration, ensures faster and smoother melting and extrusion, can handle various filament materials as PLA, PETG, ABS, TPU and nylon
- 【Efficient Cooling & Easy to Use】Powerful double-sided cooling fans and model cooling blower fans prevent warping and enhance print quality. Various connect options including WIFI, U disk, and LAN, just start your printing jobs with a one-key file transfer
ELEGOO Neptune 4 Max High-Speed 3D Printer Specification
Specification: ELEGOO Neptune 4 Max High-Speed 3D Printer
|
ELEGOO Neptune 4 Max High-Speed 3D Printer Videos


ELEGOO Neptune 4 Max High-Speed 3D Printer Reviews (8)
8 reviews for ELEGOO Neptune 4 Max High-Speed 3D Printer
Show all
Most Helpful
Highest Rating
Lowest Rating
Only logged in customers who have purchased this product may leave a review.


Antonio Serrano –
Love this machine, straight out of the box I printed an elegoo toolkit and a Stl file from the web. Very happy with it so far.
Dominic Walsh –
I. Am very pleased so far with this printer the only thing on the sd card I had with it the trial print was lovely and smooth but since then can not get same finish
Antonio Serrano –
La impresora se ve bastante bien. Solo tomen en cuenta que el extrusor viene con fallas y no he obtenido respuesta de Elegoo por este tema.
Zdev –
I am replacing and ender 3 with this neptune 4 & I must say, it really is a nice bit of kit for the price. Print speeds are FAST. So far I’ve been able to get decent quality prints even when running the infill @ 250mm/s & the outside wall @ 100mm/s. It seems to handle first layer speeds of 100mm/s as well. Lastely the klipper firmware & interface is a really nice feature to have. I don’t think I can go back.
Now it doesn’t have all the bells, for example internet is ethernet not wifi but really my expectations were exceeded at the price point
Update:
The printer no longer seems to boot correctly saying it can’t connect and when it does boot it no longer seems to read any files from SD card or USB. Not really sure what to think at this point but now it’s Essentially a boat anchor. Will update if the situation changes.
Update: elegoo support quickly solved the issue and sent new firmware update with clear instructions. The printer is working great again.
UPDATE AGAIN…. The machine lost zero and crashed hard, at first i thought maybe this was my mistake but it was quickly followed by the printer firmware failing and refusing to connect thus making this again a boat anchor. at this point i have more than 20hrs of my time trying to make this pile of crap work. Really its a shame as it seems like it would have been a great printer minus these glaring problems.
Duzzitwerk –
I did a LOT of research before buying this printer. It was actually a close call between spending a fortune on the superb Bambu X1C which is a truly amazing piece of kit, or doing the sensible thing and going for this entry-level printer as a starter to see how I get on with 3D printing. Well, I’m truly amazed at how good the Elegoo Neptune 3D Pro is – it may be entry-level pricing, but it’s certainly not entry-level engineering. It’s built beautifully out of solid materials which really feel like they have been made to last. You have to put it together, but Elegoo have supplied a how-to video on the supplied SD card which makes it extremely easy for anyone to build in very little time. I was printing my demo model within an hour of breaking the seal on the delivery box! And then I wished I’d ordered some more filament because you can’t print much more than the demo with the sample supplied, but thankfully Amazon came to the rescue again and I had more filament within 24 hours!
It’s incredible that the printer comes set up to print perfectly straight out of the box. The factory had even levelled the print bed but I decided to run the levelling routine after I’d built it just to be absolutely sure it was spot-on, it only takes a few minutes to do, and then you’re good to go.
When I went to give this purchase a review after owning it for 3 weeks, during which it’s gobbled up a quarter of a reel of PLA+ filament and done about 17 hours of printing, I saw it only has one review… How is that possible? Must have been reset or something. Anyone getting one of these will just want to rant about how good it is! And no, I didn’t get it free or have anything to do with anyone or anything related to the product, I’m just an extremely happy buyer!
I went straight for PLA+ filaments for the extra strength over PLA, and the Elegoo own-brand ones are available on Amazon for an amazing price, just £14 a kilo and the print quality is superb. I wouldn’t mind paying a bit more for Overture or eSun etc but why do that when you can get it for Elegoo price? Well ok some of the colours are out of stock but if you want black or white to get going with then the Elegoo stuff is brilliant.
I used TinkerCAD (Autodesk) for my first few designs, and these came out perfectly using Elegoo’s supplied custom version of Cura slicer. I thought it would take me ages to learn how to use them but no, watch a few tutorials and you’re good to go. I’ve even started using the freebie “personal” version of Fusion360 which is extremely powerful and takes over from TinkerCAD which has quite a few limitations for more complicated models.
The original demo Buddha supplied was printed with the supplied PLA filament sample at the recommended 200C and that was perfect. When I put PLA+ into the printer, I notched up the temp to 205C which is the bottom end of the temp range for PLA+ and again it printed perfectly. Frankly I’m afraid to change the temps or mess with anything because I can’t see anything in my models which could possibly be improved, and if it ain’t broke, why fix it? Heheheh!
I bought a pack of eSun vacuum bags which come with spare valves and a pump, just to make sure that my filament doesn’t absorb too much moisture as I don’t print vast quantities of stuff and the filament that’s not on the machine is going to sit around for a while. PLA isn’t TOO bad on moisture absorption, but a long time could change that and it’s a pig to dry filament so just keep it dry :o)
What else can I add? Well one negative is that it’s quite tricky to change filament mid-print. With the current firmware and the included Elegoo Cura slicer, you’d have to mess with the gcode using scripts and I haven’t quite nailed that yet. It’s quite possible this will be addressed with future software/firmware updates as it’s mainly a procedural process rather than a hardware limitation, although it will still require manual changing of the filament at the appropriate time – if you’ve got the money for a Bambu then of course you can get a multi-filament unit for it which does it all for you, but that facility costs a lot more money!
So for anyone wondering whether or not to dabble in 3D printing, this is THE machine to start you on the road. The price is amazing, and the build and results are better than you could have hoped for at anywhere near that price. And if you get stuck, you can ask their tech support – the only question I needed to ask so far (can I use PLA+ as it’s not listed in the materials) was answered by a very friendly agent within one working day, you can’t ask for better than that!
nitewatchman –
This is my 4th 3d printer in 14 years and I currently have two other Delta type machines running other parts.
The Neptune 4 Max has had some bad PR when first released but that is clearly in the past now! After unboxing, assembly, alignment and calibration the first print was highly detailed, perfect and fast.
This is by far the easiest printer to bring on line that I have experienced out of my printers and a dozen or so other printers that I have helped startup. While the supplied Elegoo branded Cura slicer is old in the tooth and doesn’t have all the latest widgets in is highly optimized for the Max.
And did I say that it is BIG and Fast?
There is also a large after market for mods. I have added Linear Rails and Z Axis Belt Drive to my Max greatly increasing stability for printing large tall parts. Works VERY well without the mods, even better after they are installed.
I am very happy with the Neptune 4 and would recommend it for both entry-level and advanced users. The only small negative that I can mention is Fan Noise. The Max has a large Auxiliary Part Cooling Fan mounted on the Crossrail. While it is somewhat loud, it is also a key to the printers performance. If the noise is objectionable, there is a manual cutoff switch located on top of the fan which can be used to silence it.
And did I say that it is BIG and Fast?
Artman99 –
First thing’s first – the print quality and build size of this printer is excellent. There is no layer shifting, the printer is quiet, the speed is unbelievable, and the huge build plate makes it a breeze to print that cosplay helmet you’ve always wanted, or every part of that Thingverse toy in one shot. BUT… the journey to get to that quality is not for parents looking to get their kids into 3D printing for the first time, or anyone who isn’t comfortable getting hands-on. If you want that, get an Ender or equivalent. This printer does not “just work” out of the box. Not even close. There’s a pre-flight checklist that needs to be done before attempting a first print, then another checklist to do before subsequent prints. There may be a few more things to check, but here are the items I checked prior to my first print (which was flawless only AFTER the checklist). I’m making a review and not a guide, and there are dozens of videos and forums that will step you through the problems/fixes. Nothing below is complicated to fix, but they must be addressed prior to printing:
1. Are the screws on the z-arm tight? Nope. Mine weren’t even finger tight.
2. Is the z-arm level? Nope. My left side was 1mm off. It might seem like nothing, but 1mm is 10 layer lines – a disparity like that is huge. Yes, the auto leveling somewhat compensates, but why force the printer to adjust for something so easily remedied?
3. Are the wheels on left and right of the z-arm properly tensioned? Mine were just OK, but some adjustment was still needed.
4. Is the voltage set to 110v if you’re in the USA? Almost certainly not. You’ll know if yours are incorrect because the bed LEDs will look like a light show at a rave as soon as the bed heater turns on.
5. Is the bed loose? Mine wasn’t, but many are. Simple fix (sort of)
6. Is the bed level? Not from the factory it’s not. Not even close. Set your z-axis adjustment, then go into the manual setting and set the 6 bed level screws… TWICE. Then check the z-axis one more time and you’re good.
7. Is the bed clean? Just wipe the bed down with IPA and you’re fine. The community has opinions on this – just use the IPA. No need to wash the damn thing in the sink every time.
8. There is test filament in the nozzle – be aware and run decent amount of your new filament through the extruder before starting your first print.
9. DO heat the bed up a print temp for a minimum of 20-30 minutes before printing. The large bed needs time to thermally adjust/swell before it’s level across the entire surface.
10. Ditch that dated Cura slicer and upgrade to Orca. The Neptune 4 Plus profile is almost dead-on.
11. I would HIGHLY recommend turning down the jerk/acceleration on this printer. I set mine to half of the recommended settings. Yes, you’ll lose some speed, but at least you won’t have the print head flying around the bed, knocking off supports and delicate parts from your print. This printer can be a bit TOO fast at times, and there is often a direct (negative) correlation between speed and quality. Rookies see a peak 500 mm/sec speed and think this will be their new norm, but it’s not. That kind of speed is limited to VERY specific applications/filaments. On a related note, cheap PLA can be printed at 200 mm/sec, but it’s not ideal. Get PLA designed for higher speeds if you want to do it right.
12. Lastly, if you’re printing anything more exotic than vanilla PLA, consider leaving that giant z-axis fan OFF. Yes, your layers need a few seconds to cool, but that fan will cause odd shrinking and adhesion issues if you’re not careful. Don’t think you need to use it simply because it’s there.
Pre-flight checklist is done! Your first print is amazing! BUT your second print is a mess. What happened?
1. Again – preheat the bed EVERY time you start printing a new batch, 20-30 minutes minimum.
2. I would highly recommend re-leveling the bed prior to each print session. If nothing else, check your initial z-axis clearance, then auto-level the bed, then print. Yes, it’s a hassle. But it’s the price you pay for such a large print surface. That 10 minutes of work will stop your print nozzle from dragging across printed areas, tearing off supports, or providing weak layer adhesion.
Buy this printer. But understand that a few hours will go into the assembly and setup. Then a little time needs to be spent prior to each print. Follow those rules and you’ll be extremely happy with this printer.
David Serrat –
Llego antes de tiempo, caja abierta pero por cuestiones de aduana con sellos de aduana, todo completo y buen estado, esta maquina es muy grande y la impresion es muy buena, recomendable para personas con conocimientos de impresion, es necesario modificar pequeñas partes para mejorar rendimiento.