
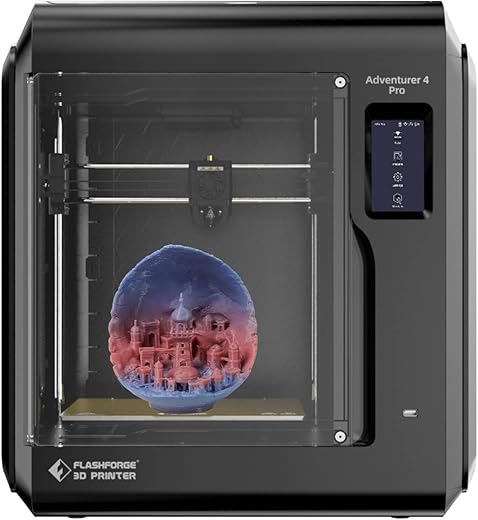
FLASHFORGE Adventurer 4 Pro 3D Printer, High-Speed
FLASHFORGE Adventurer 4 Pro 3D Printer, High-Speed Price comparison

- All prices mentioned above are in United States dollar.
- At amazon.com you can purchase FLASHFORGE 3D Printer Adventurer 4 Pro with Auto Leveling, 300mm/s High Speed Printing, Upgraded Quick Detachable 265°C Hardened Nozzle, Perfect for Printing Carbon Fibre Filament for only
- The lowest price of FLASHFORGE 3D Printer Adventurer 4 Pro with Auto Leveling, 300mm/s High Speed Printing, Upgraded Quick Detachable 265°C Hardened Nozzle, Perfect for Printing Carbon Fibre Filament was obtained on September 24, 2025 04:59.
FLASHFORGE Adventurer 4 Pro 3D Printer, High-Speed Price History
FLASHFORGE Adventurer 4 Pro 3D Printer, High-Speed Description
Discover the FLASHFORGE Adventurer 4 Pro 3D Printer: High-Speed Innovation
The FLASHFORGE Adventurer 4 Pro 3D Printer is an innovative solution for creators, engineers, and hobbyists seeking high-speed printing capabilities. Designed by Zhejiang Flashforge 3D Technology Co., this printer combines advanced technology with user-friendly features. If you’re looking for the perfect balance between performance and ease of use, this 3D printer is a fantastic option to consider.
Key Features and Benefits of the FLASHFORGE Adventurer 4 Pro
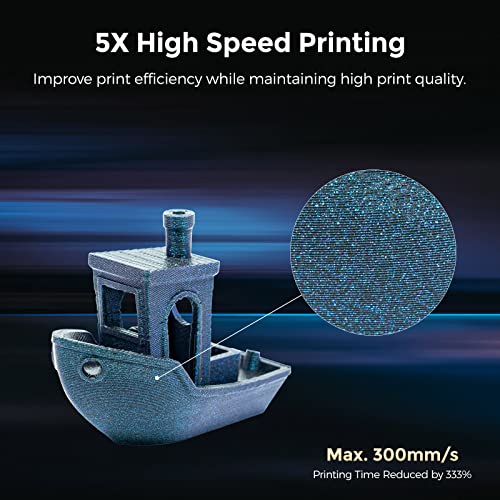
- High-Speed Printing: The Adventurer 4 Pro stands out with its high-speed printing abilities. This feature allows you to create intricate designs without sacrificing quality, making it ideal for both professional and personal projects.
- Compatible with Multiple Operating Systems: This printer supports Windows, Linux, and macOS, enabling versatility for various users. Regardless of your preferred operating system, the Adventurer 4 Pro integrates seamlessly into your workflow.
- Generous Build Volume: Measuring 22 x 22 x 24 inches, the build volume of the Adventurer 4 Pro accommodates larger prints and extensive projects. This cutter’s spacious area allows for multiple smaller projects to be printed simultaneously.
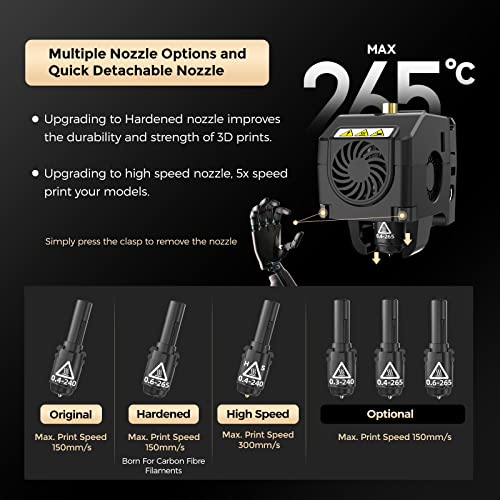
- Carbon Fiber Compatibility: The ability to work with carbon fiber material adds a new dimension to your 3D printing. It enhances durability and strength in your prints, making it perfect for functional prototypes and engineering applications.
- Lightweight Design: Weighing in at 50.9 pounds, the Adventurer 4 Pro is relatively light for its class. This features portability, allowing you to reposition the printer easily as your workspace evolves.
- User-Friendly Interface: A streamlined setup and intuitive controls ensure that both beginners and experienced users can navigate the printer with ease. This means more time creating and less time troubleshooting.
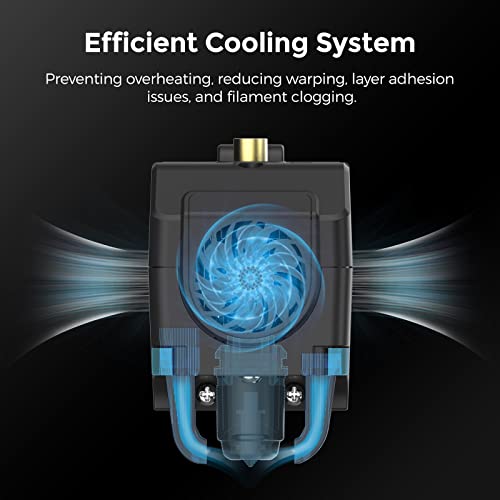
- Advanced Cooling System: The built-in cooling system maintains optimal printing temperatures. This feature is essential for achieving accurate and high-quality prints across various materials.
Price Comparison Across Suppliers
When considering the FLASHFORGE Adventurer 4 Pro 3D Printer price, it’s imperative to compare rates across different suppliers. The prices can vary significantly based on promotions, availability, and shipping fees. Our price comparison tool allows you to view the latest offers from trusted retailers, ensuring you make an informed decision. By monitoring prices, you can identify great deals and get the best value for your investment.
6-Month Price History Trends
Reviewing the price history chart for the Adventurer 4 Pro reveals interesting patterns. In the last six months, the price has seen fluctuations, often influenced by market demand and seasonal promotions. Staying updated on these trends can help you buy at the right time and save money.
Customer Reviews: What Users Are Saying
Customer feedback on the FLASHFORGE Adventurer 4 Pro highlights both its strengths and areas for improvement. Many users praise its high-speed capabilities and the quality of prints, stating that it outperforms competitors in speed and detail. The compatibility with carbon fiber is particularly applauded by professionals requiring durable prototypes.
However, some users have noted a learning curve for beginners. They suggest that those new to 3D printing might benefit from additional resources. Overall, the consensus is that once users overcome initial hurdles, the performance makes it worthwhile.
Explore Unboxing and Review Videos
If you’re considering the FLASHFORGE Adventurer 4 Pro, check out unboxing and review videos available online. These visual guides provide a comprehensive view of how the printer operates and its features in action. Many reviewers share tips and tricks to help you maximize your 3D printing experience.
Why Choose the FLASHFORGE Adventurer 4 Pro?
Investing in the FLASHFORGE Adventurer 4 Pro means choosing a reliable, high-speed 3D printer that fits various needs. Its combination of innovative technology and user-friendly design equips you to tackle any project, from elaborate models to functional prototypes. Plus, keeping an eye on the price comparisons and customer reviews helps ensure you’re making an informed choice.
With its exceptional build volume and compatibility with advanced materials, the Adventurer 4 Pro stands out as a leading option in the market. It’s designed to take your printing projects to the next level.
Compare prices now!
FLASHFORGE Adventurer 4 Pro 3D Printer, High-Speed Specification
Specification: FLASHFORGE Adventurer 4 Pro 3D Printer, High-Speed
|
FLASHFORGE Adventurer 4 Pro 3D Printer, High-Speed Reviews (12)
12 reviews for FLASHFORGE Adventurer 4 Pro 3D Printer, High-Speed
Only logged in customers who have purchased this product may leave a review.
Dylan collins –
The printer is overall pretty good if properly calibrated and well-maintained.
Pros:
– quiet
– does fine detail nicely
– easy to set up and understand
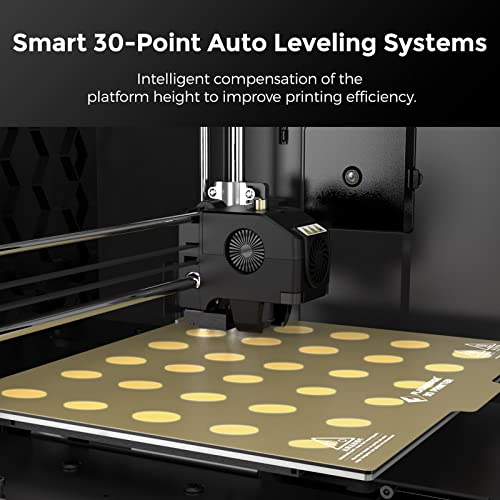
– no bed leveling required (pro version)
– heated glass bed
– nicely contained so my cats can’t get at it
– well-lit and attractive
– easy yet reliable software
Cons:
– nozzle gets partially clogged easily
– makes popping noises when not perfectly clean (usually just at the beginning of a print)
– weak filament extractor servos
– has trouble printing PFEG (can, but not really worth trying)
– limited size spool chamber made for smaller Flashforge spools only
Overall, it’s a good machine for beginners so don’t be discouraged by the reviews from people not following the proper setup – most people that get into the hobby don’t have a clue about what they’re doing anyway.
You can fix the spool issue by printing your own extender. I designed my own but there are some useful designs already out there.
Keep the nozzle clean inside. It’s hard to do but they do sell pins that are helpful for cleaning. It’s easier if you heat those up with a lighter first.
As for the servos – maybe someday I’ll get the ambition to try replacing those, it’s a chore though and we’ll see.
This printer is great for PLA and doesn’t take up much space. I’ve grown quite fond of it over time and am frequently printing out designs I made in Solidworks (saved as STL files). I’d recommend it for any beginner with these notes.
Happy printing!
Shaun Lay –
I honestly thought 3D printing was still at a stage where even a nice enclosed model like this would be really fiddly and tricky to use. I have been amazed at how easy it has been. There is obviously still a learning curve and some trial and error with regard to settings etc., but I was printing the demo model in minutes and my own designs not long after.
To be clear as well, I’m using Tinkercad (free app and website) on a 7th gen iPad and the Flashcloud website to upload the jobs to the printer.
I bought the Adventurer 3 Pro, so it needs a sharp tool to lift the models from the 3D print bed once done (35°C seems to be the optimal cooling point to do this). I’m just using an old, broad kitchen knife.
I’m generally a cauldron of frustration and rage when technology is inconsistent or poorly thought out and there has honestly been zero swearing!
I would, however, note that the Flashcloud website can be a bit fickle at times. That does appear to have improved since switching the printer to my guest wifi as opposed to my main. No idea why 🤷🏻♂️
kev –
Arrivata, sballata, accesa e stampato subito. Risultati eccellenti, le stampe risultano con una finitura superficiale ottima, (qualcuno mi ha anche chiesto se le stampe erano state fatte da stampante a resina!). I comandi sono intuitivi, si collega immediatamente alla rete wifi. La forma con il case chiuso aiuta molto a tenere la temperatura costante nella zona di stampa. Lo slicer proprietario è molto completo e valido e ha nuemrosi parametri personalizzabili anche se per la maggior parte delle stampe si può usare con tutti i valori di default. Per un problema, che poi non si è rilevato tale, ho avuto modo di contattare l’assitenza che prontamente mi ha guidato passo passo via chat. Inoltre la stampante oltre a essere silenziosa è esteticamente molto bella, compatta e facilmente trasportabile. Consiglio senza dubbio l’acquisto.
JAS1 –
Great printer for beginners, easy to use with a few YouTube tutorials, would definitely recommend for people starting out.
I found the adhesion a slight issue with the printer, but using a glue stick on most prints seems to solve that entirely (the adhesion issues are probably user error rather than the machine in the first place)
Great print quality for what I need, I have personally printed as long as 0.08mm but generally use 0.13 for fairly detailed items.
My personal downsides are the build volume, but it’s plenty big enough for most things just be aware it’s not the biggest at 150*150, and the fact it doesn’t fit a 1kg spool on by standard, so if you do buy this, make your first big print a spool holder
All in all a great machine, enclosure works fine and even after a year of use I only had to replace two consumables (the nozzle and Bowden tube but both for user error) and both where really easy to replace
Genuine Reviews –
I rarely leave reviews but I’ve been so impressed w/ this printer. I’d never 3d printed before this purchase. Hardest part was loading the PLA filament the first time cuz I had no clue what I was doing but figured it out. I used Tinkercad to design which took some time to understand how it works, but after about a week I feel confident I can make anything. The printer has more than met my needs (creating custom parts for my modded car). The finished product is typically great, with only an occasional noticeable flaw but could be w/ the design too. It sits in my office and is not loud at all. Job well done at a reasonable price point!
Genuine Reviews –
No set up issues, easy to use, makes good prints.
Roger Yates –
This printer is genuinely the biggest piece of garbage I’ve ever received from a company, when my first one was delivered it was completely unusable out of the box I tried looking around at it so see if there was something I missed I watched multiple videos of different things that could happen, mind you this is my 5th 3d printer so it’s not like I didn’t have some type of idea how to use it. Completely 100% unusable out of package actual piece of useless trash , I decided that maybe it was just a fluke and ordered a replacement when it got here I opened it and set it up exactly how it says so on the website it did a single print and then completely broke down unusable just like the first one. With this one I didn’t even try I just turned it off and came here to write a review. I hate writing poor reviews I like giving every company a chance but zero support , zero feedback and zero use of this 800 dollar printer. Amazon is amazing like always and did the absolute most they could but flash forge is awful do some research buy anything else before you make the mistake I did.
Jestcy –
Love it this is number four printer for me. I love this one. The best highly recommended for the money is an awesome printer.
Jestcy –
The media could not be loaded.
UPDATE-
This is long but if your a novice and are clueless and/or having any printing problems you’ll be glad you took the time to read this.
This printers awesome. After having/using it for some time now I’ve come to realize the majority of the complaints I’ve read are user error. Unfortunately since it doesn’t come with any instructions your sort of doing this blindly in the beginning and it’s like a you don’t know what you don’t know type of situation… Your not sure where to begin because your not sure what your option are. (If anyone owns a Cricut cutting machine it’s the same concept.)
I searched for many YouTube tutorials on how to start using this however the majority of them were all speaking in terminologies I was clueless to or at least for people who have printed at least once before. I needed someone to show me where/how to start properly. Thankfully I came across some guys YouTube channel where he posted such a helpful video called “Flash Forge mini guide” and that was exactly what I needed to understand where/how to start!!!!.
Basically there’s different types of filaments (most if not all this machine will take.) Each filament requires different temperatures /settings which need manually imputed into FlashForge software which isn’t hard at all.) Here’s a few things I’ve found out that are going to help you A LOT.
1) If your filaments not sticking it’s because either your plates not cleaned off enough. (Use rubbing alcohol to clean it off after 5 prints. OR the type of filament is set wrong in your software and if that’s the case then chances are your printing temp and bed time temps are wrong too which need properly set. (Search the printing and bed time temps for the filament your using and pick something in between for both :printing and bed temps.)
Also PRE HEAT your bed (do this FROM the printer- under the “preheat” option. You want your bed to be warm before your print or adhesion won’t be good to stick. Doing one or all of the above should fix the sticking issue and any printing problems your having because once I did all of this it completely changed my understanding and my print quality.
2.) The “popping” sound I read a lot of complaints about isn’t because your machines broke or malfunctioning. It’s because your filament hasn’t heated up to the correct temperature it needs to be. **Again pre heat your bed and printing temperatures and this fixes not only the bed adhesion but also the popping sound you might hear.
3.) You don’t need to know how to build something from the ground up. There are many free sites that offer amazing quality 3D prints to download free. Just google the topic you want and search free 3D STL prints. Then you’ll see the option to download.
Ok now for the printing part….
(Once you have the FlashForge software on your computer and you download a free print,
after you open your print your downloaded print will automatically open up in your FlashForge software.
****Before you start to slice it (build it,) make sure to heat up your bed and print temps **from your 3D printer screen** under the “preheat” option or again your filament and bed won’t be hot enough for the filament to stick and stay down on potentially creating a mess.
(From this point choose “start slicing” on your computer and then enter in your filament and temps (bed and printing temperatures,) …
(For the correct temperatures on the different filaments, search the filament temps that you have:PLA, PET-G, etc, and just play around and see which one works best. (This parts a trial and error but doesn’t take long to find out what works best for you,) For example on PLA recommended times are 190-220 for printing temps and anywhere from 25-60 for the bed temps. I’ve found that 200 for the print temp and 45 for bed temps worked pretty good for me as anything less or more caused more stringy pieces of very fine filament to be on my prints. (My guess is either the filament wasn’t as either hot or cold as it should have been thus causing the strings of filament on my prints. Again these temps are just something you have to test and play around with. Just stay within the recommended range and you’ll find a sweet spot that works great or better than ones you had previously made.
I write down my temps and keep them off to the side so I remember what temps I previously used as to not use them again when testing for a better print quality.
Next choose “start slicing.”
A box will pop up in middle of screen and in the upper top I choose the 3rd option on right (hover over it and it’ll say “send to printer.”)
At that point a box comes up for the Geo code with the file name. Whatever file name is in here is what will appear on your printer screen. You can either leave the file name as is or change it to what you’d like the file named as.
Click ok.
Next choose the refresh looking option to find your 3D printer and choose “connect.”
Your print will automatically start printing on your printer. 😁
These are the main things I’ve found thus far that have helped tremendously.
Hope they can do the same for you.
Good luck!
…………………………………………………………….
I’m completely new to 3D printing and while I didn’t purchase on here I do have this machine.
I came across this 3D printer and what appealed most was it being a “beginner friendly” 3D printer. I wanted something that was straight forward and easy to use as I run a small business on the side. I don’t have any extra time to learn anything else new right now.
The set up on machine itself was pretty straight forward and simple to do as far as loading the filament in, plugging the cord in, (basically is all that was needed done.) The part that left me hanging was ok now HOW exactly do I get the images I wanted to print, to print from this machine? Also WHAT images would I want to print from this machine? The first step is finding your images. (Google search for 3D images and there’s a couple different sites that pop up. Some are free to use and some aren’t. Now the hard part (for me anyways,) was figuring out how to get this connected to my wifi because even though I set it up on the same network that my Mac is working off of ,( and yes this DOES work on a Mac btw,) when I went to my Mac my printer list this 3D printer wouldn’t show up on my printer list no matter what I did. I search tons of videos and nobody had any on how to set up the Adventurer 3 pro on a mac! Different machines yes, but not this one. So off to the instruction manual I went. (Which was a total waste of time- so don’t do that.). The instructions tell you to go to Cura for some odd reason (which is a 3rd party slicing program that I had no luck in whatsoever.) I don’t even want to take the time trying to explain that part of it because as far as I’m concerned that part had nothing to do with this machine! After researching on my own I found the software called “Flash print,” which is through Flashforge. (Why the instructions tell you to go to Cura to set this up to your computer is truly beyond me as I didn’t see or notice anything having to do with one another. Anyways, go to the Flashforge website and click downloads and then find the “Flash print” software … now the issue I had doing this was when I’d click on the Flash print software download doing so would bring me to the page asking which printer I had -which then ultimately took me back to the instructions of telling me to download through Cura again? 🤯.. total run around.. I then googled if Flash print worked with the Adventurer 3pro and it does, so If I can remember correctly I (believe,) I chose another machine in order to download Flash print as this was the only way I could get the Flash print to start the download for some reason. (If this sounds confusing trust me,.. it was!
Once I downloaded the flash print I was only THEN able to connect the 3D printer to my computer. However, actually finding it on my computer was yet another tricky part I had to go through. Thankfully someone under the questions section on here was nice enough to explain once you download Flashprint in order for your Mac to open/run it you need to search under “finder” (on a Mac,) and then right click it to open it up, once you do that the actual icon shows up on ur desk top which will allow you to click and start the software. (Your Mac will say something about the author not being able to be validated -which you will need to bypass in order for it to continue.) Once your in the software (I can’t remember the exact buttons but just click around and you’ll find a spot where you can add your printers Ip address. Once you do that your printers set up and then you can print from there.🤪
(I apologize if my instructions are confusing but that’s how they were to me. A complete run around trying to get this software installed on my Mac. I read some posts where people were saying it doesn’t work on a Mac and I can see why they’d say that because it seemed almost impossible at first because every way Id try per FlashForge it was giving me trouble.
(I had to find a way around it and from the best of my recollection this was how I did just that.)
It’s an awesome 3D printer but this company really needs to do a better job on the instructions because they’re not helpful at all and give you the run around. They don’t explain things hardly at all and when they do it’s not in laymen’s terms.
Just give a clear manual on how to get this printer hooked up to someone’s WiFi and also steps on setting up Flash Print, on ALL computers, Mac’s especially. Please!
If anyone has a Mac , don’t give up, just keep trying different things and you’ll get it right. It’s kind of like trial and error for a while before you do though.
Getting my file was pretty simple to do (thankfully!!) This part was what I’d be hoping for. Simple and easy. If the beginning had been this easy this would have gotten 5 stars but because of the headache it’s not. Oh AND I emailed support asking for help and as of late got no response back which I wasn’t to happy about but thankfully was able to do it on my own!! 😏
clyde booth –
The FLASHFORGE Adventurer 3 Pro 3D Printer is my very first 3D printer. Without any prior knowledge of 3D printing, I was able to print my test box in under two hours. The Z-axis calibration can be easily done by just watching the Youtube video. Within the five days, I was able to print a rabbit, spool holder extender for 1Kg spools, and a set of dice.
It comes with cloud print with that can be used to print remotely thru the cloud or a computer.
FlashCloud, FlashPrint, PolarCloud are all free, but with MyMiniFactory, there is a monthly membership.
There is a camera inside the printer, viewing with Flash Cloud is very slow but with Flash Print 5.0 images can be viewed in real time. The only down size is, it does not record.
The difference between the Adventurer 3 and the Adventure 3 Pro is the glass bed and extra higher temperature tip on the PRO.
Although, the print quality is only VGA(640×480), the printing it is very quiet and the PLA filament does not produce any odor, as a beginner to 3D printing, am truly amazed that is so easy to print.
I recommend this printer as it does print everything I needed so far.
kev –
Easy to use
Can create great small projects
Logan –
I have an open 3D printer and I am satisfied with this enclosed FlashForge 3D Printer. The size is perfect for the type of projects that I’d like to complete! The software is really easy to use and navigate! I love the digital interface! If you have questions the Support really does help out quickly. I had questions and they were really nice and understanding! This 3d printer is really a good value for the price. The performance of this 3d Printer was exceptionally fast! I’d definitely recommend it!