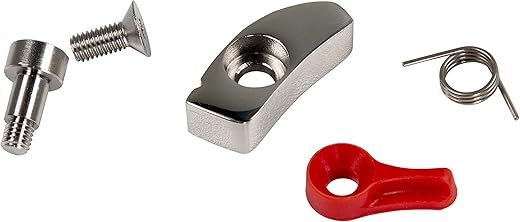
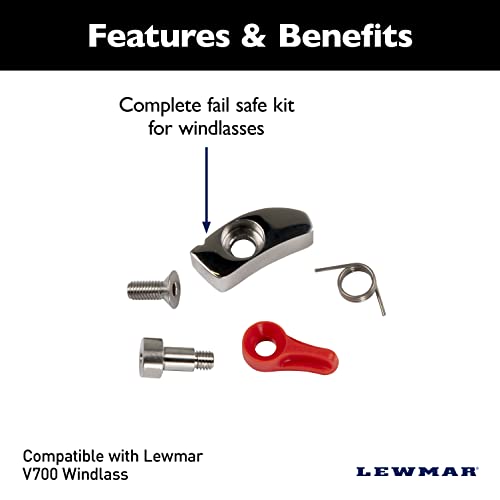
Lewmar V700 Windlass Replacement Fall Safe Kit
Set Lowest Price Alert
×
Notify me, when price drops
Set Alert for Product: 66000607 Fall Safe Kit for V700 Windlass - $18.74
Last Amazon price update was: January 6, 2025 23:41
×
Product prices and availability are accurate as of the date/time indicated and are subject to change. Any price and availability information displayed on Amazon.com (Amazon.in, Amazon.co.uk, Amazon.de, etc) at the time of purchase will apply to the purchase of this product.

Lewmar V700 Windlass Replacement Fall Safe Kit
Original price was: $27.95.$18.74Current price is: $18.74.
Lewmar V700 Windlass Replacement Fall Safe Kit Price comparison
Lewmar V700 Windlass Replacement Fall Safe Kit Price History
Price History for 66000607 Fall Safe Kit for V700 Windlass
Statistics
| Current Price | $18.74 | January 10, 2025 |
| Highest Price | $19.24 | November 1, 2024 |
| Lowest Price | $17.34 | October 27, 2024 |
Since October 27, 2024
Last price changes
| $18.74 | December 16, 2024 |
| $19.24 | November 1, 2024 |
| $17.34 | October 27, 2024 |
Lewmar V700 Windlass Replacement Fall Safe Kit Description
- Compatible with Lewmar V700 Windlass
Lewmar V700 Windlass Replacement Fall Safe Kit Specification
Specification: Lewmar V700 Windlass Replacement Fall Safe Kit
|
Lewmar V700 Windlass Replacement Fall Safe Kit Reviews (5)
5 reviews for Lewmar V700 Windlass Replacement Fall Safe Kit
Show all
Most Helpful
Highest Rating
Lowest Rating
Only logged in customers who have purchased this product may leave a review.


Todd –
Needed these repair parts to fix my Lewmar V700 windlass on my Grady White 307 Freedom. The parts were a direct factory replacement. The instructions provided were clear and covered the important details however there were a few Things I had to overcome on my own.
First, instructions say to use 3mm hex key, but it is actually 2.5mm. On my boat, Grady White placed windlass too close to the hull so I had to cut down the 2.5mm hex key so it was very short so I could back the screw out of the red plastic switch lever.
You need a 4mm hex key, a 1/2” drive ratchet or Lewmar windlass winch handle, a flat head screwdriver, a beach towel and a 2.5mm hex key, a small bucket, 2 liter Diet Coke, some silicone grease, and a scotchbrite pad, loctite 222 and 638.
Use the beach towel to fill anchor pass through in hull to keep small parts from falling overboard. Remove the fall safe pawl using the 2.5mm hex key. Be aware there is a spring under the pawl, you will want to avoid losing it although a replacement is in the kit. Drop the anchor to ground, leaving some slack in the rode. Disconnect power to the windlass before starting the remainder of disassembly to avoid risk of injury. Remove the gypsy cover using the 1/2” ratchet handle. It will fit in the star shaped hole on top of the windlass. Next remove the cover for the anchor rode pass through using the 4mm hex key, pull up some rode and unwind the rode from the gypsy spool. Remove the washer from the top of the gypsy spool, you may need the screwdriver to help get it lifted. Remove the gypsy spool from the windlass by pulling it upward off the shaft. If it is corroded on, use some Diet Coke to help remove corrosion then try again.
Remove screw holding red plastic failsafe pawl switch lever using 2.5mm hex key.
After all parts are removed soak in small pail of Diet Coke to remove any corrosion. A scotch brite pad can be helpful. Diet Coke is not sticky, don’t use regular Coke. Remove old grease from shaft and clean.
Inspect parts for wear and replace any worn parts.
Install new spring for fail safe pawl to windlass, there is an indentation where it goes. Apply loctite 638 to screw for fail safe pawl. Place new pawl on spring so that it engages the spring end. The flat side of the pawl should face the shaft when folded. Install the screw while holding pawl so it engages spring and tighten screw.
Grease shaft with silicone grease. Reinstall gypsy spool while holding pawl out of the way. If unsure of orientation of gypsy, the washer goes on the top,there is an indentation for it to fit in to. There is not on the bottom. Place washer back on gypsy spool.
Rewind anchor rode around gypsy. It goes counter clockwise around the spool when looking down on shaft center.
Reinstall gypsy spool cover by hand. Do not bother tIghtening yet.
Reinstall anchor rode pass through cover with 4mm hex key.
Place loctite 222 on screw for red plastic failsafe pawl switch lever. Insert through new lever. With lever not engaging pawl (perpendicular to shaft), tighten screw until tight but not so tight that lever will not move. Lever should have a litTle tension to it when moving. Once tight, hold pawl away from gypsy and flip lever in to vertical position to engage pawl in open position.
Turn on power to windlass, bring up anchor until tight.
Turn off power to windlass. Then using ratchet, tighten gypsy spool cover until tight. Do not overtighten.
Allow loctite to dry per instructions.
Hope this helps!
Daniel Weindorfer –
For my Restoration
mike –
Oem product
Tom –
No issues, it did its job
Tomas –
Great