Thermaltake S200 ARGB ATX Mid Tower Chassis
Set Lowest Price Alert
×
Notify me, when price drops
Set Alert for Product: Thermaltake S200 TG ARGB ATX Tempered Glass Mid Tower Gaming Computer Chassis with 120mm ARGB Lite Front Fan Pre-Installed CA-1X2-00M1WN-00 - $58.22
Last Amazon price update was: January 7, 2025 15:43
×
Product prices and availability are accurate as of the date/time indicated and are subject to change. Any price and availability information displayed on Amazon.com (Amazon.in, Amazon.co.uk, Amazon.de, etc) at the time of purchase will apply to the purchase of this product.
Thermaltake S200 ARGB ATX Mid Tower Chassis
$58.22
Thermaltake S200 ARGB ATX Mid Tower Chassis Price comparison
Thermaltake S200 ARGB ATX Mid Tower Chassis Price History
Price History for Thermaltake S200 TG ARGB ATX Tempered Glass Mid Tower Gaming Computer Chassis with 120mm ARGB...
Statistics
| Current Price | $58.22 | January 7, 2025 |
| Highest Price | $99.99 | October 4, 2024 |
| Lowest Price | $58.22 | November 14, 2024 |
Since August 26, 2024
Last price changes
| $58.22 | November 14, 2024 |
| $97.88 | October 27, 2024 |
| $97.46 | October 14, 2024 |
| $97.43 | October 8, 2024 |
| $99.99 | October 4, 2024 |
Thermaltake S200 ARGB ATX Mid Tower Chassis Description
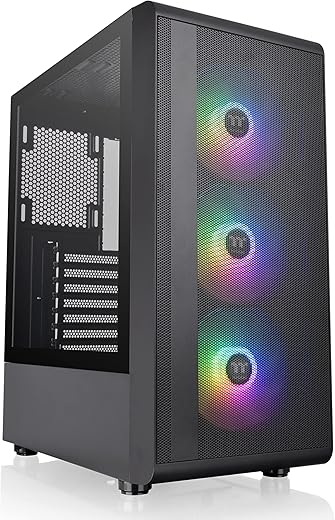
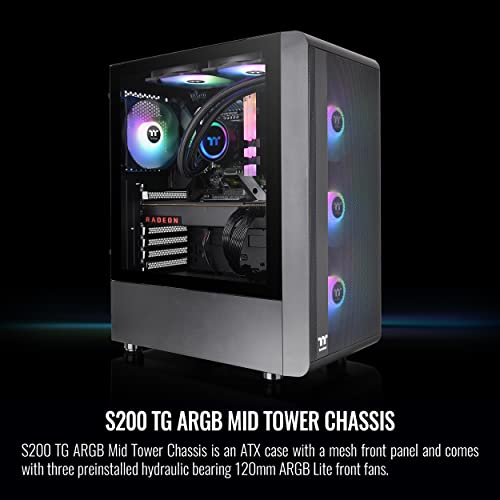
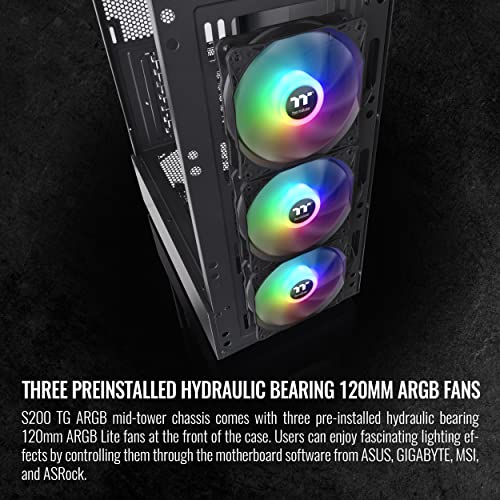
- Three Preinstalled Hydraulic Bearing 120mm ARGB Lite Front Fans
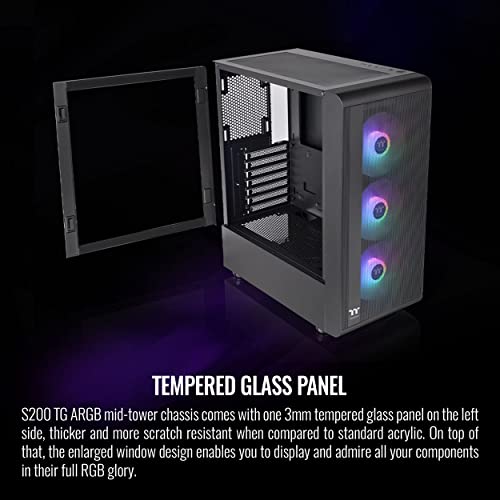
- Tempered Glass Panel
- Sync with Motherboard RGB Software
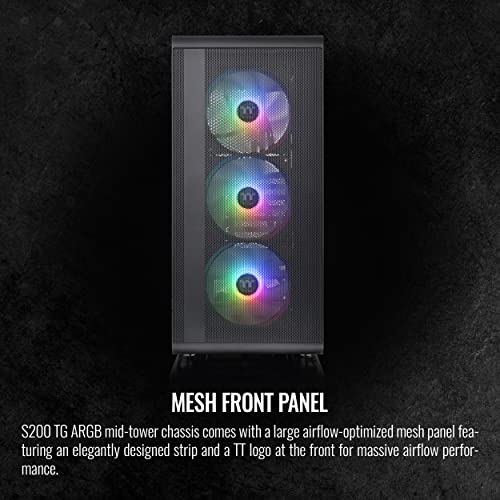
- Mesh Front Panel
- Built-in PSU Cover
Thermaltake S200 ARGB ATX Mid Tower Chassis Specification
Specification: Thermaltake S200 ARGB ATX Mid Tower Chassis
|
Thermaltake S200 ARGB ATX Mid Tower Chassis Reviews (8)
8 reviews for Thermaltake S200 ARGB ATX Mid Tower Chassis
Show all
Most Helpful
Highest Rating
Lowest Rating
Only logged in customers who have purchased this product may leave a review.



Robert Partridge –
Needed to add some extra storage to my wife’s PC and her OEM case wasn’t setup to handle it. What’s more, the OEM case had a single exhaust fan and no option for adding an intake fan or anything. (I’m looking at you ASUS). So I went looking for a replacement – wanted something that looked nice, would be easy to build in, and not too expensive. The Thermaltake Versa H17 definitely fit the bill. This is my first Thermaltake case. After my experience with the H17, I expect it won’t be my last. (I’m giving serious consideration to moving my home server to a V21 cube chassis.)
I’ll go into detail about my experience with building in the case.
First I’ll mention, if you’re re-using old parts or if you’re on a tight budget and you’ve got / are getting a wired power supply instead of modular, the case is ideal. The H17 doesn’t use traditional drive cages of any kind to mount drives – no doubt a cost saving measure – and instead uses a system rubber washers + screws where you can mount a 3.5″ hard drive to the floor of the case under the PSU cover and second 3.5″ hard drive under the top of the PSU cover. With this mounting system instead of drive cages, this leaves TONS of space to neatly tuck away your unused power supply cables.
You mount 2.5″ drives in the same basic fashion as the 3.5″ drives, except the drives can mount on either side of the case’s motherboard tray. I chose to mount drives to the back side of the tray to make cable management easier.
The motherboard tray has a very large cutout to make access to the CPU backplate a breeze, should you ever need to. The side panels go on and off without any issues at all – unlike many other cases I’ve used over the years. Behind the motherboard tray there is PLENTY of room for cable management – especially when you include the space under the power supply cover. There are plenty of zip-tie points to help keep your wires tidy as well. If this case is missing anything it would be rubber grommets and velcro straps, however, including these would only end up increasing the price of the case.
Let’s talk for a minute about fans and cooling.
With having a mostly solid front panel, there is going to be some restriction on the amount of air coming into the chassis. However, because the ventilation holes are on the front of the panel (instead of on the sides of the front panel like some other cases) the incoming air doesn’t need to make a directional bend and lose pressure. The front of the case is listed as supporting up to 3 x 120mm or 2 x 140mm front fans along with 1 x 120mm or 140mm top fan (featuring a magnetic dust filter) and 1 x 120mm rear exhaust fan – a 3 pin basic black Thermaltake fan is included here. Only including the one fan is another cost saving measure on Thermaltake’s part.
When I purchased the case, I ordered 2 x 120mm Cougar Vortex PWM fans to use with it in addition to a 120mm Cryorig fan that I already own. While I don’t think most people will need to add three fans to this case, I do highly recommend you get at least 1 decent fan to include as a front intake. My original plan was to include all 3 fans in the front of the case and leave the top fan location vacant. I changed my mind on this during the build for 2 reasons.
1 – The wires for the buttons, LEDs, and ports on the top of the case are attached to the front panel. When you install the fans too high up in the case, it becomes difficult to route these wires into the case.
2 – After I noted the position of the top fan location is in a more “forward” position relative to the CPU, I decided to put the 120mm Cryorig fan there as an intake fan. If the position were more toward the back, I’d have instead configured it as an exhaust fan. If I’d have made this fan an exhaust where it’s located, I’d literally be stealing cool air that’s coming into the chassis and exhausting it away from the CPU before it has a chance to make use of it. This is not withstanding that positive air pressure is best for managing dust. If this computer had a tower style CPU cooler (such as a Cryorig H7 or CoolerMaster 212 EVO) instead of a stock downdraft style cooler, I would not have added the top fan at all as this would just cause turbulence.
If I were going to ding the score of this case for any reasons at all, it would be these points about the fan mountings. However, I don’t feel it’s appropriate to deduct from the score of this case at all. Here’s why.
As this case is a budget case, I don’t expect many people who purchase it to plan on using 360mm AIO coolers – which could be difficult due to the wire issue that I mentioned – and in all honesty, I think the cooling configuration I’ve got in place right now is likely more optimal than my original plan for 3 fans in the front of the case. Running the 3 fans in the front would only have blown extra air under the power supply cover. Having the top fan more forward winds up being a plus because running an intake fan here alleviates any problems this case would have with pulling in sufficient air to keep things inside cool.
All-in-all, if you’re looking for an attractive case (especially if you don’t want a windowed side panel) that is high on build quality but low on price, I would highly recommend you consider the Thermaltake Versa H17.
Cliente de Amazon –
Love the colour (white) and the room for installation was second to none. Cable management was ideal. This was a steal on sale and for the price, I should have bought two. Excellent construction. ThermalTake knocked this out of the park. I would most definitely recommend this case.
Christopher P. –
El gabinete se siente de buena calidad, viene con todo lo que indica, es ideal para una micro atx junto con una gráfica no muy grande
Christopher P. –
This case is one of the best budget Micro ATX case, its not flimsy at all, very strong metal. Real easy to work with. I was gonna get the Cooler Master Master Box but it was out of stock, Its about $10 cheaper than this one but i prefer this one more
Justin –
Me llego en buenas condiciones y el producto correspondiente, también a buen tiempo.
Alexis Salazar –
Me encanto por el precio, es muy bonito, incluye 3 ventiladores frontales, es de cristal templado, en conjunto se siente muy liviano, todavía no lo voy a usar,… cuando lo ponga a trabajar incluire fotos
He montado todos los componentes, la parte trasera puede quedar muy justa si pones más ventiladores, necesitarás un hub para organizarlos, pero por lo demás estoy muy contento con el resultado y la estética
Luis Loyo –
Like the headline says this is a nice looking case! Was looking for a case with a mesh front that was reasonably priced. This one came with 3 RGB fans which was a huge bonus. The case seems well built and has 2 3.0 usb slots. I’m by no means an expert computer builder (this is my 3rd time building a pc) but it was easy for me to build in.
Pros
– 3 RGB fans
– easy to build in
– mesh front
– seems well built
– lightweight
Cons
– no rear fan
– needed RGB switch to connect all fans
– RGB fans were all daisy chained (might be intimidating to someone new – took me a minute to figure it out)
– only 2 usb ports
Overall I’m happy with the case. Would recommend if $100 or less.
Robert Partridge –
So this review is for the Thermaltake S200 TG ARGB.
I noticed there weren’t alot of reviews for this specific case so I wanted to add one.
It was very light yet I found it to be very sturdy. The layout of the case is excellent where you can hide all of your major wires behind the motherboard panel and make everything look very clean. It has a very cool SSD mounting system on the back of the motherboard panel as well that keeps everything tidy. It has alot of places to mount fans in the back and on top and has a beautiful mesh front and mesh top with a magnetic removable screen that allows GREAT airflow.
This ARGB version came with 3 thermaltake RGB case fans that work great and look great as you can see from the pics and they also have a linking system that combines all of the case fan plugs into one so you only need to use up one case fan plug on your motherboard. The other cool thing about the fans is it comes with the plug to attach to your motherboard so you can adjust the fan colors depending on which motherboard software you use. At first the lights didn’t turn on and I was confused until I figured out it has a separate plug for getting the lights to work so make sure you read the instructions on the case manual and motherboard manual to figure out where to plug it in. ALSO pro tip…to get all the lights to work there are 3 separate plugs that you attach to one another like a chain with one open at the end to plug into your MB.
ONLY problem I had was where you mount the traditional spinning hard drive sits underneath in front of the power supply. I have a XFX PRO1000w full modular PSU and it was to long to allow the use of the hard drive mounting bracket. So I had to leave my 3tb spinning HD storage out, not really a big deal and Im sure you could find some other creative way of mounting a drive that size if you wanted to. I just didn’t want to go to the trouble. NOW most PSUs aren’t as long as mine so most won’t have this issue at all so it really isn’t the cases fault.
Thats basically it….I looked for days for a case that met my needs went through all the youtube reviews on Corsair, NZXT, LIAN LI, etc, high airflow cases and I found this one with the addition of the 3 ARGB fans was perfect and the right price.