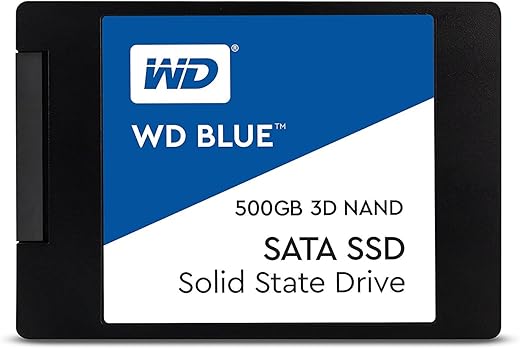
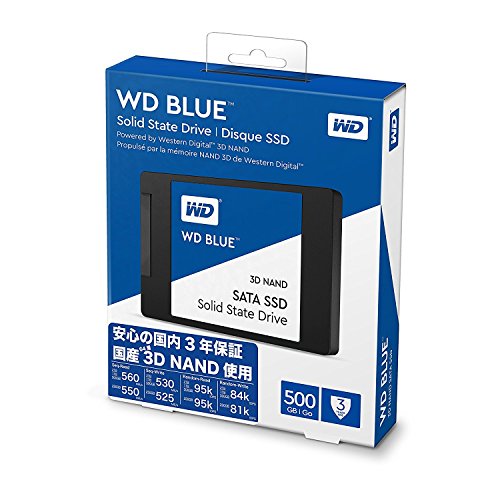
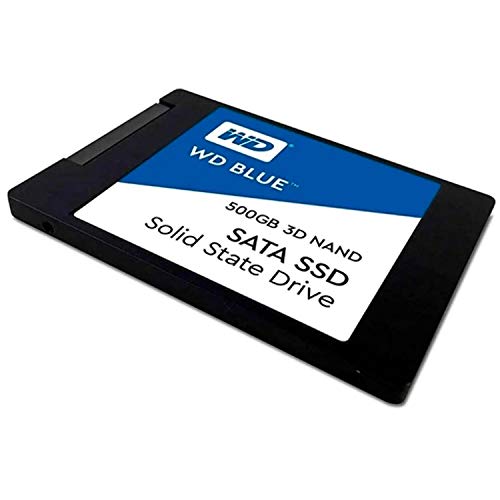
Western Digital 500GB 3D NAND Internal PC SSD WDS500G2B0A
Set Lowest Price Alert
×
Notify me, when price drops
Set Alert for Product: Western Digital 500GB WD Blue 3D NAND Internal PC SSD - SATA III 6 Gb/s, 2.5"/7mm, Up to 560 MB/s - WDS500G2B0A, Solid State Drive - $66.00
Last Amazon price update was: January 7, 2025 17:09
×
Product prices and availability are accurate as of the date/time indicated and are subject to change. Any price and availability information displayed on Amazon.com (Amazon.in, Amazon.co.uk, Amazon.de, etc) at the time of purchase will apply to the purchase of this product.

Western Digital 500GB 3D NAND Internal PC SSD WDS500G2B0A
Original price was: $99.99.$66.00Current price is: $66.00.
Western Digital 500GB 3D NAND Internal PC SSD WDS500G2B0A Price comparison
Western Digital 500GB 3D NAND Internal PC SSD WDS500G2B0A Price History
Price History for Western Digital 500GB WD Blue 3D NAND Internal PC SSD - SATA III 6 Gb/s, 2.5"/7mm, Up to 560 MB/s...
Statistics
| Current Price | $66.00 | January 7, 2025 |
| Highest Price | $75.98 | October 17, 2024 |
| Lowest Price | $66.00 | October 27, 2024 |
Since October 17, 2024
Last price changes
| $66.00 | October 27, 2024 |
| $75.98 | October 17, 2024 |
Western Digital 500GB 3D NAND Internal PC SSD WDS500G2B0A Description
- 3D NAND SATA SSD for capacities up to 4TB with enhanced reliability. | As used for storage capacity, 1 terabyte (TB) = 1 trillion bytes. Total accessible capacity varies depending on operating environment.
- Sequential read speeds up to 560MB/s and sequential write speeds up to 530MB/s. | As used for transfer rate or interface, megabyte per second (MB/s) = 1 million bytes per second and gigabit per second (Gb/s) = 1 billion bits per second
- An industry leading 1.75M hours mean time to failure (MTTF) (1) and up to 600 terabytes written (TBW) (2) for enhanced reliability. | (1) MTTF = Mean Time To Failure based on internal testing using Telcordia stress part testing. (2) TBW (terabytes written) values calculated using JEDEC client workload (JESD219) and vary by product capacity
- WD F.I.T. Lab certification for compatibility with a wide range of computers.
- Free downloadable software to monitor the status of your drive and clone a drive, or backup your data
- An active power draw up to 25% lower than previous generations of WD Blue SSD.
Western Digital 500GB 3D NAND Internal PC SSD WDS500G2B0A Specification
Specification: Western Digital 500GB 3D NAND Internal PC SSD WDS500G2B0A
|
Western Digital 500GB 3D NAND Internal PC SSD WDS500G2B0A Reviews (7)
7 reviews for Western Digital 500GB 3D NAND Internal PC SSD WDS500G2B0A
Show all
Most Helpful
Highest Rating
Lowest Rating
Only logged in customers who have purchased this product may leave a review.


Yusuf Merza –
In this review, I am going to rate the WD SSD 500GB. The review will be on four main criteria, and I will mention what I liked, and what I didn’t like about the product. Furthermore, I will also share my experience and how I got the product up and running.
This review is very detailed, so if you just need to upgrade MacBook Pro, just scroll down to “Upgrade”.
This review has been written on the day I had the product running. This review has not been sponsored by WD, and it is solely my own experience and tips I’d like to share.
Price:
No one can argue that this SSD is fairly priced. I can say it is definitely worth the investment. The value for money is just ridiculous.
Quality:
Even though this product will be stuck underneath the laptop case, but the plastic feels solid, and it came well packed.
Speed:
Using BlackMagic Disk Speed Utility, I got the result of 276.7 MB/s write and 504.6 MB/s read. Not quite the promised but good enough. Besides, since this is a 3rd party tool and not embedded in the operating system I don’t expect exact results.
Performance:
Generally, after replacing my drive, I found out that it made my mac at least 5-8 times faster. Moving large files is instant, starting applications and everything else is much quicker.
—————————–
Upgrade for MacBook Pro 13 inch ( Mid 2012 model – Non-Retina )
~~~~~~~~~~
I bought this SDD to upgrade my MacBook Pro 13 inch (Mid-2012 model). This Apple MacBook model is essentially the last model with the upgradable disk. Some other models are upgradable with M2 SSD. So, if your MacBook Pro is a mid-2012 or below, it is most likely upgradable.
For non-Apple devices, you need to look up your model and check if this SSD is suitable. Amazon offers a handy tool to do so. This guide will only help for Macs.
~~~~~~~~~~
Disclaimer:
I shall not be held responsible for any damages to the drives or loss of data as a result of your mistakes in the process. You are to do this upgrade at your responsibility, and you hold all the risks associated with the upgrade.
*It is however advised to backup your data ( mainly the most important ) and to watch other tutorials to have a better idea of the procedure. This is only a guide with the concept of the procedure and is LACKING SOME STEPS.
**Basic knowledge of how partitioning and how disk drives work may be important.
~~~~~~~~~~
Before anything, you need to decide the size of the disk. My original was a 500GB spinning drive (HDD), and I bought the 500GB SSD. If you decide that you need more storage, the OSX installation is skipped. Just keep in mind that this could be a major investment in your computer, so if you are left with something between 0-75 GB, you might want to consider getting a bigger sized drive.
Step 1: Restart your Mac and press (CMD + R) to enter recovery mode. Go to desk utility and check your currently installed drive (should appear under internal), check the Partition style. Mine showed APFS, but it may be another like Mac OS (Journaled).
Step 2: Take the new SSD drive and put it in an enclosure for USB connection. I used the AmazonBasics enclosure, the price and the quality are great. Plug it into the mac’s USB. The drive should appear under external.
Step 3: Erase the new drive and format with the format identical to the original drive. (CONFIRM THAT IT IS THE EXTERNAL DRIVE). You can give the new drive any name but try to go for something unique so you don’t confuse it with the current drive.
Step 4 A: If you chose an SSD with size larger than your current drive, you can just go back to the EXTERNAL drive in the disk utility and click restore. Then choose the current internal drive as the source. This will fully clone your old drive to the new drive.
Step 4 B: If you chose an SSD with size equivalent or smaller than your current drive ( note: You can’t cram 400GB of data into a 250 GB drive), you need to go back to the main recovery page and click on reinstall OS. It will ask you which drive to install into for this case choose the EXTERNAL ( whatever you named it). It will then reinstall the operating system. Next, It will then ask you if you want to get data from another drive just choose the current drive (INTERNAL). Tick everything to get a full copy (Trash is not copied).
Step 5: The time it takes usually takes a while depending on your data. After you confirm that the new drive is working fine, you can swap the drives. (You can find step-by-step tutorials on Youtube)
——————
Pros:
It is Excellent. That’s it.
Cons:
Not sure if I should consider this as a drawback but more of a ”would be
handy to have”. I think if WD supplied software to assist in the logistics of moving data, it would have been really fantastic. As an IT, I don’t trust free 3rd-party software, and if I went for paid software, it would cost high. Otherwise, there is absolutely none.
Overall:
I think this product is really great, it will give life to ancient computers, and I totally recommend it. You can buy it without hesitation.
Other products you may consider (That I’ve been also considering, but haven’t tried) :
Sandisk Ultra
Kingston A400
Silvija –
VORGESCHICHTE:
Mein 10 Jahre alter Laptop (HP Pavilion 16-f… irgendwas, Windows 7-Konfiguration) war damals ein Top-Gerät. Irgendwann kam ich auf die Idee ihn neu aufzusetzen und er lahmte nur noch.
Ich bin keine PC Expertin, doch die Datenträgerauslastung lag IMMER bei 100%, egal, was ich tat. Diese Festplatte wurde mir als Ersatzfestplatte bei versch. Seiten angezeigt und ich dachte mir: „Was soll‘s. Ich probier‘s mal aus.“
Der Laptop wird nur für Uni/ Bürokram genutzt und in 2-3 Jahren wollte ich mir eh einen neuen Laptoo anschaffen. Das bisschen, was die neue Festplatte kostet, kann man ja mal ausgeben, selbst, wenn‘s n Fehlkauf ist.
Tja, der Laptop läuft wieder einwandfrei! 🙂
Die alte Festplatte wurde in einen Adapter eingesetzt. Als externe Festplatte funktioniert die immer noch sehr gut.
LIEFERUNG:
Problemlos, pünktlich und unkompliziert. Die Festplatte kam in einem kleinen Paket, gut abgesichert in einer Plastikverpackung.
EINBAU:
Mit zwei linken Händen gut hingekriegt! Liegt aber auch immer am PC, also kann ich nur für meine Erfahrung sprechen.
PREIS:
Preis-Leistungstechnisch das beste Modell der Reihe (auch im Vergleich mit z.B Crucial oder anderen Marken). Preis wird meist über den Speicherplatz definiert, deswegen habe ich die 500GB Variante statt der 1TB gewählt. Für meine Zwecke vollkommen ausreichend.
EIGENSCHAFTEN:
Wie gesagt, PC lahmt nicht mehr und läuft für sein Alter sehr flüssig und schnell.
Schreibgeschwindigkeit ist wie angegeben. Lautstärke ist sehr leise und angenehm, ich merke keinen Unterschied zu vorher.
NEGATIVPUNKTE:
Keine. Für Ungeübte würde ich jedoch raten, dringend ein Tutorial zum Festplattentausch zur Hand zu nehmen.
luigi –
prima di sostituire il mio PC un dell XPS L702X 17″ che ormai era diventato macchinoso sia in avvio che durante l’utilizzo ho deciso di fare un tentativo sostituento RAM e HDD. per la RAM mi sono affidato a due banchi della crucial mentre per l’SSD dopo attenta valutazione ho optato per WD e devo dire che mai scelta è stata pù giusta.
Qualche consiglio,
1) innanzitutto non essendo un esperto mi sono affidato a qualche tutorial, su youtube ne trovate decine, il mio timore era quello di trovarmi difronte a qualche incompatibilità con il mio PC per questo vagliando le varie recensioni ho optato per questo SSD della WD che cmq è un brand affidabile.
2) per la clonazione mi sono affidato al software Macrium reflect 8 segnalato sempre su alcuni tutorial, semplice e intuitivo serve solo una veloce procedura di registrazione ma nulla di complicato.
3) procuratevi un cavo USB/SATA per collegare SSD al pc nella fase di clonazione, io ho optato per uno della Sabrent ad un prezzo assolutamente ragionevole poco più di 11 Euro
il risultato finale è strabiliante, il tempo di avvio si è ridotto enormemente e anche durante l’utilizzo è tutto più fluido e veloce quindi posso dire che il mio caro PC del 2011 è tornato in vita, l’impressione è quella di lavorare con una macchina nuova. Soddisfatto al 100%
4) l’altra cosa che mi ha fatto decidere per questo SSD è il prezzo, meno di 60 Euro per resuscitare un PC che volevo sostituire è più che ragionevole, combinando il tutto con la RAM (60 Euro x due banchi da 4GB ciascuno) e il cavo.
Insomma per concludere SSD consigliatissimo, nessun problema in fase di clonazione, zero problemi nell’installazione e funzionamento perfetto, quando ho avviato il PC dopo la sostituzione del vecchio HDD tutto era al suo posto (impostazioni, file, cartelle varie) come se nulla fosse successo, mi sono quasi commosso 🙂
Spero di esservi stato utile e di avervi dato qualche indicazione in più.
louis –
j’ai chercher durant plusieurs heures pour trouver un disque durs de 500Go de très bonne qualité avec une bonne vitesse d’écriture et de lecture. je suis plus que satisfait de mon achat. il est d’une simplicité d’installation. le seul point qui pourrais être négatif c’est qu’il n’y a pas de notice pour la mise en place (formater le disque) pour une personne qui n’y connais rien en informatique. mais je l’ai acheter il n’y a que quel que mois mais il devais remplacer le précédent de la même marque qui lui avais presque 6ans. je fait une confiance presque aveugle au près de cette marque qui a réussi a faire connaitre ses produis avec des prix abordable et une excellente durée de vie.
Johnny B –
This drive is super fast. However it did not come without a few headaches. First, you will likely need to purchase a SATA cable and 2.5 inch drive bay converter. Each are cheap and plentiful on Amazon, just keep in mind that you likely will not be able to install without them. I added this drive to my old PC which I purchased in 2011, but was pretty future proof at the time. Before I installed, I did a thorough dust cleaning inside the case and then replaced three dead case fans which I didn’t even realize had stopped working. OK, now for the drive install. First backup any important files to another drive. I initially tried to clone my existing 8 year old hard drive with Windows 10. The operation went fairly smoothly. However, I found that after I disconnected the old drive and tried to boot up with this drive that it would start Windows but after just a few seconds of beginning the boot process, it would hang at a blank screen and never get me to the login screen. After researching, I determined it was likely issues with out of date drivers or with the PC trying to reference the ID of the original drive while booting up with the new one. In any case, I decided to just go with a fresh install of Windows 10. Assuming you have a fairly current version of Windows, you can do this quite simply and do not need to go rummaging for your product ID, which I could not find. Microsoft allows you to do a fresh install without the need for that as long as you have a current version installed. I followed the steps from the Microsoft web site for a clean install. It took maybe 30 minutes total. First I needed to create an installation media for initial bootup. This is pretty simple, just find a USB drive with at least 8 Gig of space and then you’re good to go. Disconnect the old drive after that. Once you have created the installation media, disconnected the old drive and installed and connected the new drive and formatted it, go into Bios settings and set the boot priority so that the installation media (USB drive) is first in line. Then save settings and exit. You will then follow the prompts to do a fresh windows install on the new drive. Once that completes, shut down, re-connect the old hard drive again, go back into Bios and make the SSD drive the first in line for boot priority and remove the installation USB. Save settings and exit. You should now boot up from the new drive. My machine booted up in record time, maybe 40 seconds total from power switch to desktop. It used to take a good four minutes. The downer is you will need to re-install all your programs and browser favorites, etc. But honestly the speed improvement was worth it. This drive is quiet and fast. Very happy so far.
Sydnei Lucchesi Le Petit –
Marca consagrada pela qualidade de seus produtos. Em meu laptop de 8 anos funcionou perfeitamente e extendeu a vida útil do equipamento, certamente por mais alguns anos, proporcionando um desempenho fantástico.
ZiulOCZ –
instalado en un ps4, ha funcionado genial, mejoro enormemente el tiempo de carga