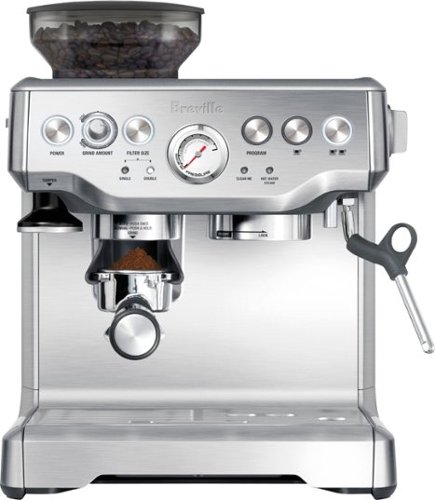
Breville Barista Express Espresso Machine, Stainless Steel
Original price was: $699.95.$549.95Current price is: $549.95.
Breville Barista Express Espresso Machine, Stainless Steel Price comparison
Breville Barista Express Espresso Machine, Stainless Steel Price History
Price History for Breville - the Barista Express Espresso Machine with 15 bars of pressure, Milk Frother and...
Statistics
| Current Price | $549.95 | January 6, 2025 |
| Highest Price | $699.95 | September 20, 2024 |
| Lowest Price | $549.95 | October 3, 2024 |
Last price changes
| $549.95 | November 27, 2024 |
| $699.95 | October 18, 2024 |
| $549.95 | October 3, 2024 |
| $699.95 | September 20, 2024 |
Breville Barista Express Espresso Machine, Stainless Steel Description
- Earn up to 200 cashback with a Beanz coffee subscription when you purchase a selected Breville espresso machine. Visit earn-cashback.breville.com purchase to claim. Valid Aug 1, 2023 until Jun 30, 2024
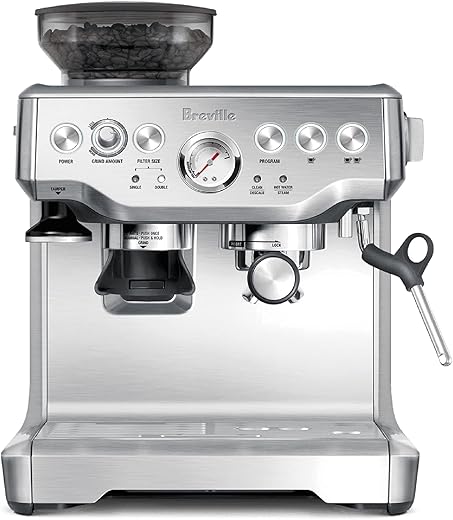
- The Breville Barista Express delivers third wave specialty coffee at home using the 4 keys formula and is part of the Barista Series that offers all in one espresso machines with integrated grinder to go from beans to espresso in under one minute, helping you make the perfect cup of Cappuccino or Latte
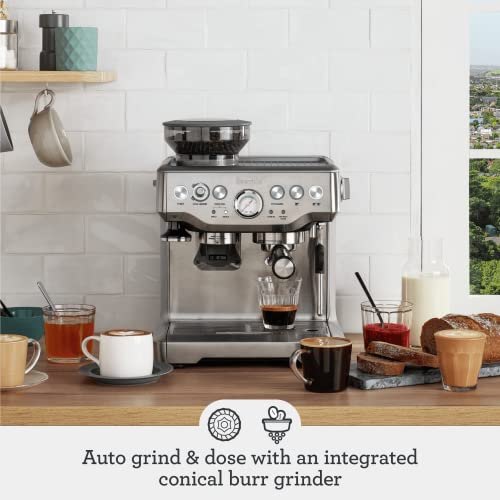
- DOSE CONTROL GRINDING: Integrated precision conical burr grinder grinds on demand to deliver the right amount of freshly ground coffee directly into the portafilter for your preferred taste with any roast of bean
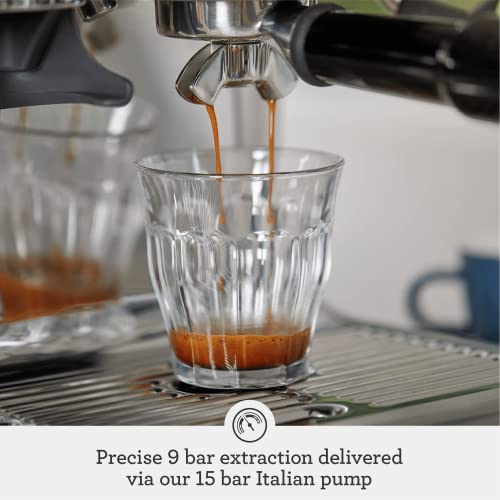
- OPTIMAL WATER PRESSURE: Low pressure pre-infusion gradually increases pressure at the start and helps ensure all the flavors are drawn out evenly during the extraction for a balanced tasting cup
- PRECISE ESPRESSO EXTRACTION: Digital temperature control (PID) delivers water at precisely the right temperature, ensuring optimal espresso extraction
- MANUAL MICROFOAM MILK TEXTURING: The powerful steam wand performance allows you to hand texture microfoam milk that enhances flavor and enables creation of coffee art at home, helping you make the perfect cup of latte or cappuccino
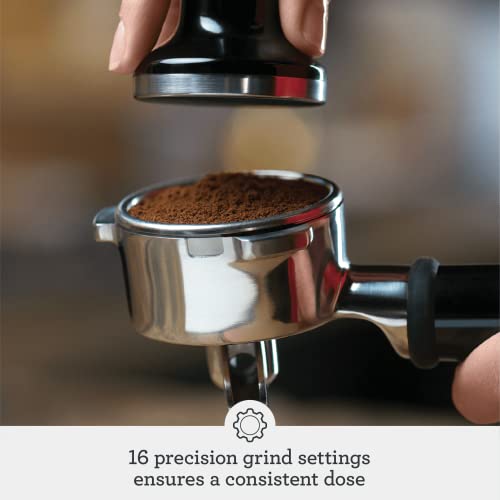
- ESPRESSO MACHINE WITH GRIND SIZE DIAL: Simple and intuitive, giving you control over the grind size no matter what type of bean you’re grinding
- COFFEE and ESPRESSO MAKER COMBO WITH BUILT-IN COFFEE GRINDER: Innovative grinding cradle allows any at home barista to grind directly into the espresso portafilter for the perfect espresso
- INCLUDED ACCESSORIES: Razor Dose Trimming Tool, 54mm Stainless Steel Portafilter, 1 and 2 cup Single and Dual Wall Filter Baskets, Coffee Scoop, Integrated Tamper, Stainless Steel Milk Jug, Cleaning Disc, Tablets, Brush Tool and Allen Key, Water Filter and Filter Holder
- CAPACITY and SETTINGS: 1/2 lb Bean Hopper; 67 oz Water Tank; Single or double shots; Adjustable Grind Amount and Manual Override
Breville Barista Express Espresso Machine, Stainless Steel Specification
Specification: Breville Barista Express Espresso Machine, Stainless Steel
|
Breville Barista Express Espresso Machine, Stainless Steel Reviews (7)
7 reviews for Breville Barista Express Espresso Machine, Stainless Steel
Only logged in customers who have purchased this product may leave a review.





Nishith Dave –
Updated Feedback (28-Dec-23):
Updating my rating since they rushed a technician from another city. He worked tirelessly until it was fixed. Appreciate the urgency and the extra mile (pun intended) the seller went to help. I am happy with how they supported and resolved the problem.
Turns out the machine didn’t need a step-down converter since it needed 250V input and India supports it. It only needed a pin converter for an Australian power plug. I went by a review, ordered a step down and ran the machine alongwith it, which is what was giving machine half the power to operate and hence it didn’t pump any water. So please check the details of inputs required for the model you order. Fun fact: The input requirements are also embossed on the base of power plug.
—————————————————————–
Old Feedback (26-Dec-23):
Having removed all tags and packaging, followed all startup instructions with a step-down converter (for usage in India). After power-on we tried to run water through head, wand and steamer. None of them would dispense water. and there is no customer support available in India.
Maddle –
I absolutely love this machine. With as many lattes as I drink, this will easily pay for itself within a year, inclouding the cost of beans, milk and cleaning products.
Notes: Make sure to keep up with all the regular maintenance. Ever day after I’ve made my coffee, I wipe the steam wand, purge it, then wipe again. Make sure to get into all the crevices around the tip and you’ll never need to use the pin to clean out the tip. Once I’ve done that and poured my steamed milk, I purge the showerhead by pulling one shot into the empty mug (no filters). This keeps the showerhead clean of coffee debris and keeps the coffee tasting pure.
REMEMBER TO CHANGE YOUR WATER FILTERS. The filters should be changed every 60 uses or 2 months, whichever comes first. This wolill reduce how often you need to descale the machine, prolong it’s useful life and provide better tasting coffees. You will still need to descale the machine every so often. The manual included is very helpful for keeping up with the maintenance (as well as pulling shots, making drinks and other useful tips) and you can also find instructions on their website should you misplace the manual. Gold tone makes pretty inexpensive replacement filters specific to this machine and they’re available here on Amazon. I use them and am pretty happy with the results.
Do not let the water run out. Ever. This could cause serious damage to the machine. If you forget once or twice, you’ll probably be just fine but check the water reservoir at least 1-2 times per week.
Clean the machine parts at least once a week. You may need to empty and rinse the drip tray 1-2 times a week (depending on frequency of use) but take it out and hand wash at least once a week. This is a good time to wash the tools and tool bin as well. Also, dont forget to take the coffee filters out of the portafilter and wash those as well. Over time, residue can build up underneath there. Also, the spouts in the portafiler twist off so you can clean them better. Clean out your parts, get in those crevices regularly and you’ll be just fine.
Don’t forget to clean the hopper and grinder. You should clean it out every time you switch to a new bean or at least every few pounds of coffee. The instructions in the manual are pretty easy and straight forward. I also use a clean, dry towel to wipe any remaining coffee and oils from both the grinder parts and the hopper. Do not wash in warm water as you could risk it not drying well and rusting or not being lubricated enough and over heating. Just use the included brush and clean, dry paper towels. You could also vacuum out residual coffee from the grinder to assist in cleaning, but I don’t usually need to.
Also, remember that the stainless exterior is stainless plating. This means it can wear over time and not look as nice. The best way to handle this is to wipe it down with a damp cloth (once daily then more detailed once a week) and follow it up by drying it with a clean towel. This will prolong the exterior appearance. Also during your weekly cleaning, be sure to look under where the coffee and steam come out and clean around there. Milk, coffee and residue steam can splatter and build up so be sure to clean it as well.
The weekly cleaning sound intensive but really takes maybe 5 minutes.
Common issues: Keep in mind certain o-rings will need to be replaced over time. This is noted by Breville in the manual and on the website. There are two main places where you need to replace these: around the tip of the portafilter (where the spouts connect) and where the portafilter connects to pull shots.
Another common issue is that the machine will make a loud “buzzing” sound and/or leak water out of the bottom of the machine. This is a common issue and, when it does occur, usually happens around 6 months to a year. This generally occurs due to a broken solenoid valve. If your product is still under warranty, take a video and contact their customer service. Maybe suggest it’s a solenoid valve and they are usually very good about fixing or replacing the machines and parts. If it is no longer under warranty and they will not resolve the issue (because sometimes they still will after the warranty period), there are many repair services that can fix this. If you are especially handy and brave enough to fix it yourself, you can usually find the replacement parts fairly cheaply online (not just the valve, but really ANY part that may need to be replaced). Again, if it’s still under warranty do not go this route, as it will void any existing warranty. Also, if you don’t know what you’re doing, you could do more damage than good.
All-in-all, this is an amazing machine for this price point. There is a reason this machine is so popular and highly rated. There’s a lot of customization available to you and it is a very good quality machine. I would not suggest any product below this machine and price point for your first machine as you’ll likely be very disappointed in the results. Eventually you may want to upgrade to a more robust multi-thousand dollar machine, but this is great for the majority of consumers and is super user friendly. Use higher quality beans directly from the roasters and learn how to use the machine and make drinks and you’ll be very happy with it. The quality is truly amazing for such a low cost espresso machine.
Side note: Whole Latte Love on YouTube is a great resource for additional reviews, tips and tricks and maintenance for this machine (and many more). It’s also a great resource on how to pull shots, steam milk, pick types of milk and make many different types of drinks when you’re just starting out or want to up your coffee game.
Marcos –
Apenas llevo una semana de uso, pero llego muy bien empacada, totalmente nueva y con todos los accesorios. No es una maquina muy sencilla de usar pero sin duda de muy buena calidad, el color negro esta muy bonito. Tengo varios productos de la marca Breville y siempre he quedado muy satisfecha.
D Parra –
Llego completamente sellada en perfecto estado, la calidad de los materiales es notable. Contiene un manual donde es muy sencillo aprender a usarla. Hasta la fecha ha sido excelente.
IDF –
Between myself and husband we’d spend hundreds at Starbucks every couple months and I’d have a decaf long shot Americano with steamed heavy cream and sometimes even an extra long shot. Super picky about having amazing coffee. Once you go through the learning curve which, with the advice also below, from another amazing customer review, you should get it down in about a couple days total. Once you have it down this coffee flavour and smoothness surpasses the best coffees I’ve had at Starbucks. Freshly ground coffee is the ultimate winner and it surpasses pre-ground easily so spend the extra moula and get the grinder! Your mouth will thank you 🙂 The machine is amazing and beautiful and easy to operate once you read the instructions and look on you tube as to how to steam cream or milk exactly. You won’t regret this coffee, I was using the same beans (Starbucks Espresso Decaf) pre-ground on a routine coffee maker and when put through this machine the flavour is so rich and smooth and it just lingers all over the inside of your mouth all over your tastebuds. Crazy. My mom is European and has had her share of coffees and espressos and I brought her a cup and she said it was the best coffee she’s tasted, even better than the few she’d tried at Starbucks. Enjoy!
Here’s the review below I also used and I purchased those additions he mentioned all at once and it was super helpful and it made the experience so much smoother!
1. I am a guy, who knew nothing about espresso machines before this. I am very mechanically inclined and don’t usually read instructions. This was different – this machine is NOT self-explanatory and you NEED to read the instructions (which are well written, and even include a troubleshooting section). Don’t get frustrated with this machine until/unless you have read (all) the instructions.
2. This is not a ‘stand-alone’ purchase … this machine costs around $500 (give or take), you need to invest another $100 right from the start (preferably at the same time) to get the most out of it, enjoy it to the fullest, and not get unreasonably frustrated by making your own lattes and mochas.
3. The other things you REALLY should order at the same time (and all are available on Amazon) are:
a. ($29) 100-pack disposable 20oz. cups with lids and sleeves (sold by Yes!fresh). Trust me, you want to get these. It’s only $0.29 per cup and are far more convenient that trying to clean out a million dirty coffee cups from your car/office each week. These are worth twice what they cost in the long run. And when your friends are over, you need not ‘loan’ them a nice coffee cup to go (which you may never see again) – just give them a paper cup to take with them.
b. ($5-15 for 25 oz. / $20-30 for 64 oz.) Torani syrups and sauces, AND the pump tops that go with them (always sold separately). IF you drink the same thing on a regular basis (like I do) such as a white chocolate peppermint mocha, buy the 64 oz. white chocolate sauce and not the smaller 25 oz. bottle.
c. ($14) Amazon Basics Cotton Washcloth – 24 pack – grey (the grey matches the espresso machine, but the color doesn’t matter). Again, trust me, you want a nicely folded stack of these sitting next to the machine – you will use 1 each time you make espresso, and then it will be dirty and needs to be washed. At my house (3 people using the machine) we bought two 24-packs because we make so much coffee – two 24-packs is not too many for our house (I’m thinking about buying a third pack).
d. ($10 for pair of single shot size, $15 for pair of double shot size) Set of double-walled espresso shot glasses. Do NOT buy the rounded ones (ie: Cutehom espresso coffee cups) because they will not pour very well and drip all over the place (down the side) each time – very frustrating. Buy the JoyJolt Javaah Double Walled Espresso Glasses instead – you’ll be glad you did in the long run. And, if you’re planning to make mostly double-shot lattes/mochas, buy a set of Dragon Glassware 6 oz Espresso Cups (also double-walled) so that you don’t have to keep fidgeting with the single shot cups to keep them in the right spot under the coffee dispenser. It’s important to buy double-walled glasses for two reasons. First, it keeps the espresso hot while you’re steaming your milk, second, it keeps you from burning your fingers when pouring the espresso into your coffee cup.
e. ($15) Breville BCB100 Barista-Style Coffee Knock Box. Again, TRUST me, you want this right next to your machine – the coffee grounds will start piling up quickly and you don’t want your portafilter anywhere near a garbage can. This thing is a must.
4. Space requirements: This machine (and all that you want to go with it) will take some counter space – allow AT LEAST 34-inches of counter width to accommodate – slightly more is even better. You will from my picture, this is a 34-inch setup, and there is no room to spare.
5. Making espresso. After you read the instructions, here are some tips that they don’t include to help avoid frustration:
a. When the beans are grinding, lightly knock on the top of the hopper lid (just like knocking on a door) so that the beans keep feeding down to the grinder (sometimes they get hung up – a light knock each time keeps this from happening). Do NOT overfill the portafilter (after tamping) or it will jam coffee grounds into the water outlet and could possibly damage the portafilter or locking guide. After the grounds are tamped down in the filter cup, the silver part of the tamper should be just hidden beneath the rim of the portafilter (the machine includes a tool you can use if you accidentally overfill the filter cup, but after a short while, you’ll figure out how much to grind each time and the tool will not be necessary).
b. You ALWAYS want to watch the pressure gauge when making espresso. It NEEDS to be in the dark grey area of the pressure gauge (and ideally in/near the middle of the grey area) during the brew cycle, otherwise you are not making good espresso – rather, you are making either watered down espresso (not enough pressure) or not enough espresso which is too rich (too much pressure). There are two key things that affect pressure: the fineness at which the coffee is ground (which is adjustable) and the volume of grounds in the portafilter (also adjustable). Although there is a one or two shot size setting, I have found it best to do two, 1-shot grinds, tamping down the grounds in-between each single-shot grind. I have the grind (volume) setting on the 4th click setting, and I have the grind (fineness) setting on either 2 or 3 (play around and see what gives you the best results). IF the pressure is too low, then either your coffee is ground too coarsely, or your have not tamped it down tight enough, or the filter is not filled with enough coffee grounds, or a combination of any/all of these things. IF the pressure is too high, then either your coffee is ground too finely, or you have tamped down the grounds too hard (tightly), or a combination of the two.
c. IF using two, single-shot espresso glasses to collect a double-shot brew, keep an eye on them during the brew cycle and make sure they are centered under the espresso being dispensed (this can be avoided by using a double-shot size collection cup).
d. IF making a mocha or other syrup/sauce drink, pre-mix the espresso and syrup in the glass and stir thoroughly before adding the steamed milk.
e. Steaming milk is 1/2-art, and 1/2-science (seriously), and it does not come naturally. If you’ve never worked at a coffee shop and been trained to steam milk, do yourself a favor and watch a few good (short) YouTube videos on the proper way to steam milk. You will THANK yourself for taking 5-10 minutes on You Tube and learning the proper way to steam milk (and things to avoid). Understanding the steaming process will allow you to control the amount of foam on top and not make big mess.
f. Before you steam your milk, VENT the steam wand to remove the residual water from the boiler line (you don’t want a few teaspoons of water in your milk). Vent the line, then turn the steam off … wait 5 full seconds … then insert the steam wand into the milk, then turn the steam back on. Hold the handle with your left hand, and place your right hand underneath the stainless steel milk steaming cup, when the cup is too hot for your right hand to touch (I mean really to hot to hold), keep the steam wand in and start counting along with the pump (which sounds like a metronome in the background … dit … dit … dit … dit …). For a semi-hot latte/mocha keep the steam wand in the milk for 30 double-dits (don’t start counting until after you can non longer touch the bottom with your right hand … “and-one, and two, and three” and so on until you get to 30 (the equivalent of 60 single dits). For hot (but still drinkable) count to 40 double-dits, and for very-hot, 50 double-dits. Anything above 60 and you risk burning the milk (which will ruin the flavor and you will need to toss it out and start over). When finished, turn the steam off, and remove the steam wand from the milk about 3-5 seconds before it finishes blowing steam (to avoid having milk sucked back up into the steam line).
g. After you steam your milk, VENT the steam wand again to remove any milk that inadvertently got sucked up into the steam wand line and prevent any from making its way into the boiler. IF milk makes its way back into the boiler unit (because you failed to vent the line after use) you will DESTROY the boiler (permanently), in that, the milk cannot be cleaned out, will burn during the next use, and every cup of milk you steam in the future will have a burnt-milk smell/flavor – yuck! DO yourself a favor and vent the steam line religiously after each use – and make sure others who use your machine know that they can ruin it if they don’t do so also! (there goes $500!)
h. The bottom tray is easy to remove, empty and clean (comes apart in 3 pieces). You should empty this every 2-4 days of use because it fills up despite you not pouring liquid into it – reason is, each time you finish using the steam wand or hot water dispenser, the machine auto-vents out the line from the boiler into the bottom tray (sneaky little devil) … so even though you don’t realize it, it’s filling up a little with each use. (Fun fact – the hot water dispenser can be used for instant hot water to make tea!).
IDF –
Es una maravilla de maquina. Solo hay que contemplar que los filtros son caros.
La tengo desde hace 1 año y no he tenido ningun problema.
Buddy –
I rarely write online reviews of products I buy, but I am so impressed by this machine I must share with people who are contemplating this purchase.
BOTTOM LINE:
This is an extremely good value for the price, and I would HIGHLY recommend this machine to anyone regardless of their experience level with making espresso-based beverages. Read on for more detail…
BACKGROUND:
I am very careful when buying products in this kind of price range, and thus do a lot of research before buying. This is especially true with something you can’t truly “try before you buy”. I read over 100 of the reviews on this product, and although there are some complaints the major theme is very positive. I have been using the Breville daily now for almost two months and feel I understand it’s pro’s and con’s very well.
As a coffee person, my focus is on espresso, Americano, and lattes. I was never a drip-coffee person, but I have been a hardcore Starbucks latte guy for 6 years. I have talked at length to baristas over the years to get a more technical understanding of what makes great coffee, and previously owned a fully automatic machine from Saeco (about a $600 machine). When it came time to buy a new machine, I felt that I was ready to make the jump to a semi-automatic machine.
Lastly, I come from a technology background (e.g. Apple employee) and feel that I am a good judge of design, manufacturing, user interface, etc.
DESIGN:
This is an extremely well designed product. Every little detail, from the exterior & interior packaging to the controls on the front of the machine, is very thoughtfully done, well executed, and serves its intended purpose. From the beginning you see that it is a high quality product, and Breville spent money where it matters. The materials are visually appealing as well as sturdily built, with the kind of craftsmanship and heft you would expect from a much higher priced machine. Nice touches like having the tamper store in a magnetized hole in the top of the machine, having the top surface of the machine stay warm from the boiler to keep your portafilter and coffee cup warm, and creating a hidden accessories tray in the base of the machine are signs of top notch designers. Overall, the product is relatively compact and will fit into any size kitchen situation. Lastly, the user instructions are extremely well done and very helpful – READ THEM.
PERFORMANCE:
The espresso produced is extremely consistent, and only changes as your beans age (although a pretty small difference). The water boiler heats up very quickly and you will be drawing a shot less than 2 minutes after hitting the power button (part of this time is grinding the beans). The controls are easy to use, and the movable items such as the portafilter and steamer wand are holding up well and I have zero concern about long term reliability. The steamer wand, compared to my previous Saeco, seems to create much richer milk foam, which is important for lattes and cappuccinos. There are a number of “complaints” from people on these reviews about how difficult it is to get good espresso, but I can tell you my very first shot was good and has been ever since. I think these people are creating the wrong impression, as this machine is incredibly easy to use. However, it’s critically important that you read the instruction manuals FIRST to help ensure you get it right. The grind level is the only thing you really need to set, and that will be personal preference to some extent but for my beans it seems best at 4. The other thing you control is how hard to tamp the grounds in the portafilter, and I will tell you that if you give it a good strong press (I use two hands on a hard flat surface), it will be just fine. Don’t overthink this machine!
BEANS:
I strongly suggest you find a local shop that roasts their beans on-site so you can have truly fresh beans. You want espresso whole beans, and they need to be 100% Arabic and NOT the “oily” kind. Otherwise, you will gum up your grinder.
CLEANING:
Terrific design makes this a breeze to clean. The water and grounds catch tray just lifts out in one piece, and you can take everything to the sink without making a mess. A quick rinse and you are ready to put it back. One thing that cannot be avoided is that some of the coffee grinds will spill out of the portafilter during the grinding process, and may even fall off the coffee maker and onto the counter (or floor). I shake the portafilter mildly while its grinding to even out the grounds to minimize the mess, but even that doesn’t eliminate it completely. The other mess creator is tamping the grounds and levelling off the dose size, this will cause grounds to be spilled. Up to you how to contain this, although I just turn the dosing blade upside down and use it to scrape the grounds off my counter and into a bowl I use to catch the grounds when I level the dose. Overall it is quite minor and requires less than 5 minutes of clean-up a day.